Microsoft Dynamics 365 BC Plug-in for Experlogix Smart Flows Preview Program
Welcome to the preview program for the Microsoft Dynamics 365 BC plug-in for Experlogix Smart Flows preview program documentation. Here, we provide comprehensive information to guide you through key aspects of the preview program to ensure a seamless and informative experience.
What is the Microsoft Dynamics 365 BC plug-in for the Experlogix Smart Flows preview program?
The Experlogix Smart Flows preview program offers early access to the Microsoft Dynamics 365 BC plug-in. This allows you to test it and enables Experlogix to provide a better user experience.
Which capabilities are available during the preview program?
During the preview stage, these features are available:
-
Microsoft Dynamics 365 BC connector
-
Microsoft Dynamics 365 BC user sync
-
Microsoft Dynamics 365 BC data set
-
Microsoft Dynamics 365 BC flow trigger
-
Experlogix Documents app for Microsoft Dynamics 365 BC
How can you participate in the preview program?
Create a support ticket and include the following information:
-
State that you want to enroll in the Document Automation for the Microsoft Dynamics 365 BC preview program for in your request
-
The ID of your Smart Flows project
Your project ID is in Project Console under Control pane> About. See About for more details.
The Experlogix Provisioning Team will update your Smart Flows license and e-mail you further instructions.
Which features will be added for General Availability?
-
Store in Microsoft Dynamics 365 BC flow block (not yet available)
-
E-mail Microsoft Dynamics 365 BC flow block
When will the General Availability release be rolled out?
The general availability of the plug-in for Microsoft Dynamics 365 BC coincides with the release of Experlogix Smart Flows 4.24, slated for rollout in 2025.
Create a Microsoft Dynamics 365 BC Connector
This guide explains the process of creating a connector for the Microsoft Dynamics 365 BC Plug-in within the Smart Flows platform. It explains the essential steps required for successful setup, including connector configuration, extension management, and integration testing. By following these instructions, you can ensure seamless interaction between your systems and optimize your use of Experlogix features.
| 1. | In Project Console's Control panel, select the Connectors button. |
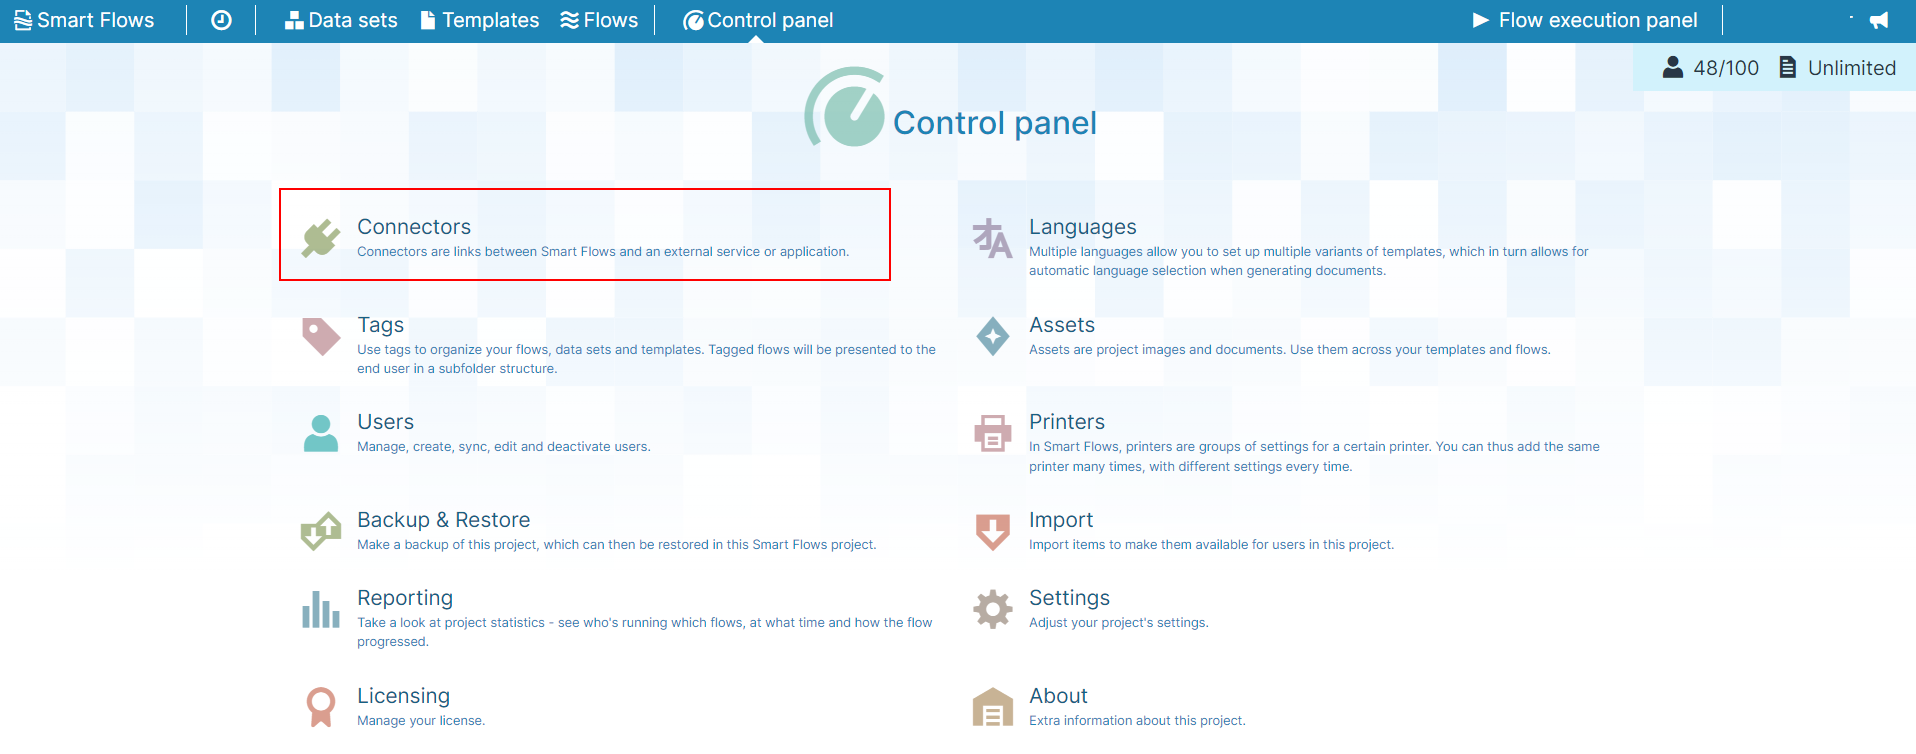
| 2. | Select the +Create button. |

| 3. | In the Name field, input the name of the connector. |
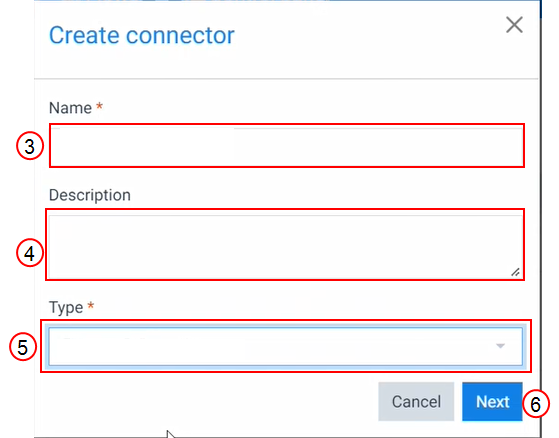
| 4. | (Optional) In the Description field, input a description for your connector. |
| 5. | In the Type dropdown menu, select Microsoft Dynamics 365 BC. |
| 6. | Select the Next button. |
| 7. | Select Authorize Experlogix Smart Flows. |
The system will prompt you to sign if you are not signed in to your Microsoft account.
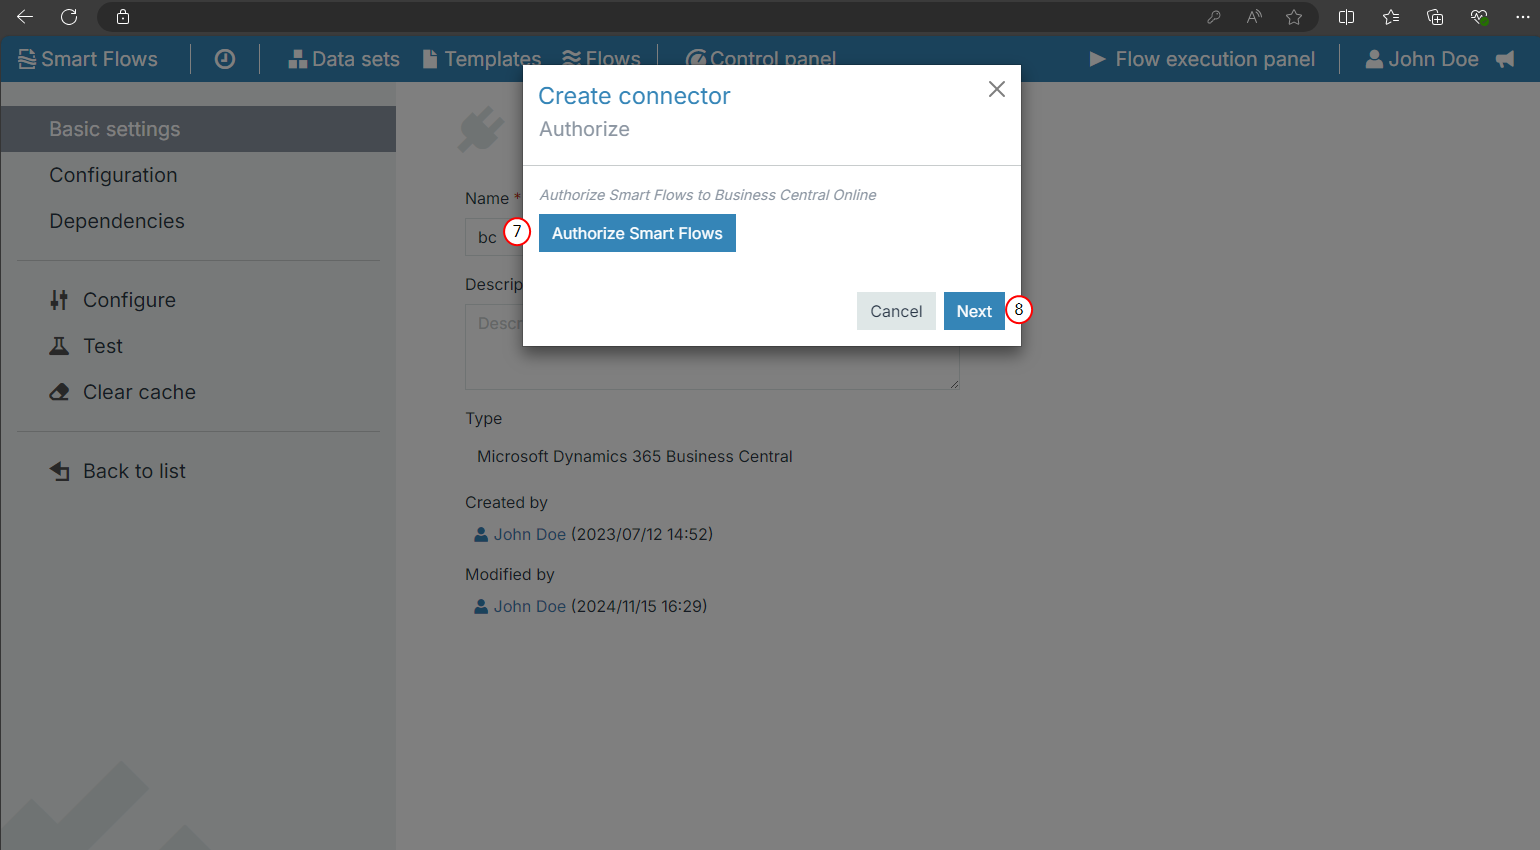
| 8. | Select the Next button. |
| 9. | In the Environment dropdown, select the Microsoft Dynamics 365 BC environment you wish to connect to your Smart Flows. |
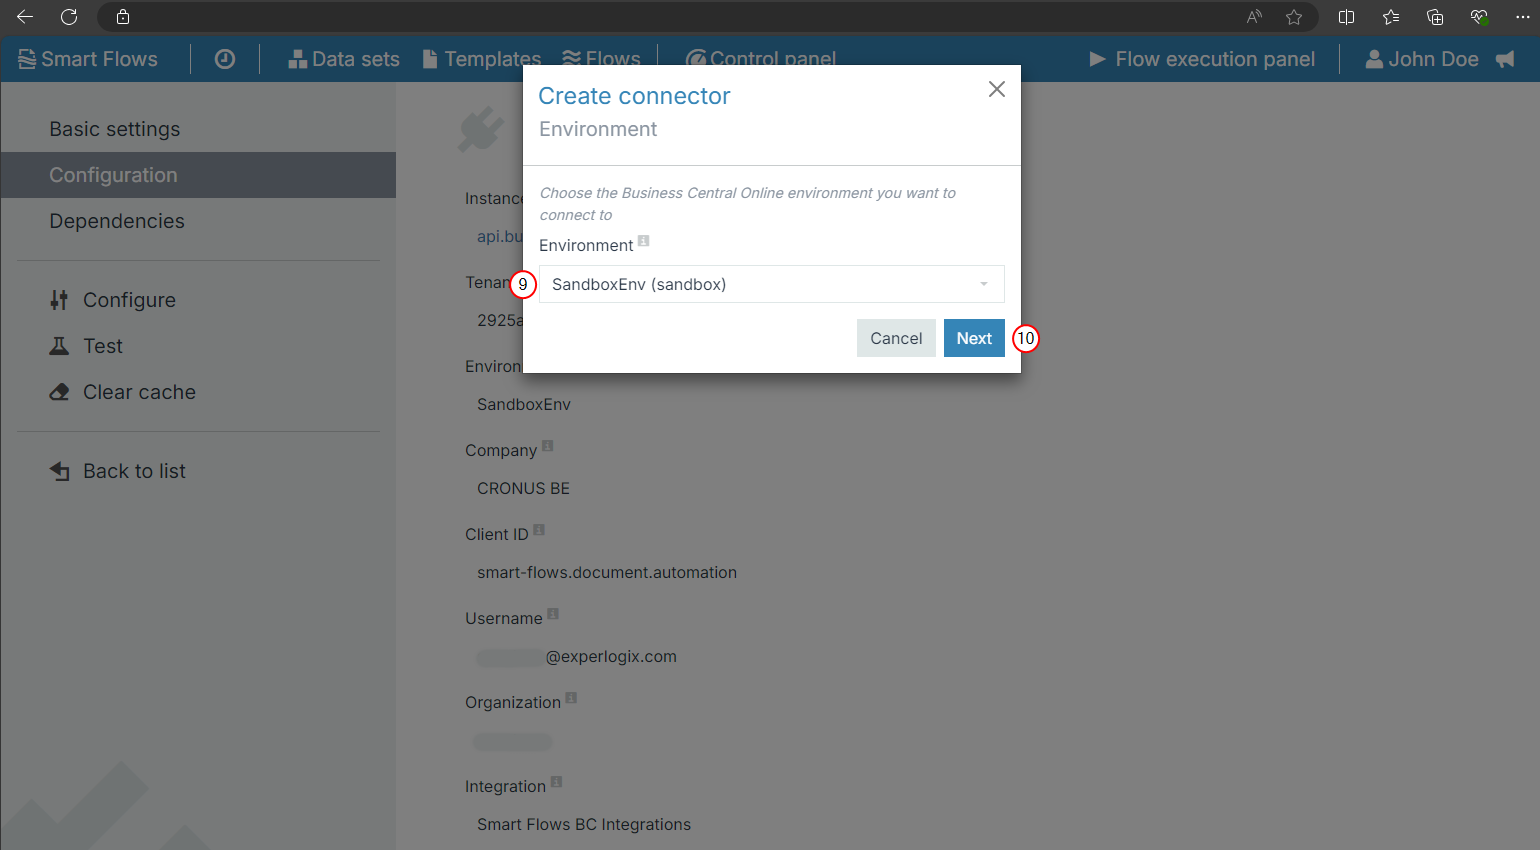
| 10. | Select the Next button. |
| 11. | In the Company dropdown, select one of the companies from your tenant. |
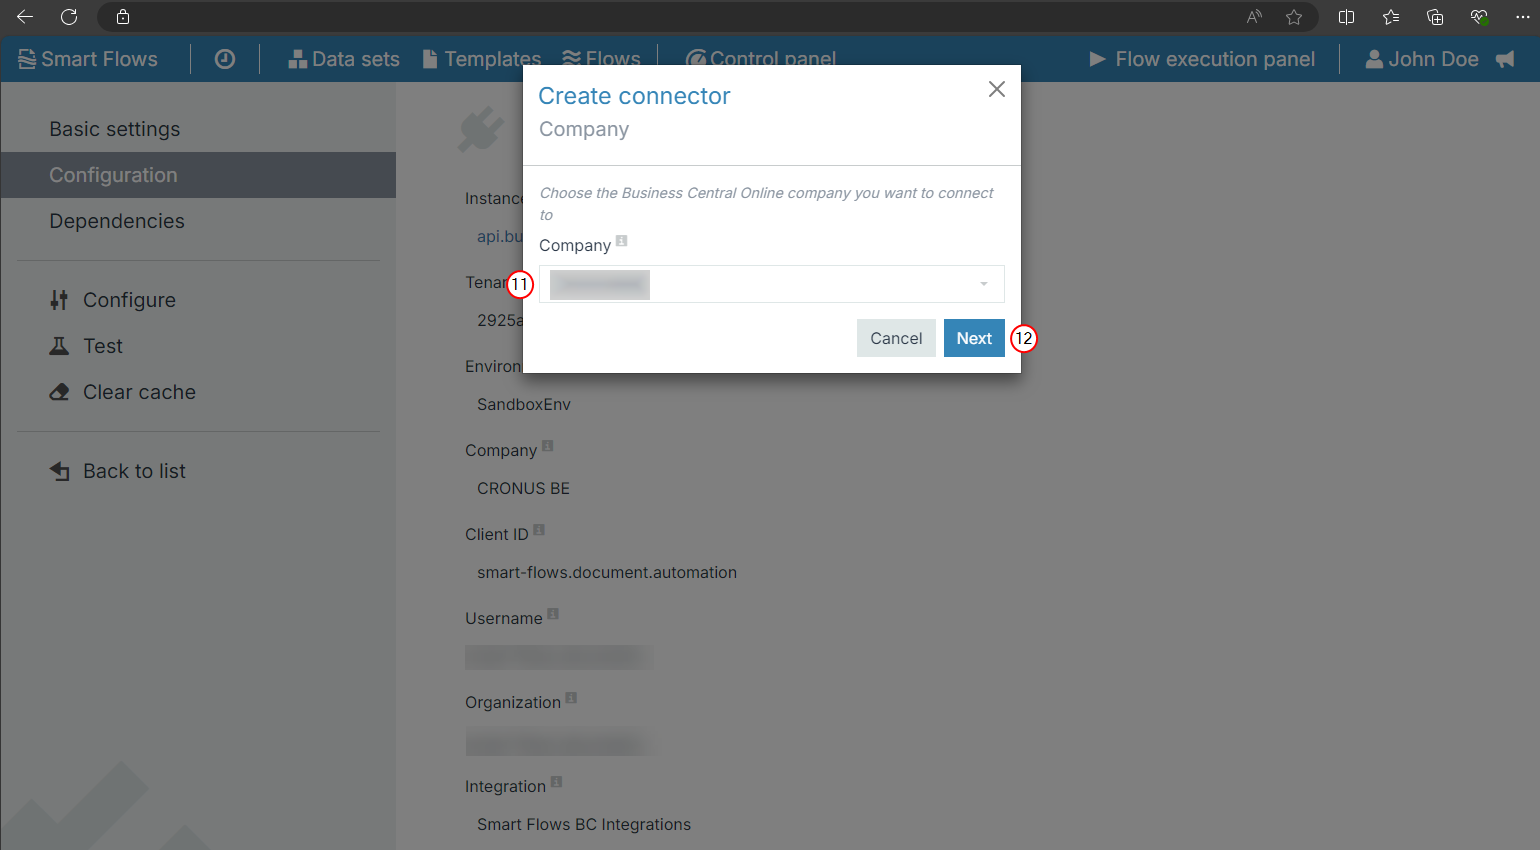
| 12. | Select the Next button. |
| 13. | Select your installation method for the Experlogix Extensions: |
-
Select Install Core and Smart Flows extensions automatically (recommended) if you want to install the latest versions of both the Core and Smart Flows extensions
-
Select Install the Core extension only automatically if you only want to install the latest version of the Core extension
-
Select Manually install extensions if you have already downloaded a version of one or both of the extensions. You can manually install the extension into your Business Central tenant.
We recommend that you choose the Install Core and Smart Flows extensions automatically (recommended). This may take a few minutes.
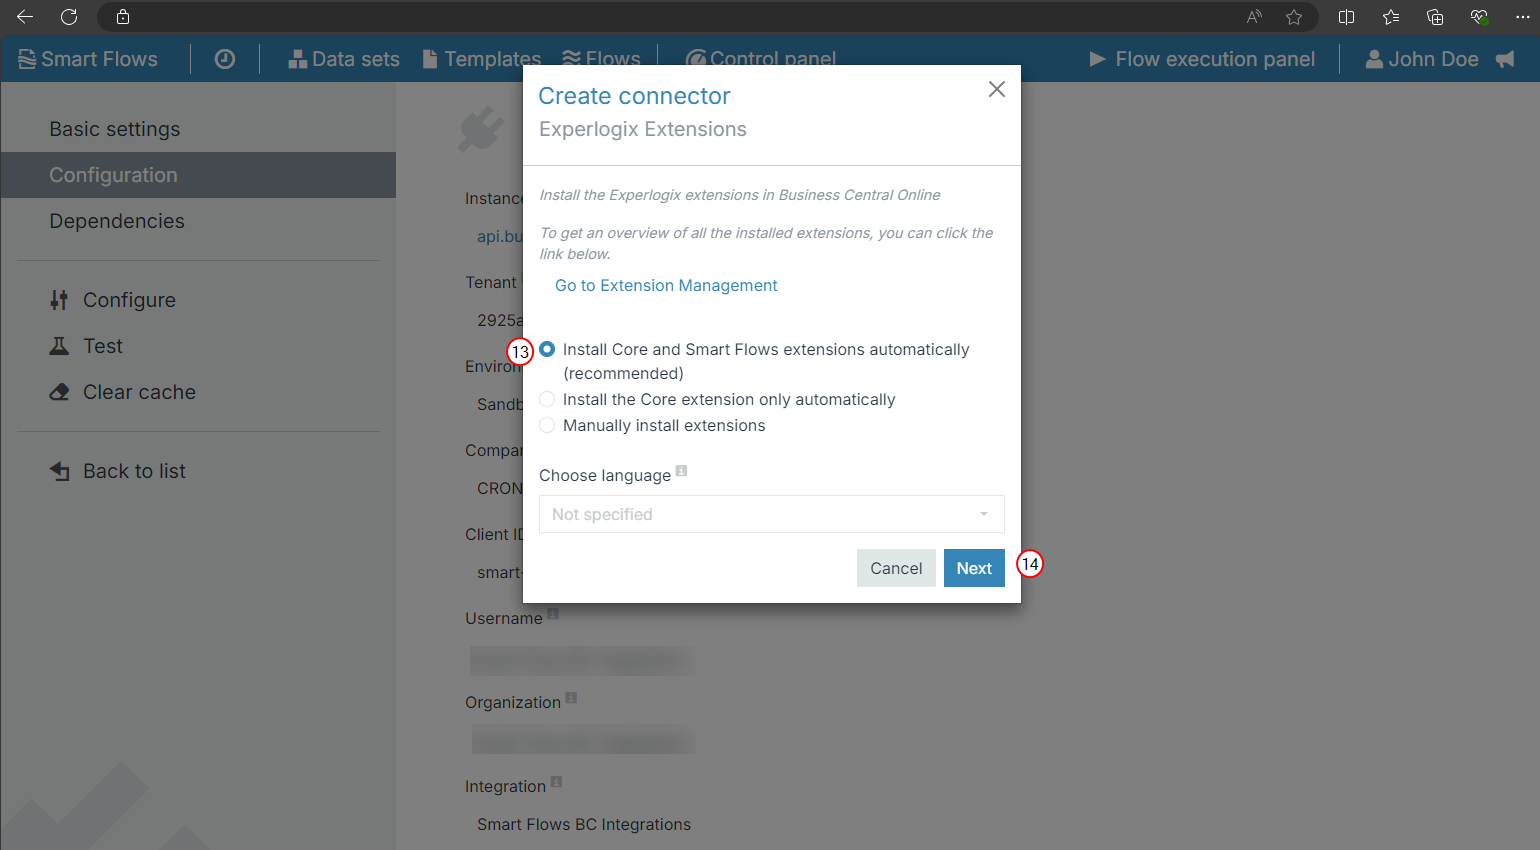
If you select the Go to Extension Management link, you will be taken to Extension Management in Microsoft Dynamics 365 BC where you can install the extensions.
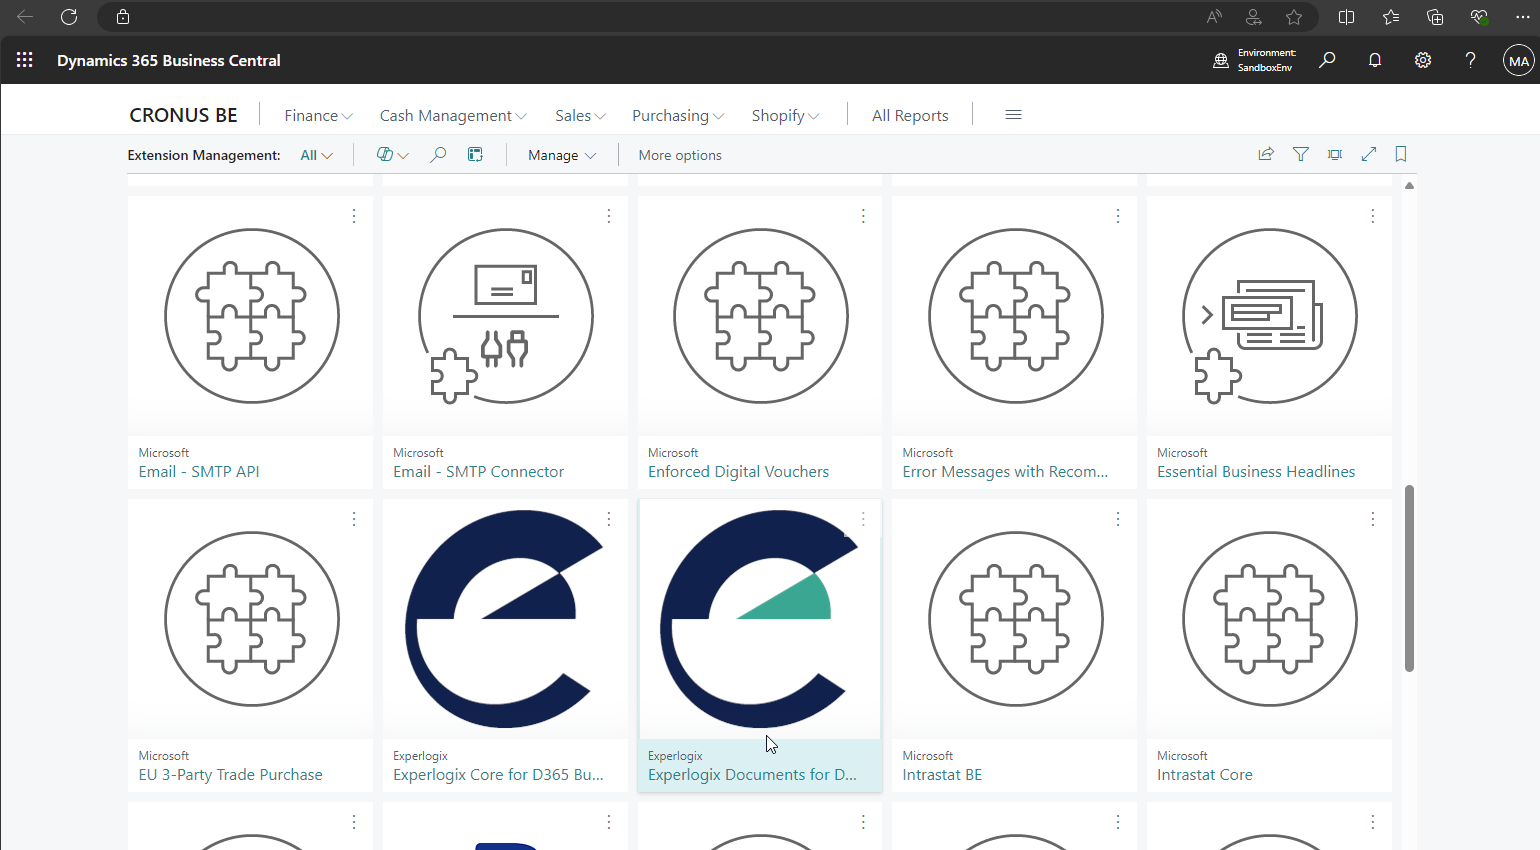
The Experlogix Core and the ExperlogixSmart Flows extensions for Microsoft Dynamics 365 BC will be downloaded from Microsoft AppSource and automatically installed. After a successful installation, both extensions display in your Microsoft Dynamics 365 BC Extension Management in Microsoft Dynamics 365 BC.
| 14. | Select the Next button. |
| 15. | Select Production. |
Experlogix uses its own Cloud Connect integration hub technology to connect your Smart Flows project and your Microsoft Dynamics 365 BC environment.
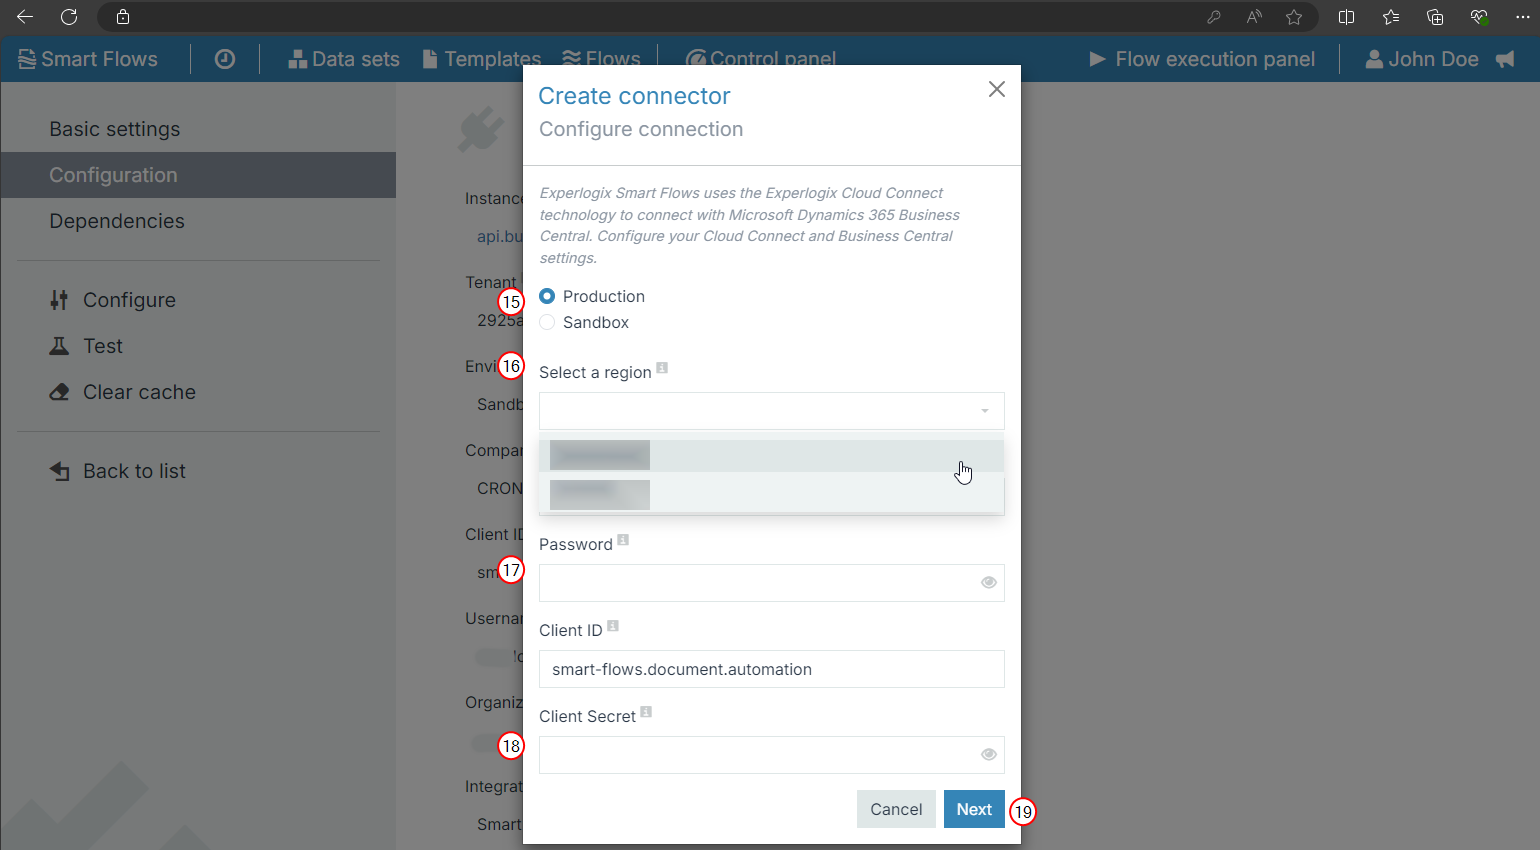
| 16. | In the Select a region dropdown, select your region. |
| 17. | In the Password field, enter the password you received when you signed up for the Microsoft Dynamics 365 BC Plug-in for Experlogix Smart Flows Preview Program. |
| 18. | In the Client Secret field, enter the client secret. |
| 19. | Select the Next button. |
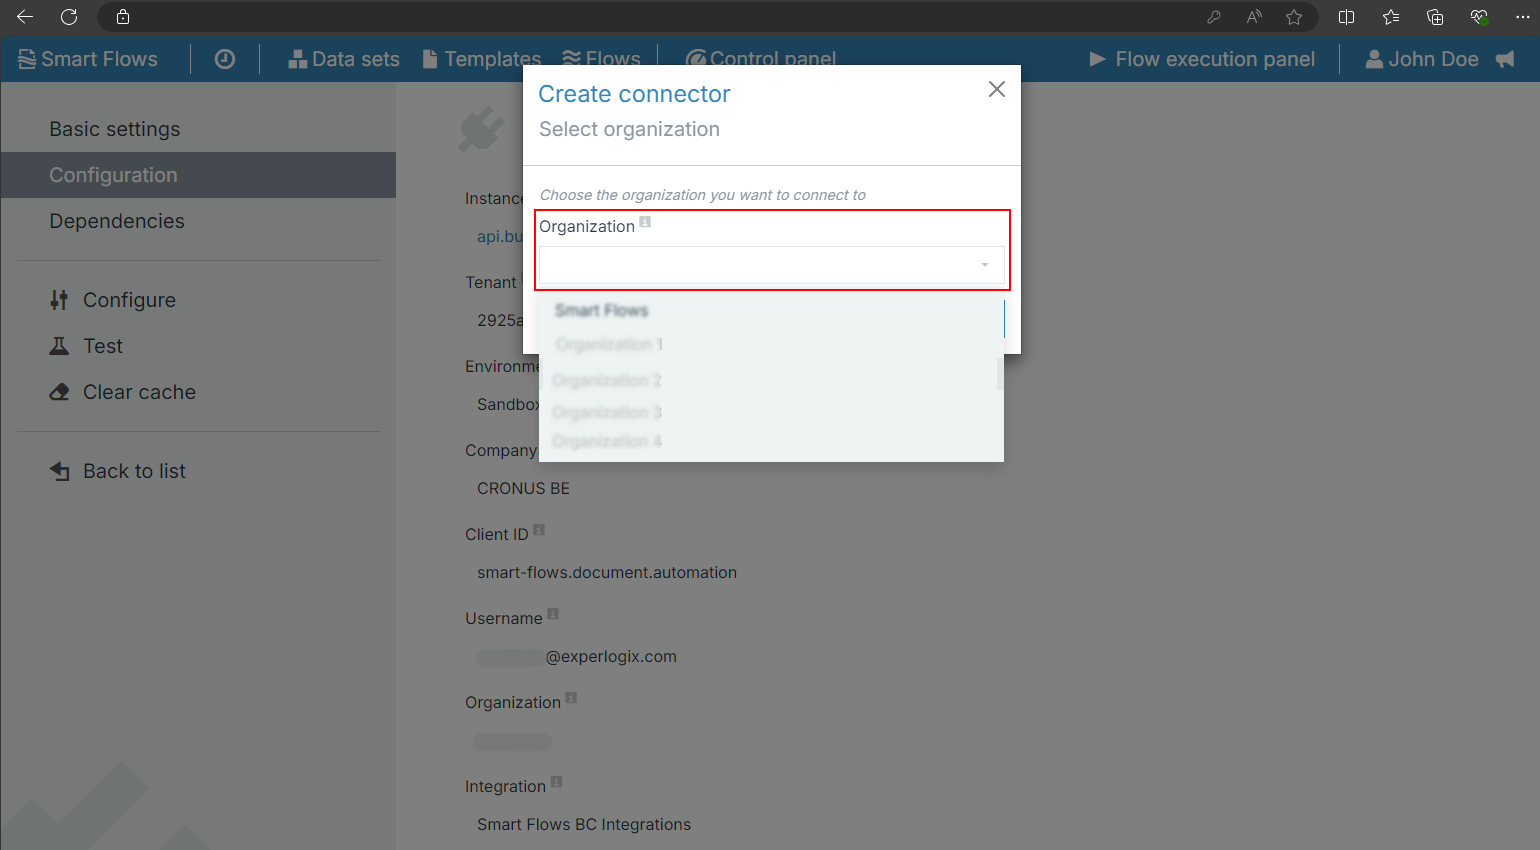
| 20. | Select your organization. |
| 21. | In the Integration field, select your integration. |
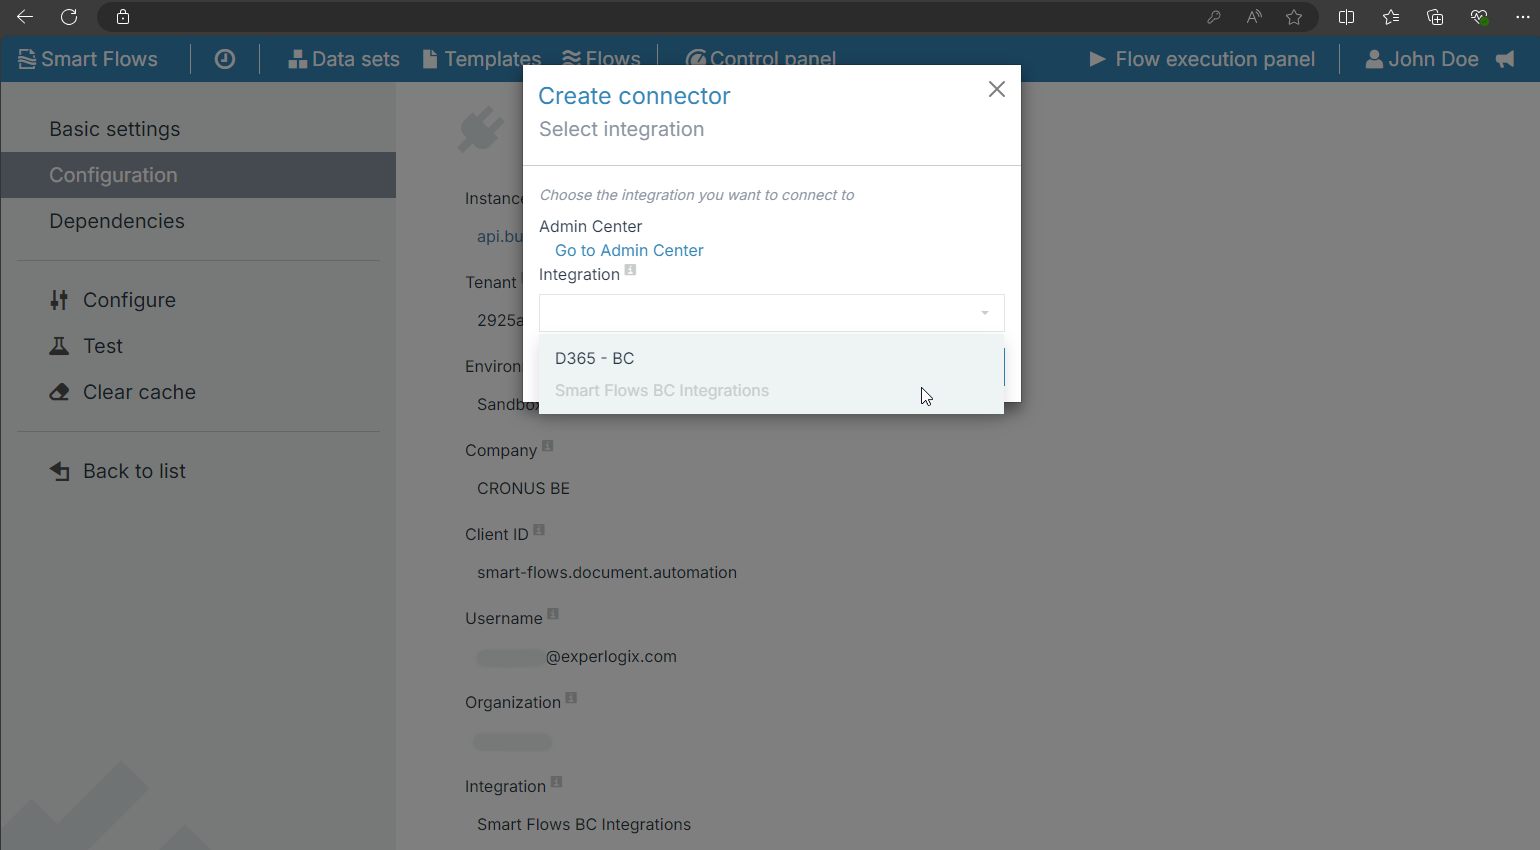
You can verify the details in the Cloud Connect Admin Center.
| 22. | Select the checkbox for Update the Experlogix Smart Flows extension in Microsoft Dynamics 365 BC. |
The connector user is the Microsoft Dynamics 365 BC user you logged in as in the first step of the connector setup process.
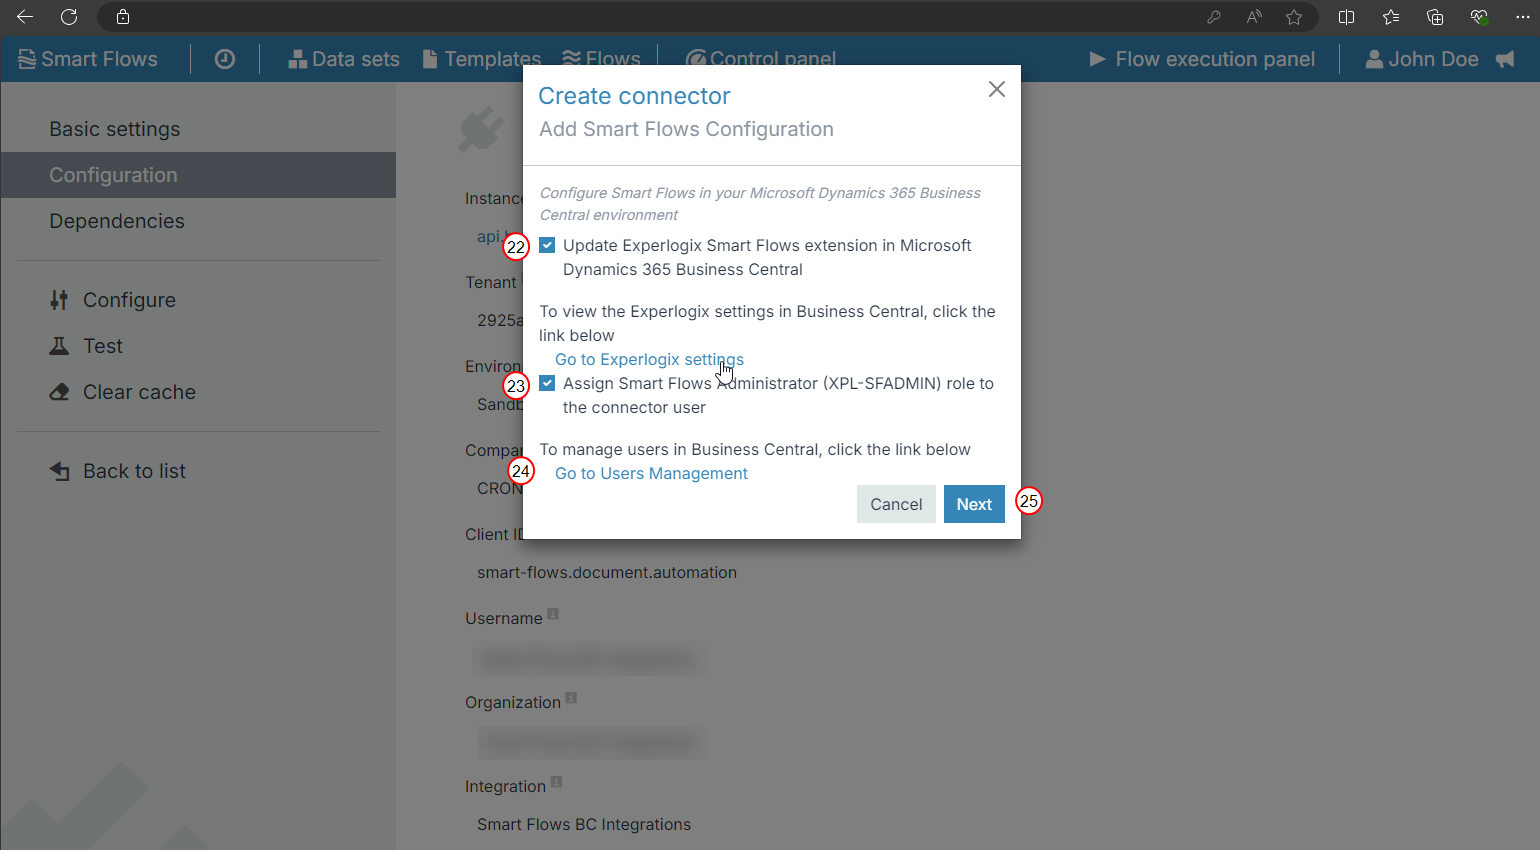
| 23. | Select the checkbox for Assign the Smart Flows Administrator role (XPL-SFADMIN) to the connector user. |
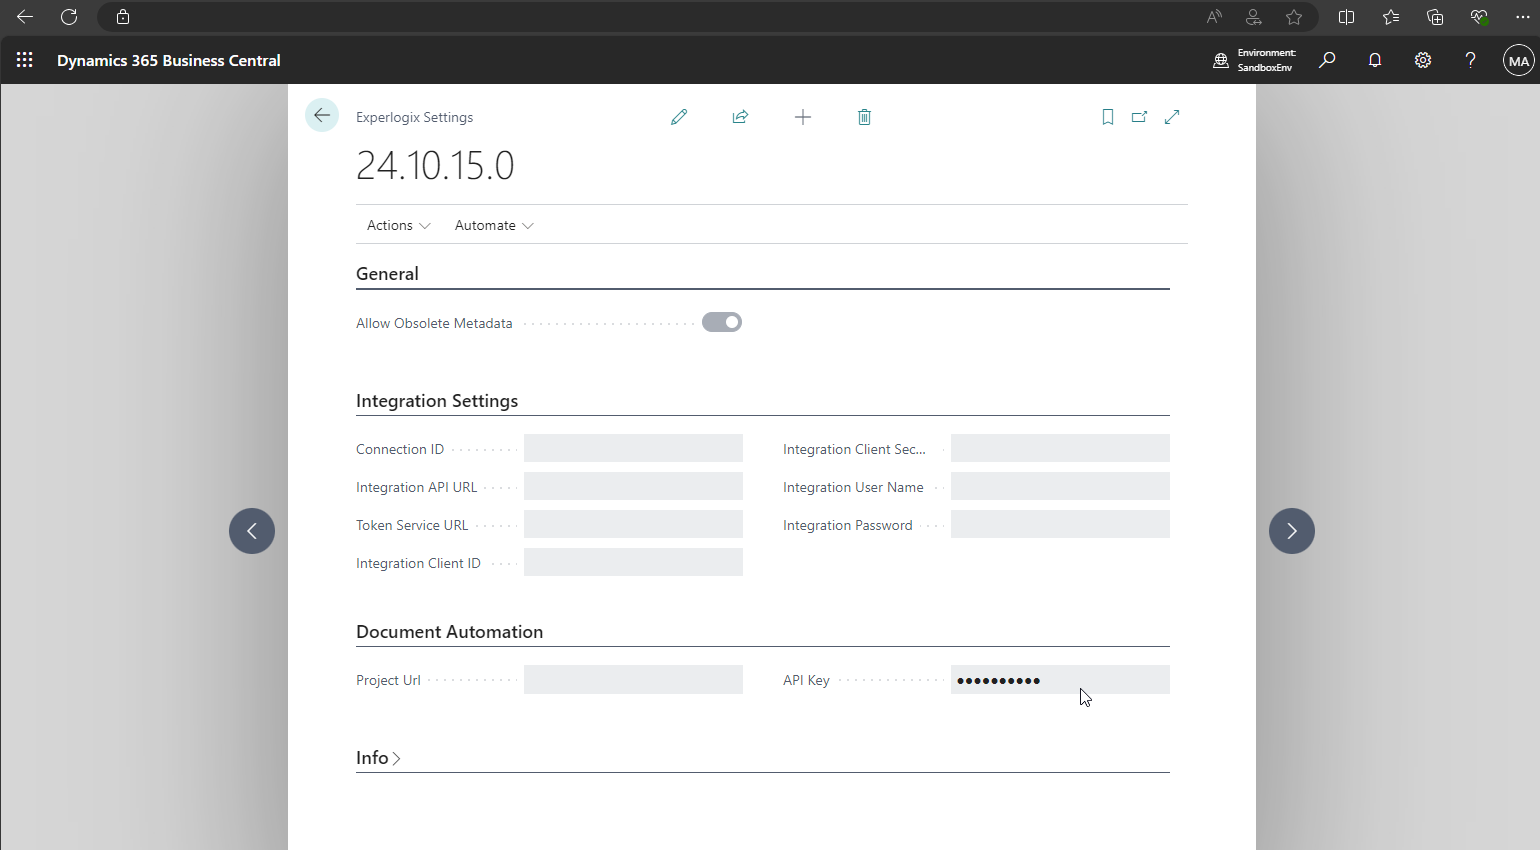
This operation will update the Experlogix Settings in your Business Central organization.
| 24. | (Optional) Select the Go to Users Management link to manage users in Microsoft Dynamics 365 BC. |
You can assign a Smart Flows role to users. This allows them to see the Experlogix Documents button on Microsoft Dynamics 365 BC entities, such as forms, and to start flow executions.
Customer Card
Customer List
Vendor Card
Vendor List
Item Card
Item List
Sales Quote
Sales Order
Sales Invoice
Sales Credit Memo
Sales List
Sales Orders
Purchase Quote
Purchase Order
Purchase Invoice
Purchase Credit Memo
Purchase List
Purchase Orders
Job Card
Job List
Posted Sales Invoice
Posted Sales Invoices
Service Order
Service List
Service Quote
Sales Return Order
Sales Return Orders
Sales Quotes
Sales Invoice List
Sales Credit Memos
Blanket Sales Orders
Sales Return Order List
Sales Order List
Purchase Quotes
Purchase Order List
Purchase Invoices
Purchase Return Order List
Service Quotes
Service Orders
| 25. | Select the Next button. |
| 26. | Select Finish. |
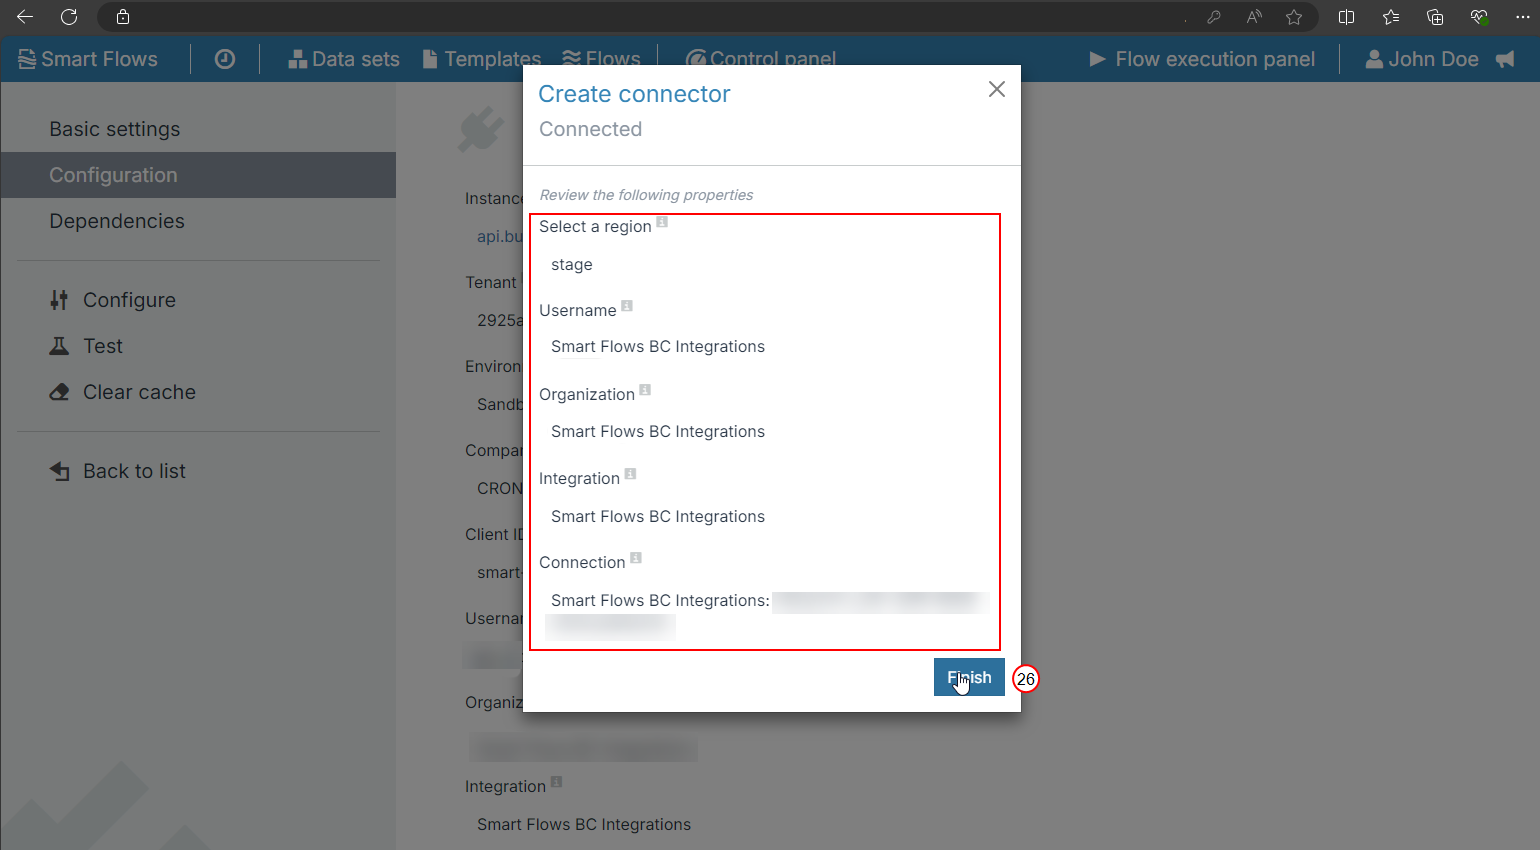
In the Edit connector dialog, you can view the configurations for the connector.
Congratulations, you've successfully created and configured your Microsoft Dynamics 365 BC connector for Smart Flows.