Formatting
Formatting a field means that you change the way it is displayed. You can turn a field into a number, date, time, an image, a bar code, a hyperlink, an e-signature, and so on.
Formatting dialog
The mapping window is where you apply formatting to the selected mapping. Double-click a mapping in the Mapping tab of the Smart Flows pane (or select a mapping and select Settings) to bring it up.
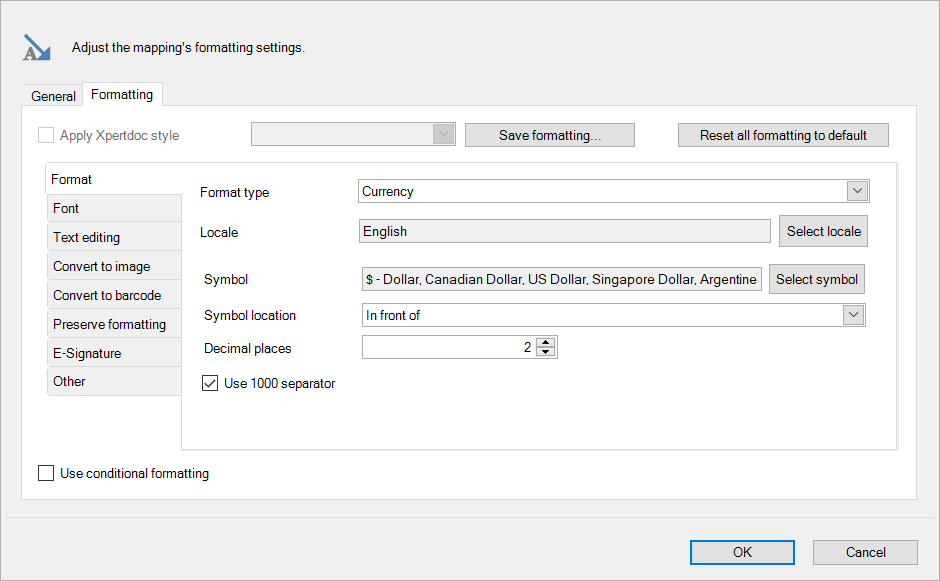
Here's the Formatting part of that window:
Template Builder styles
To configure your style use the tabs explained below, and then save it by doing the following:
Creating a new Template Builder style.
| 1. | In Template Builder, open your template. |
| 2. | On the toolbar, select the Template Builder Mapping tab. |
| 3. | Configure your formatting as desired. |
| 4. | Select Save formatting button. |
The Settings dialog opens.
| 5. | In the Name field, enter a name. |
| 6. | Select OK. |
To see an updated document with your styles applied, select Preview in the toolbar.
All the tabs to the left are explained on the following pages:
Quick apply a style to a Template
| 1. | Open your template. |
| 2. | Right-click the field to modify, and select Assign Template Builder Style. |
| 3. | From the Select Style dialog, select a style. |
| 4. | Select OK. |
To see an updated document with your styles applied, select Preview in the toolbar.
Reset to default
If you want to reset your mapping's settings to the default values, you can select the Reset all formatting to default button:
