Running Flows within your Connector User Interface
The purpose of this document is to provide a clear, concise guide on running flows from within any connected environment. You’ll learn the process of selecting items or records, executing a flow, and troubleshooting common issues. Understanding how to run flows in your connector's user interface ensures you can build experience that supports your team's users and business needs.
Running a Flow
| 1. | In your connector, select one or more records. |
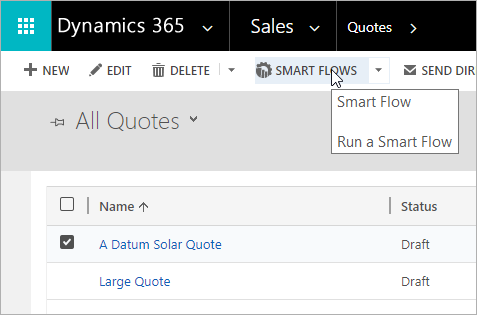
| 2. | Select the Smart Flows button. |
If the Flow Execution Panel doesn't open, see Accessing Flow Execution Panel.
| 3. | Choose a flow to run. |
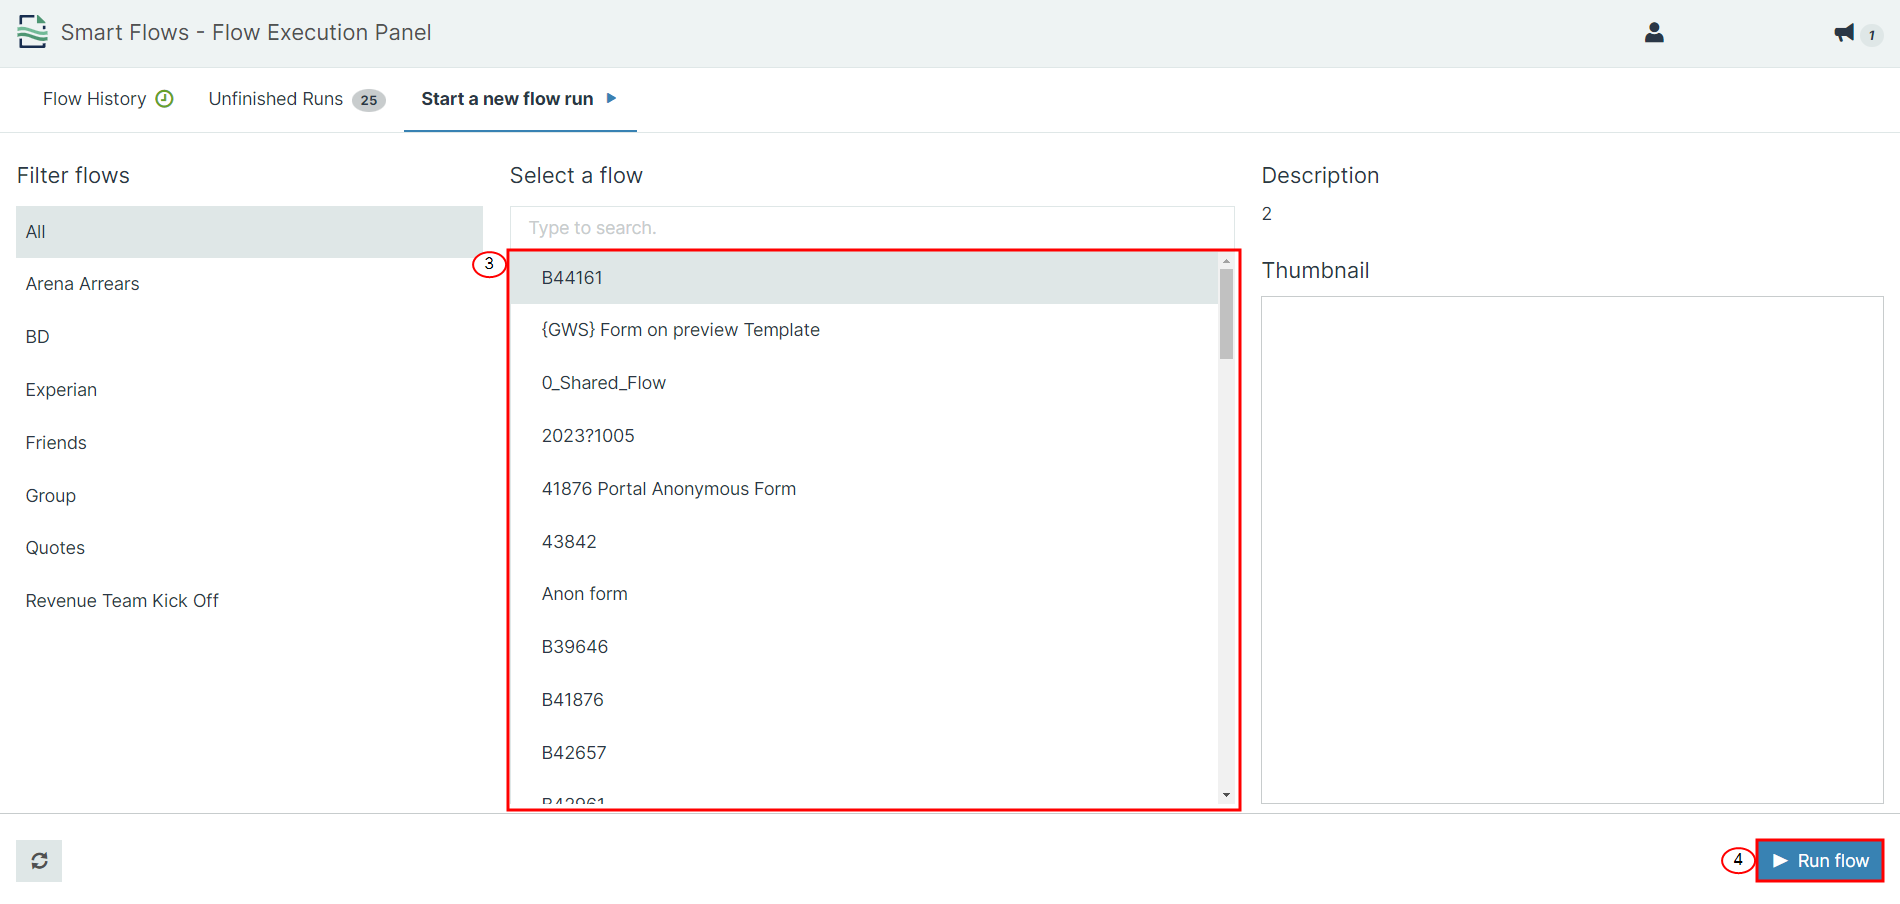
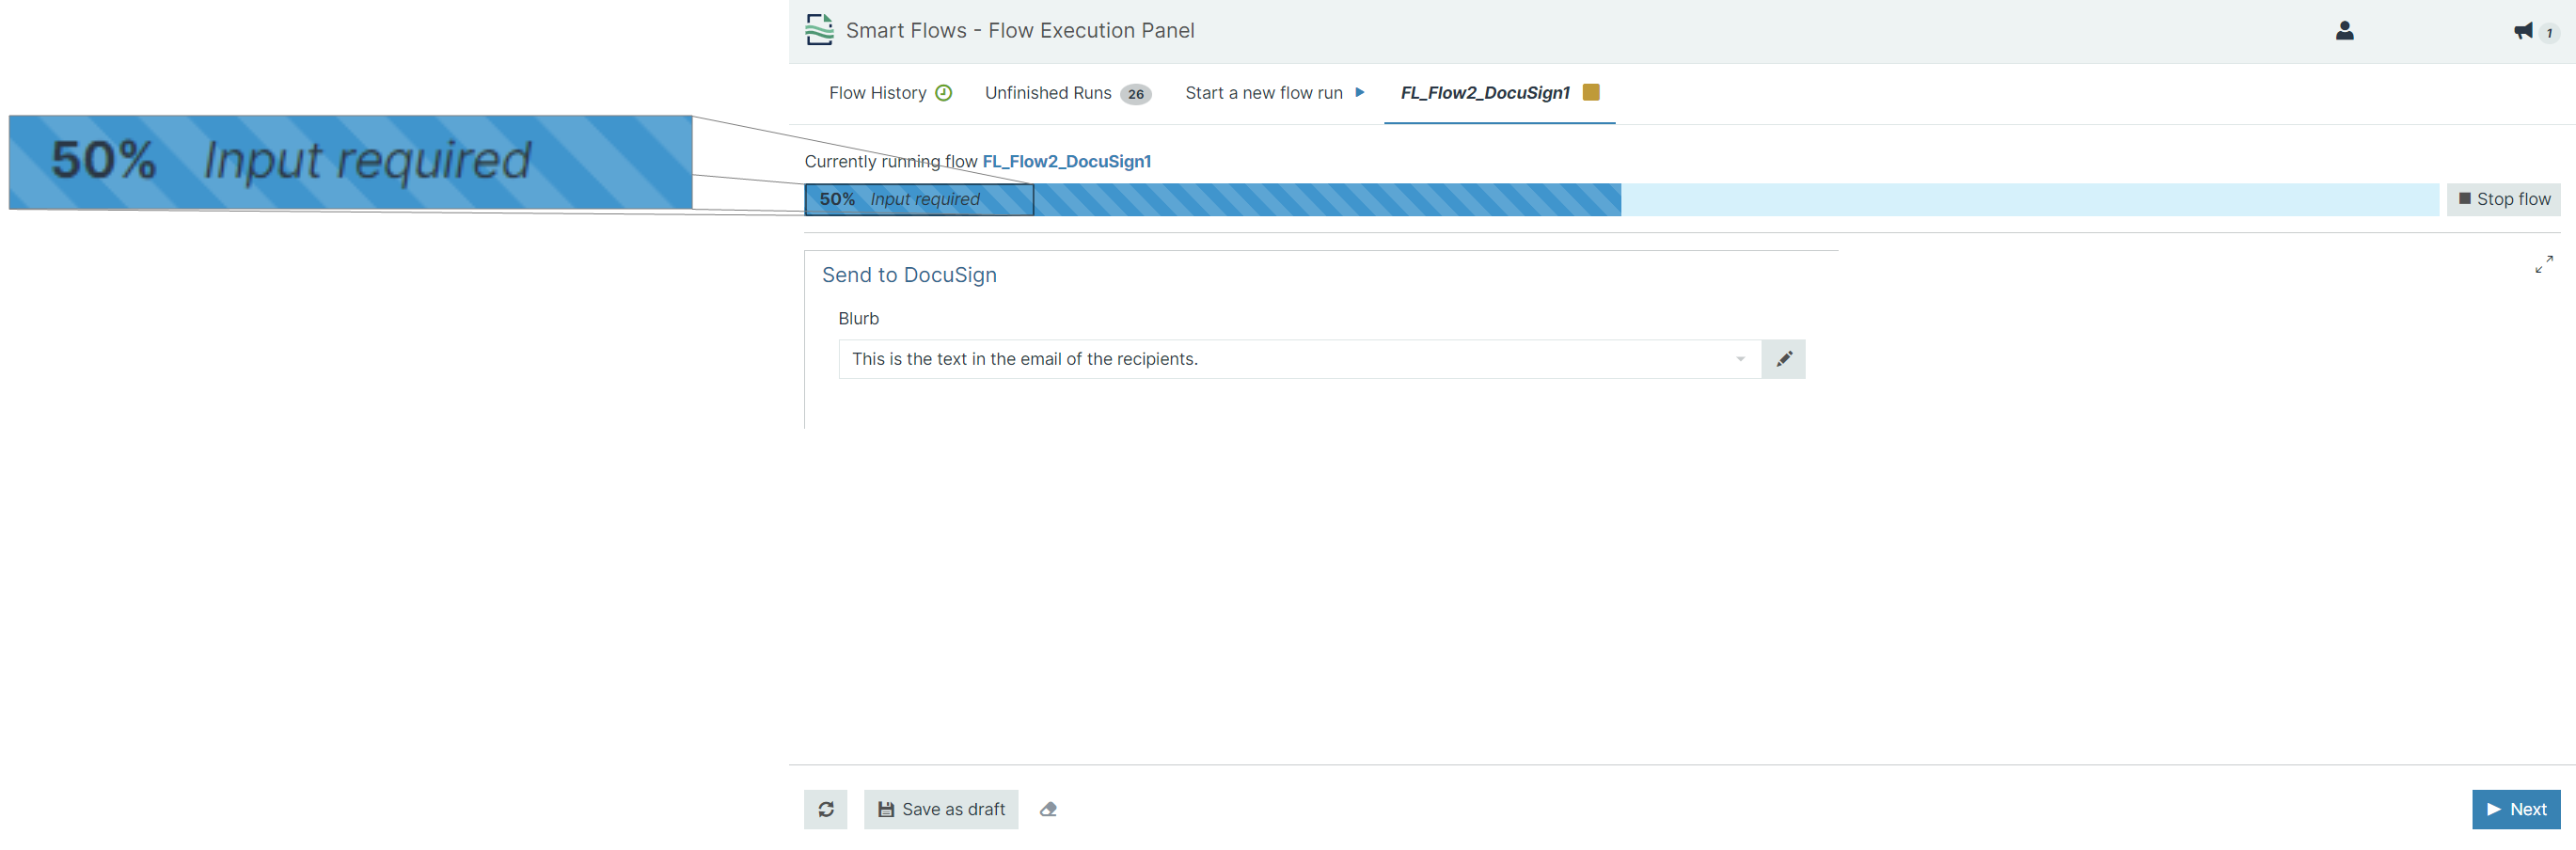
| 4. | Select Run flow. |
| 5. | (Conditional)Select inputs or add data to continue the flow. |
Depending on the setup of the flow, your flow may ask questions to fill in inputs or to customize the flow to match your use case.
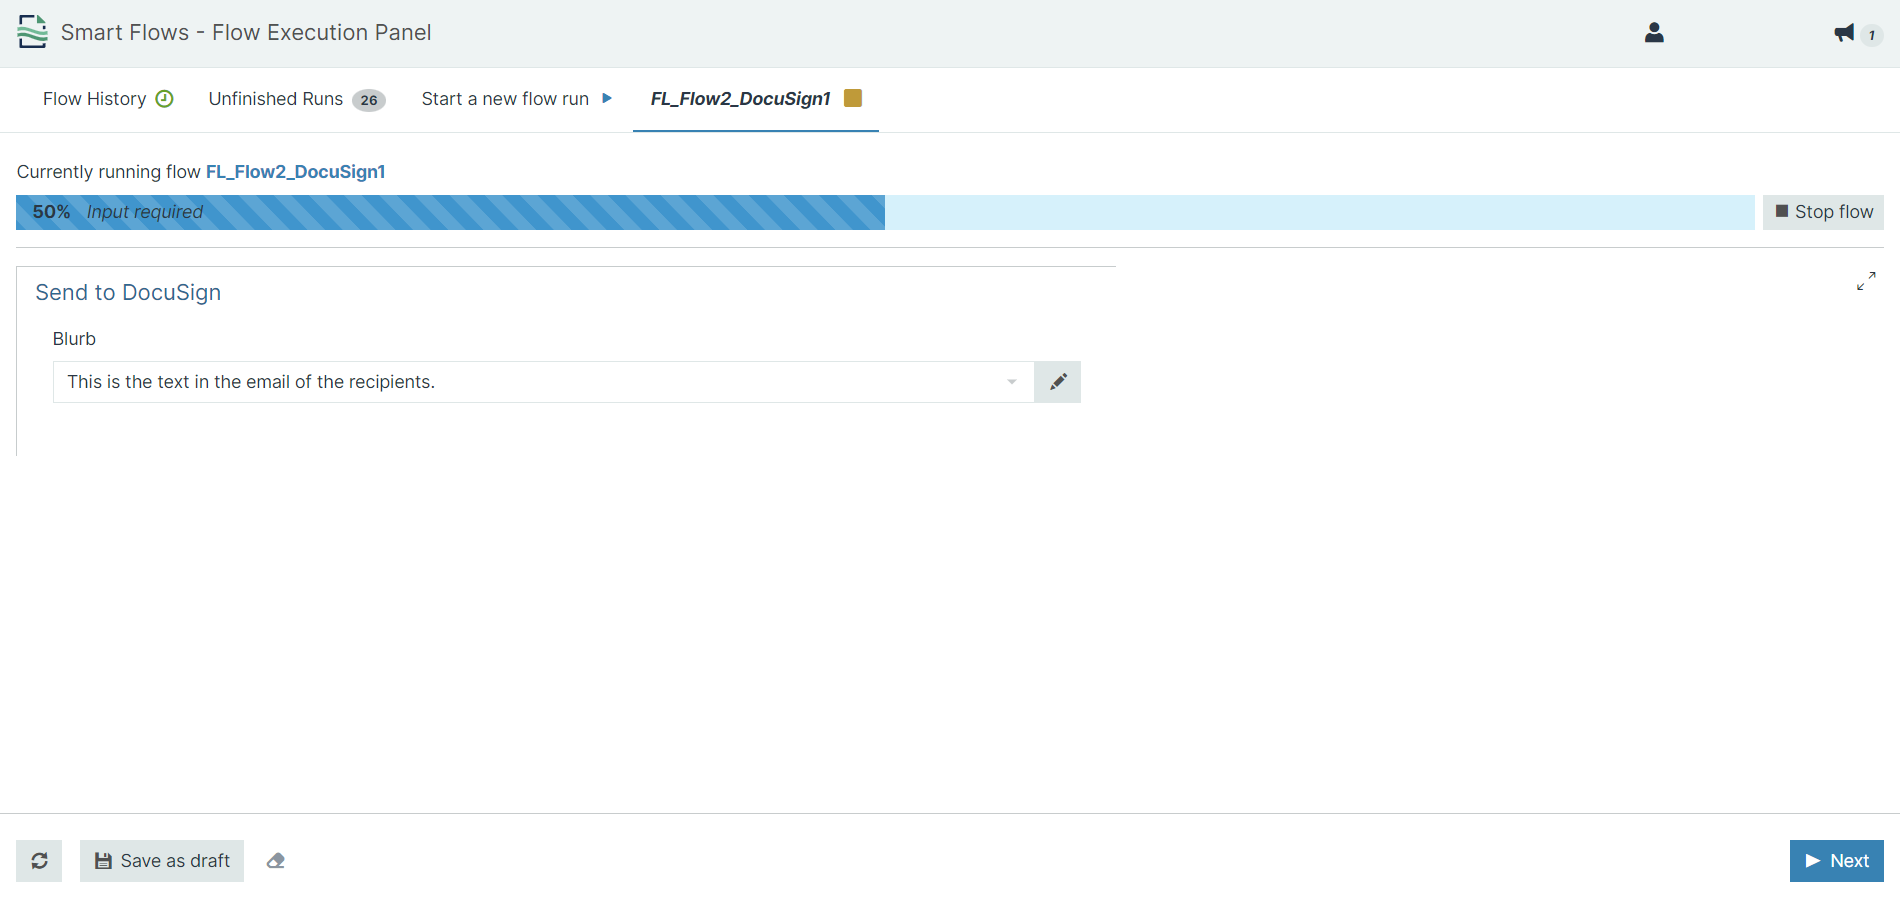
| 6. | Select the Next button to advance the flow and repeat providing inputs and selecting until you complete your flow. |
When working with an Experlogix CPQ (Preview) connector, you can initiate flows directly from the Web Configurator either triggering a specific flow or letting the user choose from multiple available flows.
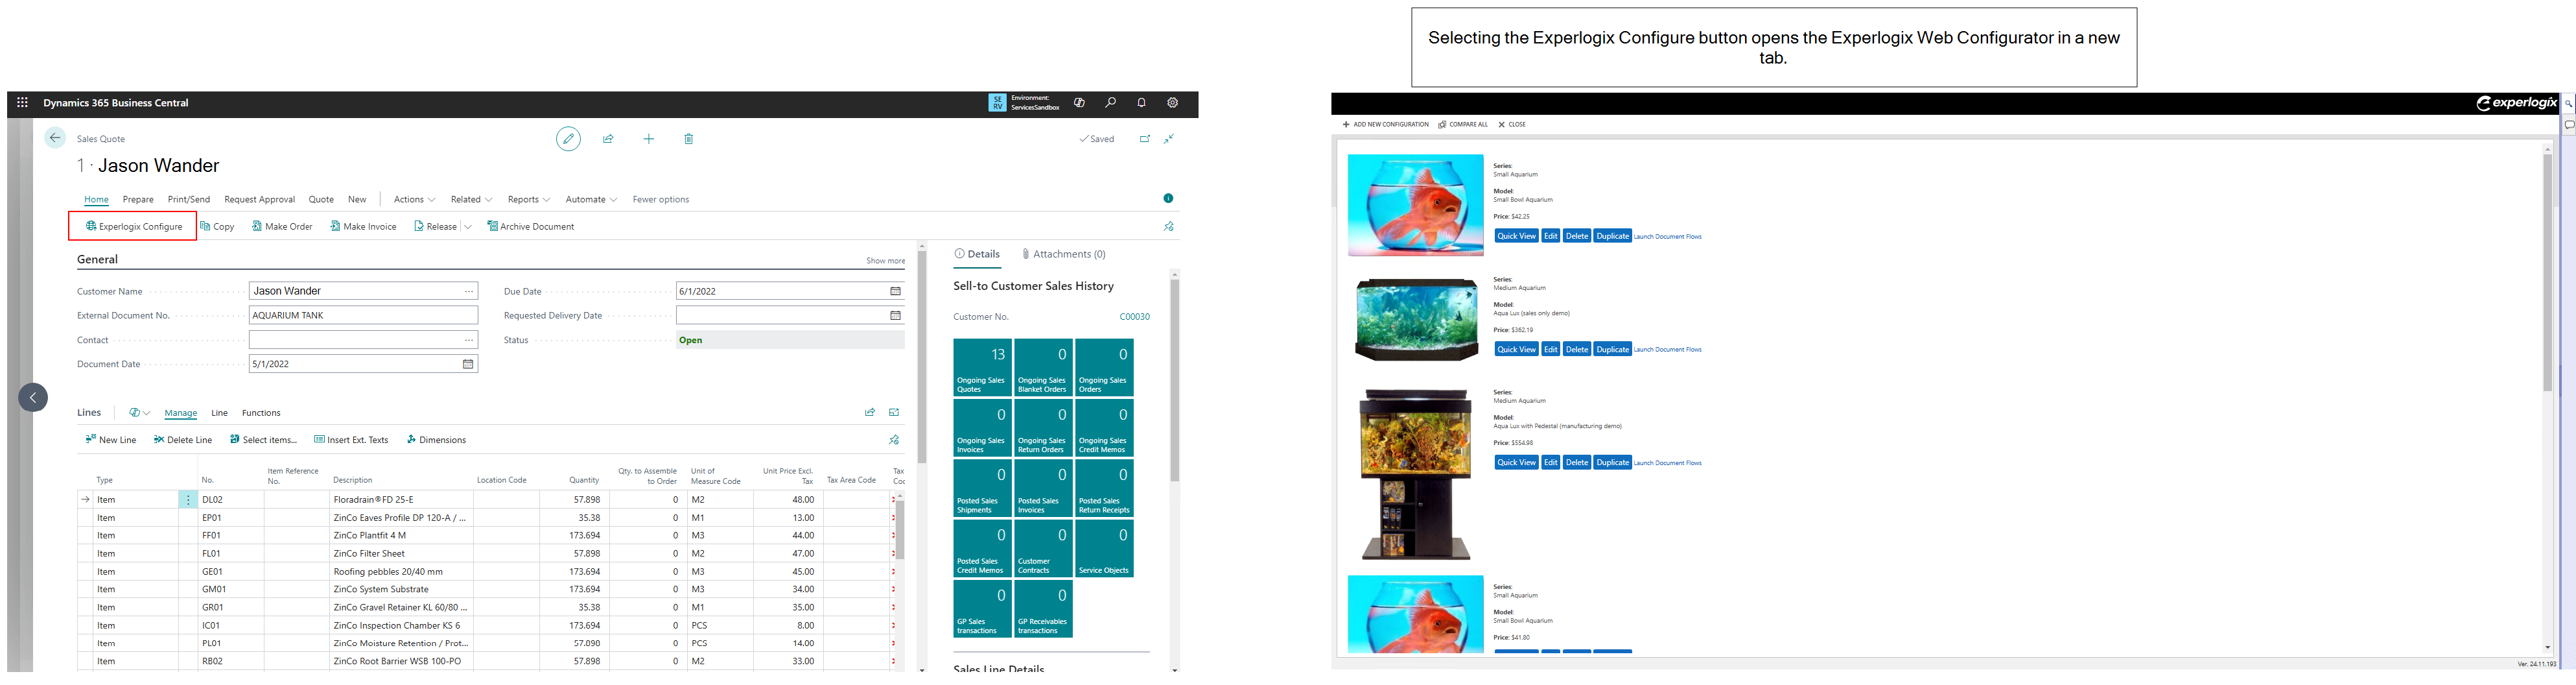
Use Cases for Experlogix CPQ (Preview) Connector
The Experlogix CPQ (Preview) connector enables users to use their Configurator CPQ configuration data in their flow executions and document generation workflows. While the system handles background operations, the end user interacts only with the Configurator and Flow Execution Panel. Below are some common scenarios for usage.
Experlogix CPQ (Preview) Connector Prerequisites
Before running flows within the Configurator and Flow Execution Panel, ensure that:
-
Process Designer: Your Process Design must be set up and validated to ensure it works as expected. See Process Designer Configuration in Design Center for more information.
-
Admin Center Setup: You must have created the following in Admin Center. These serve as the minimum requirements; most use cases will already have users in Admin Center.
-
A project in Admin Center, see Projects.
-
A team with the name exp-features-default-site. See Teams.
-
An integration for your CPQ connector data source(e.g Microsoft Dynamics 365 CE, Microsoft Dynamics 365 F&O, Microsoft Dynamics 365 BC, or Salesforce. Your integration is a conduit for passing data between your Configurator and Smart Flows environment. See Integrations and Add a Connection.
-
A CPQ type integration in Admin Center to connect to your CPQ instance to in Smart Flows. See Integrations
-
A Client ID and client secret for your smart-flows-document-automation. See Manage Client Id.
-
The Migration URL from your CPQ Configurator site, see Cloud Connect Migration.
-
-
For Salesforce environments only:
-
You must have your Salesforce connector created in Smart Flows before attempting to create an Experlogix CPQ (Preview) connector. See Salesforce for details on creating and configuring a Salesforce connector in Smart Flows.
-
You must enable Individual User Authentication in your Salesforce connector, and you must enable the "Manage the synchronization of users when they log in" in SettingsProject Console.
-
-
User Authentication: The user must have previously logged into Flow Execution Panel to establish a valid session. This guarantees that all flows run under a recognized user identity. You can always validate your expected users via the User List view in Project Console. See Users and Managing Users. Without user authentication, flow executions will fail due to an inability to validate the user.
-
Proper Configuration Settings: Your Configuration must already be setup with the correct primary entity (e.g., Quote, Configuration, or specific CPQ configuration type) defined, along with accurate values for record IDs and indices. You must already have one more Configurations in your modeling environment/ Web Configurator.
-
Flow Availability: Relevant flows for document generation must already be created.
To create a new Experlogix CPQ (Preview) Connector, you must have
-
A user that has access to at least one organization in Admin Center.
-
In the organization in Admin Center, you need to have a configured CPQ connection.
Start a Flow With Selection
- Scenario: After saving a configuration , users can open Flow Execution Panel within the Web Configurator to choose and execute the desired flow based on the configuration XML data.
-
Example: Upon finalizing a product configuration, users access Flow Execution Panel to select between flows, such as a quick quote or a detailed proposal, guided by the details in the configuration XML.
-
Aquarium Example: After configuring an aquarium, the user uses Flow Execution Panel to choose either a Standard Quote flow for pricing or a Comprehensive Proposal flow for detailed proposals, depending on the configuration XML data.
-
-
Result: The selected flow is initiated via Flow Execution Panel, which guides the user through the necessary steps, ensuring compliance with security roles required for Smart Flows, and delivers the final output tailored to the configuration.
Flow Management
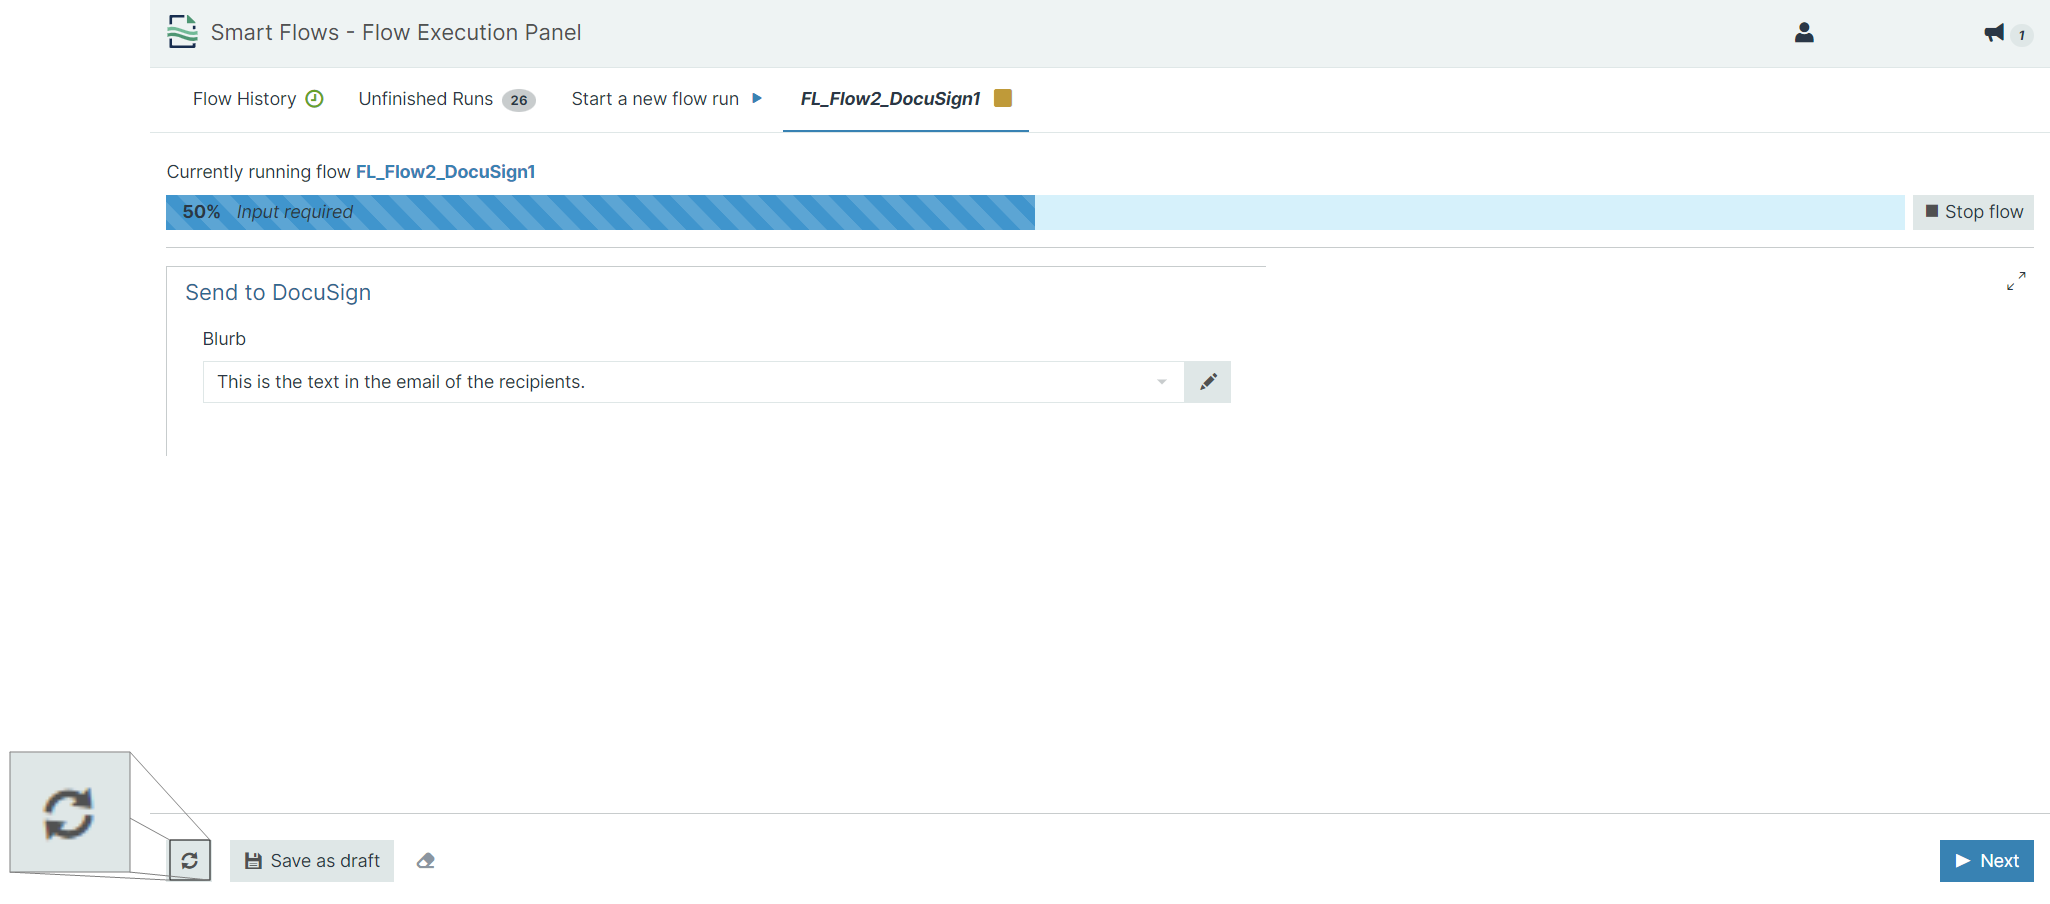
Refreshing a Flow
When a flow is waiting on external events, like a signature from Docusign the users may use the refresh button to trigger the new state of the envelope. The state is provided in real time but may also be cases when refresh can help.
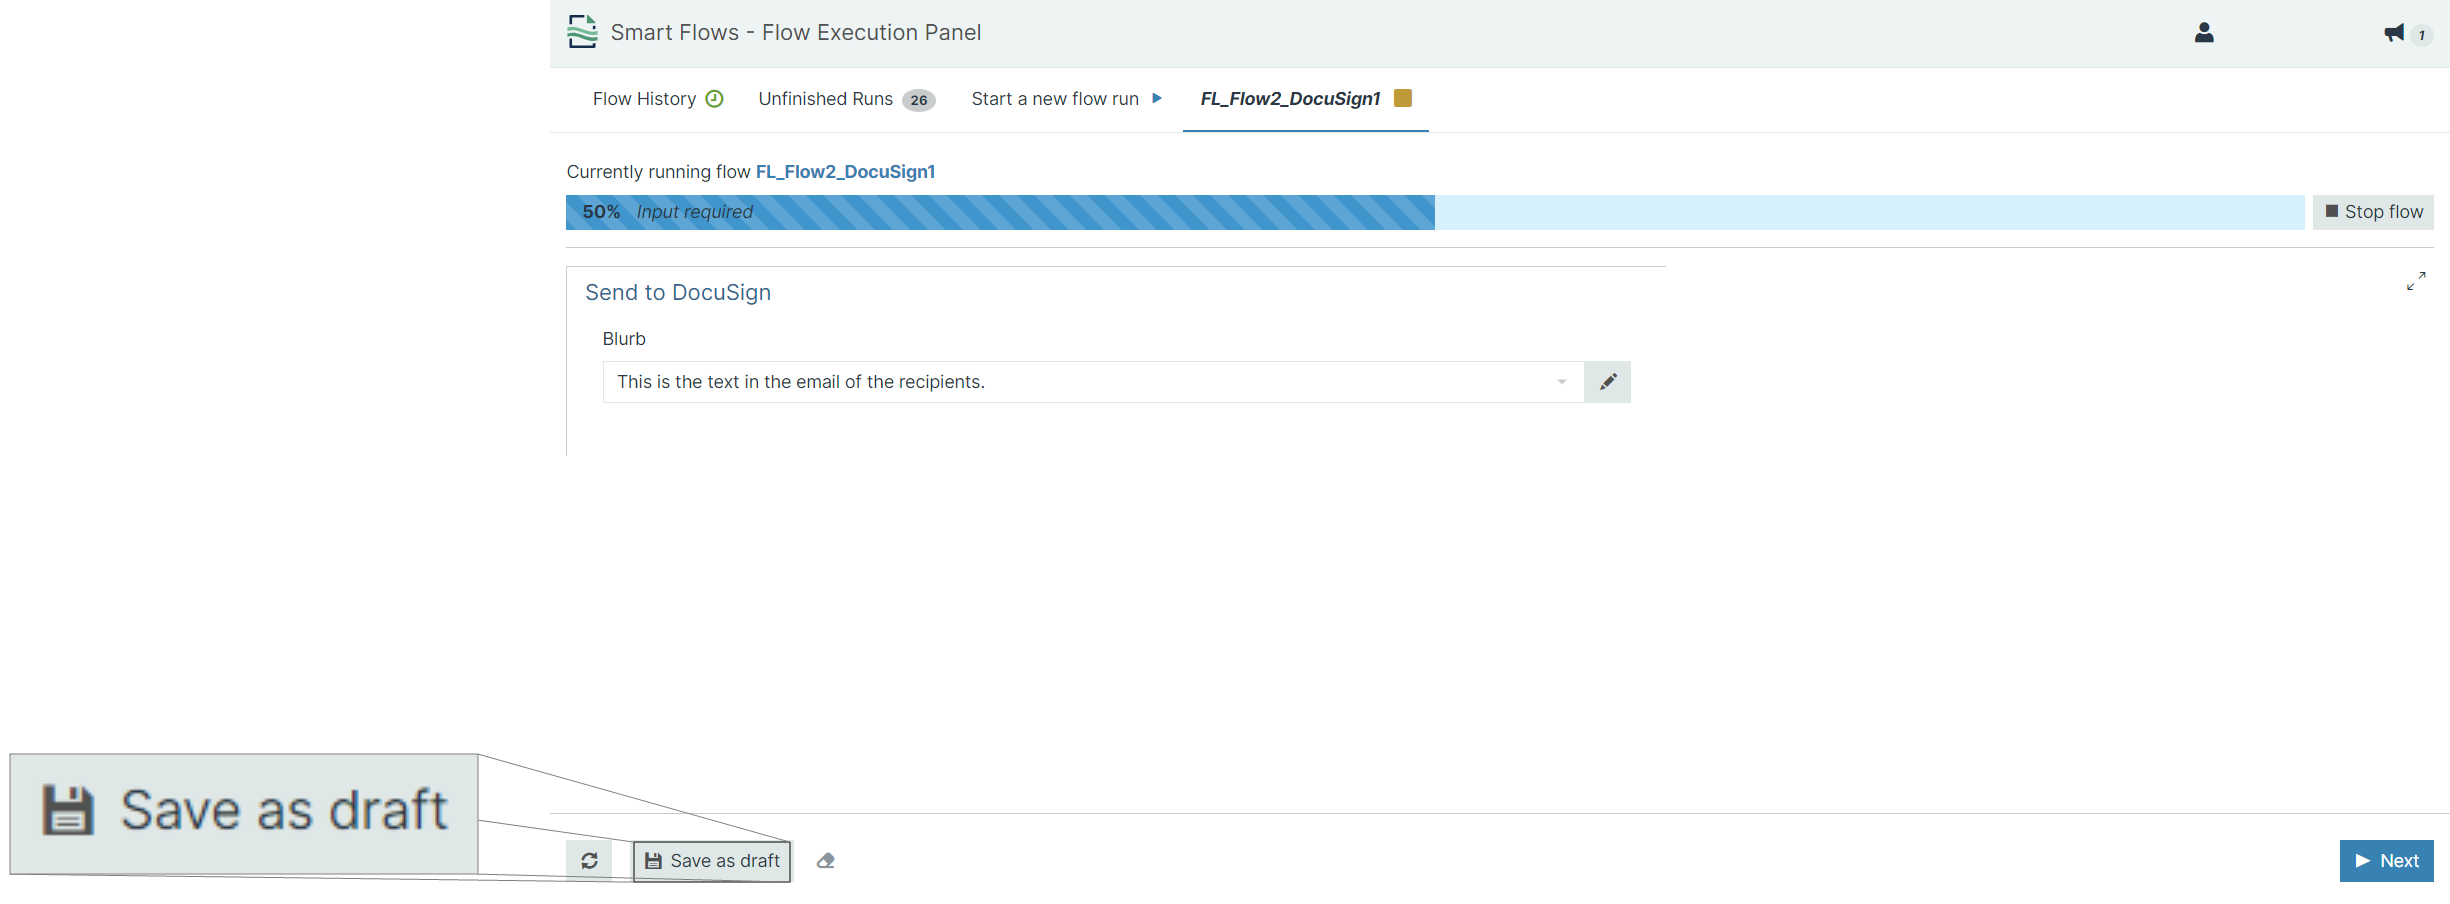
Saving as Draft
Save as draft saves the flow, including the data already entered in the form. If the user returns later and resumes the flow, the fields' saved values are retained allowing you to resume where you left off.
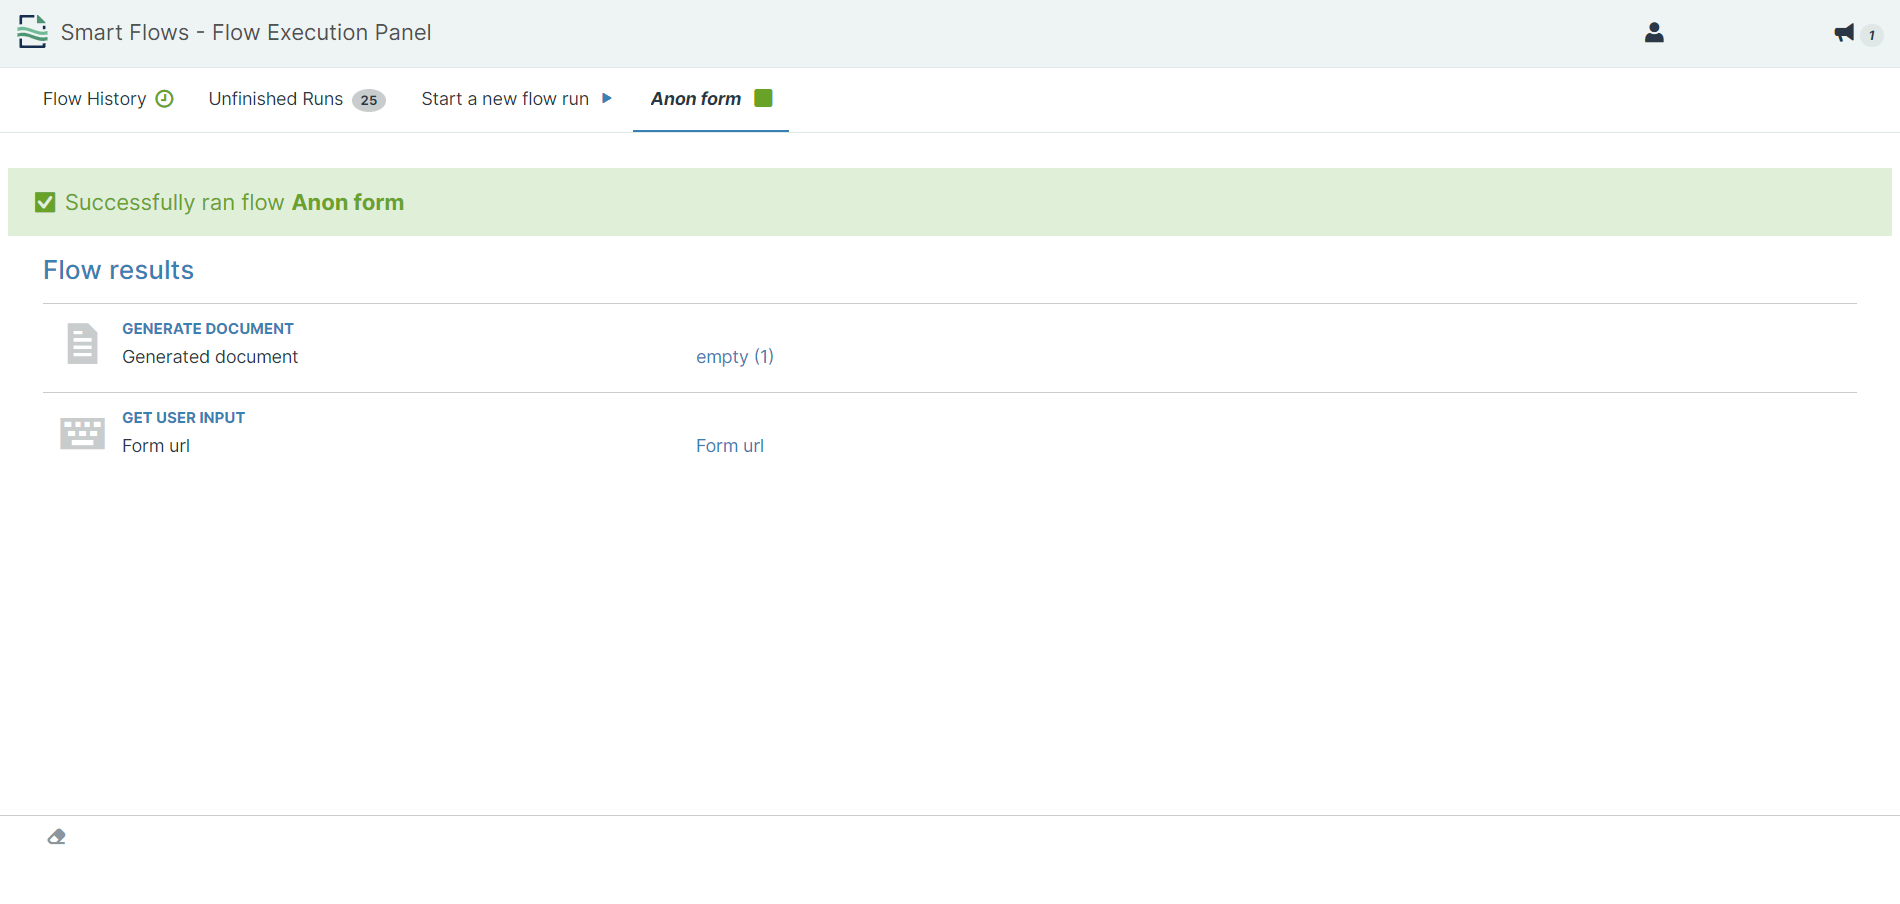
Flow Results
If your flow does not require additional input and runs successfully to completion, the system displays the Flow results page detailing the outputs you chose and actions of the flow.
Viewing Flow Progress
During an in-progress flow, the progress bar informs you of the current step and, if multiple records are selected, which record the flow is currently processing.