Individual User Settings
The Project Console Individual User Settings tab allows you to view and configure the individual user settings for a given user. ou can reach these settings via the User List view in the Settings in Project Console by selecting a user from the list.
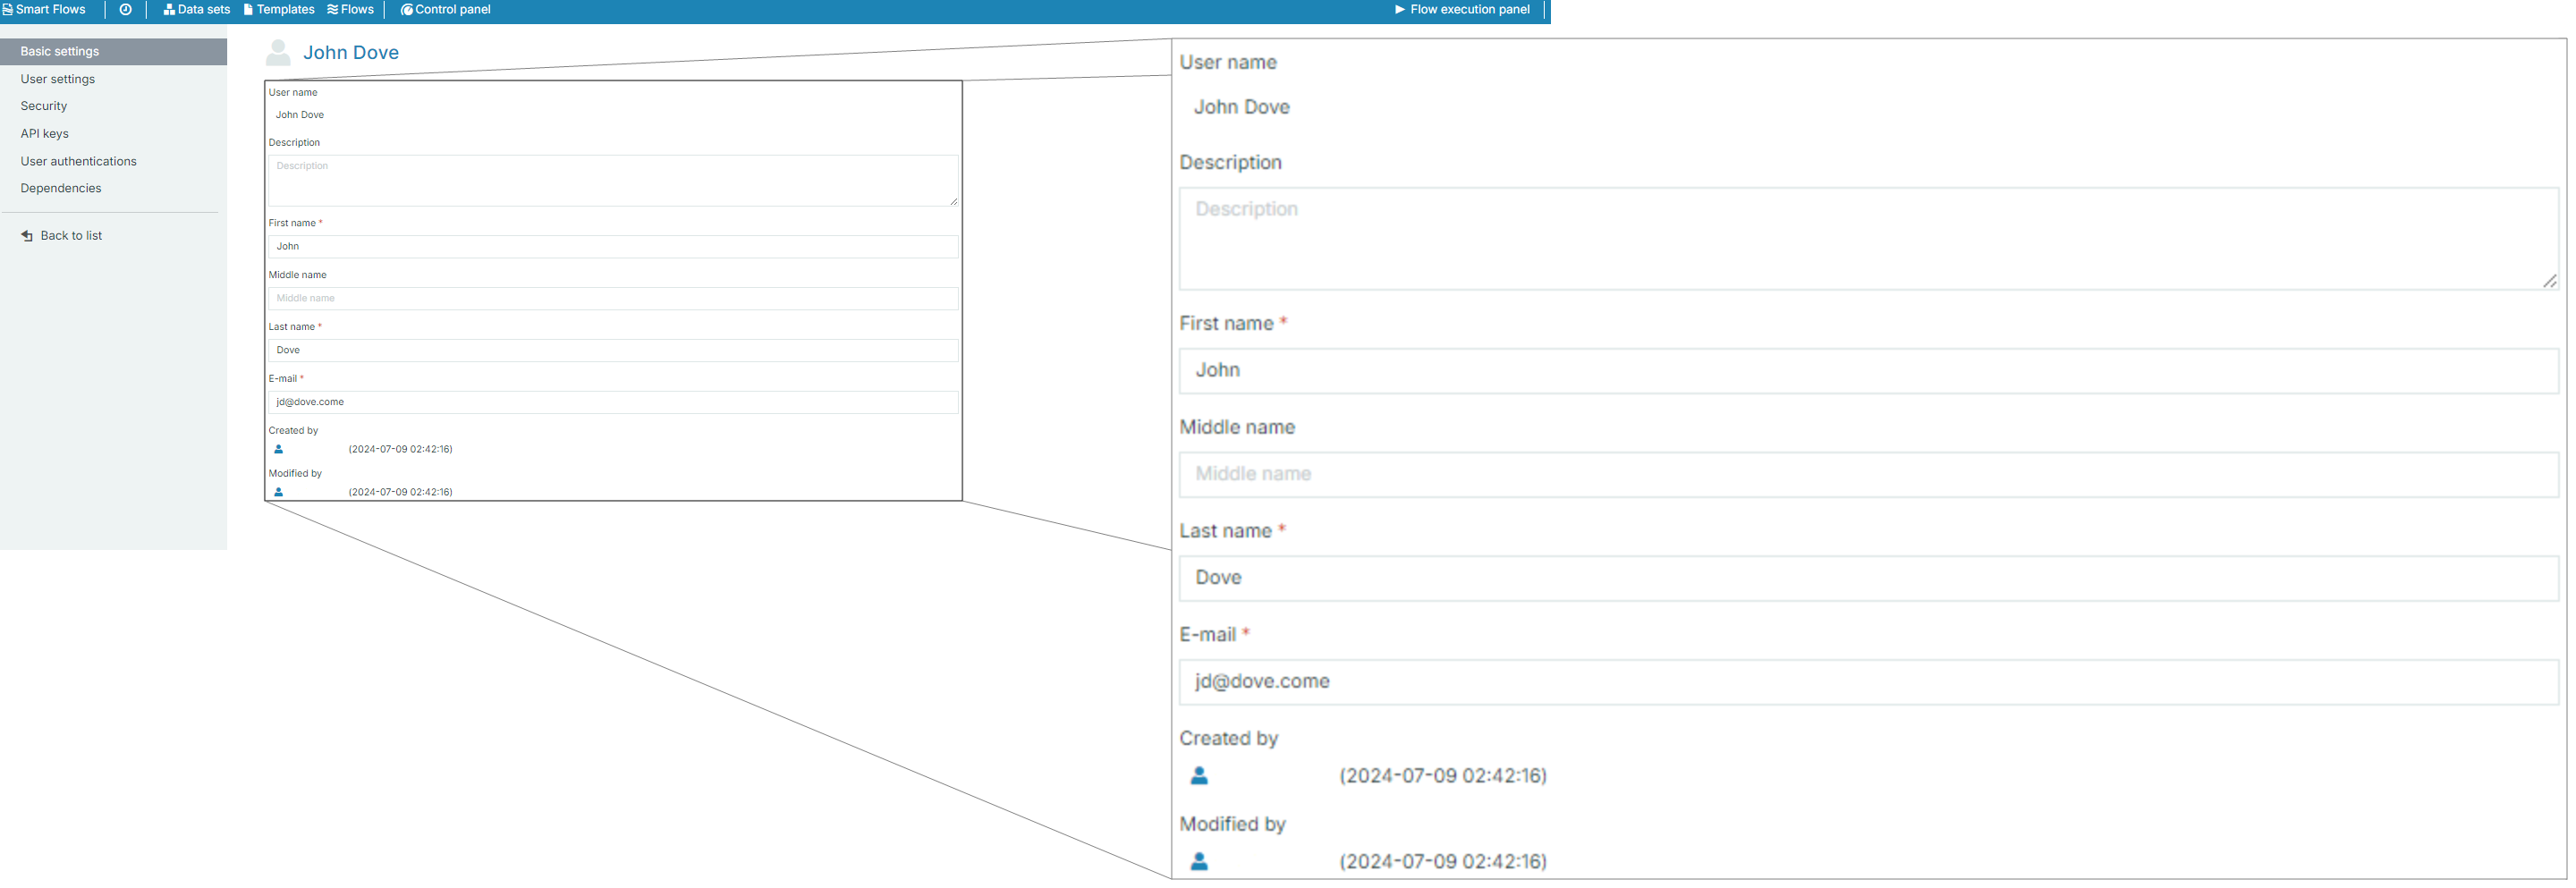
Basic settings tab
The Basic Settings tab displays user identification details, including name and email address.
| Setting | Field Name | Description |
|---|---|---|
| User Information | User name | Displays the user's name. |
| Description | Optional field for adding a description of the user. | |
| First name | First name of the user. | |
| Middle name | Optional field for the user's middle name. | |
| Last name | Last name of the user. | |
| Email address of the user. | ||
| Created by | Displays the admin who created the user and timestamp. | |
| Modified by | Displays the admin who last modified the user and timestamp. |
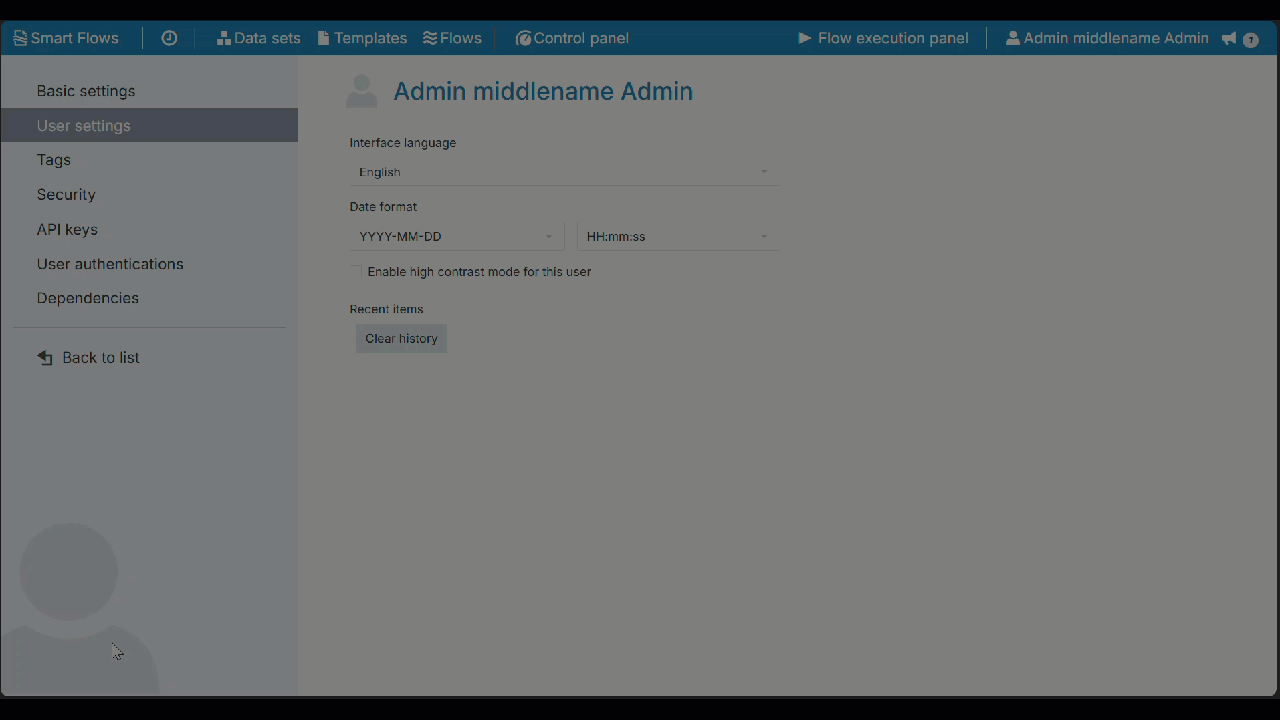
The User Settings tab lets you configure the time, date format, and interface languages for an individual user.

| Setting | Field Name | Description |
|---|---|---|
| User Settings
|
Interface language | Set the preferred language for the user interface. |
| Date format | Choose the date format to be used by the user. | |
|
Enable high contrast mode for this user |
Click the option to increase the User Interface contrast for a better visibility. The contrast of a.o. form control borders increases to a minimum ratio of 4.5:1.
|
|
|
Recent Items |
Click 'Clear History' under the Recent Items section to clear the recent item history for the selected user. |
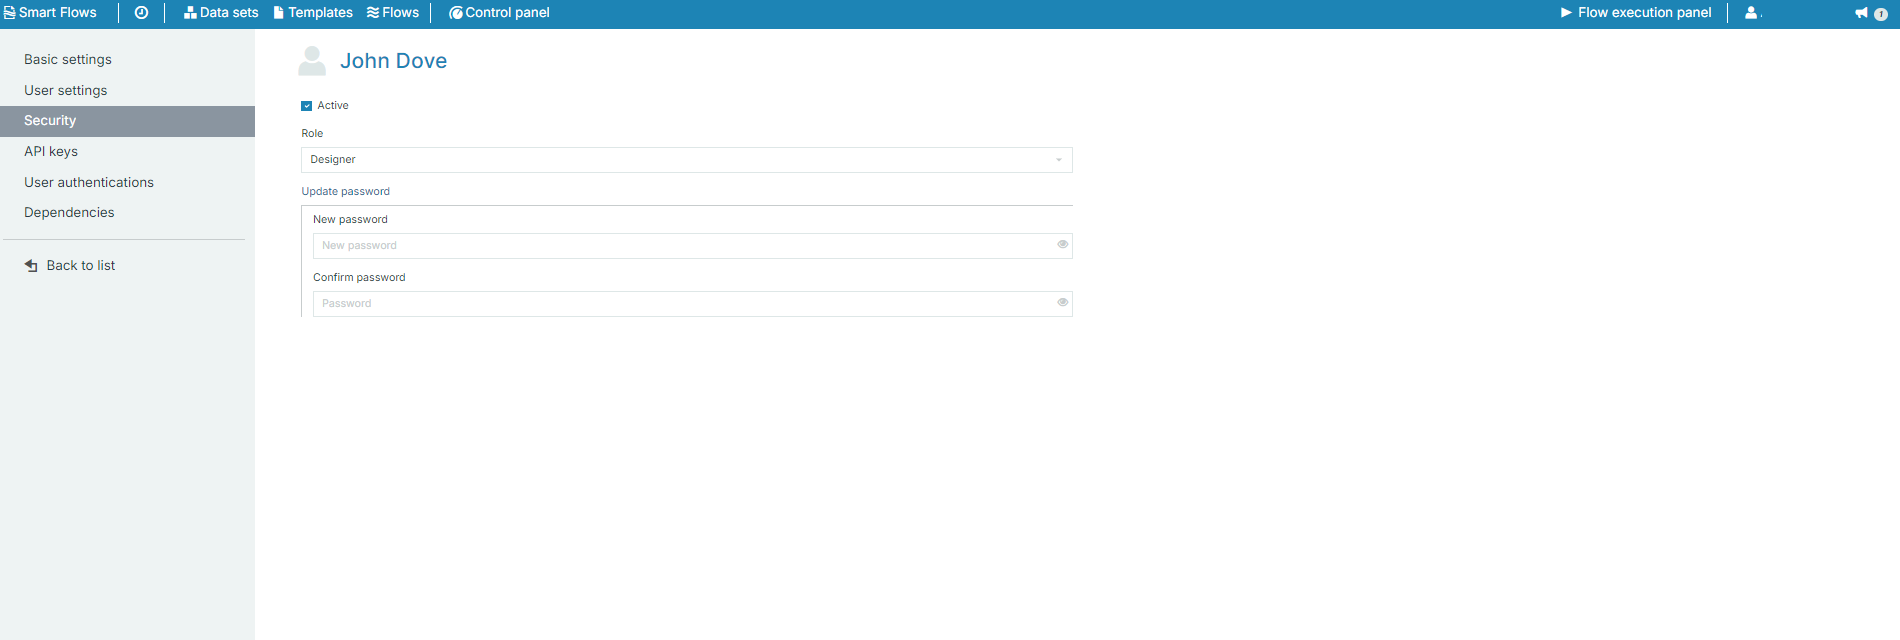
Use the Security tab to update a native user’s password and manage account status.
| Setting | Field Name | Description |
|---|---|---|
| Security | Active | Checkbox to enable or disable the user account. |
| Role | Displays the user’s assigned role (e.g., Designer, Admin, etc.). | |
| Update password | Allows you to change the user's password. |
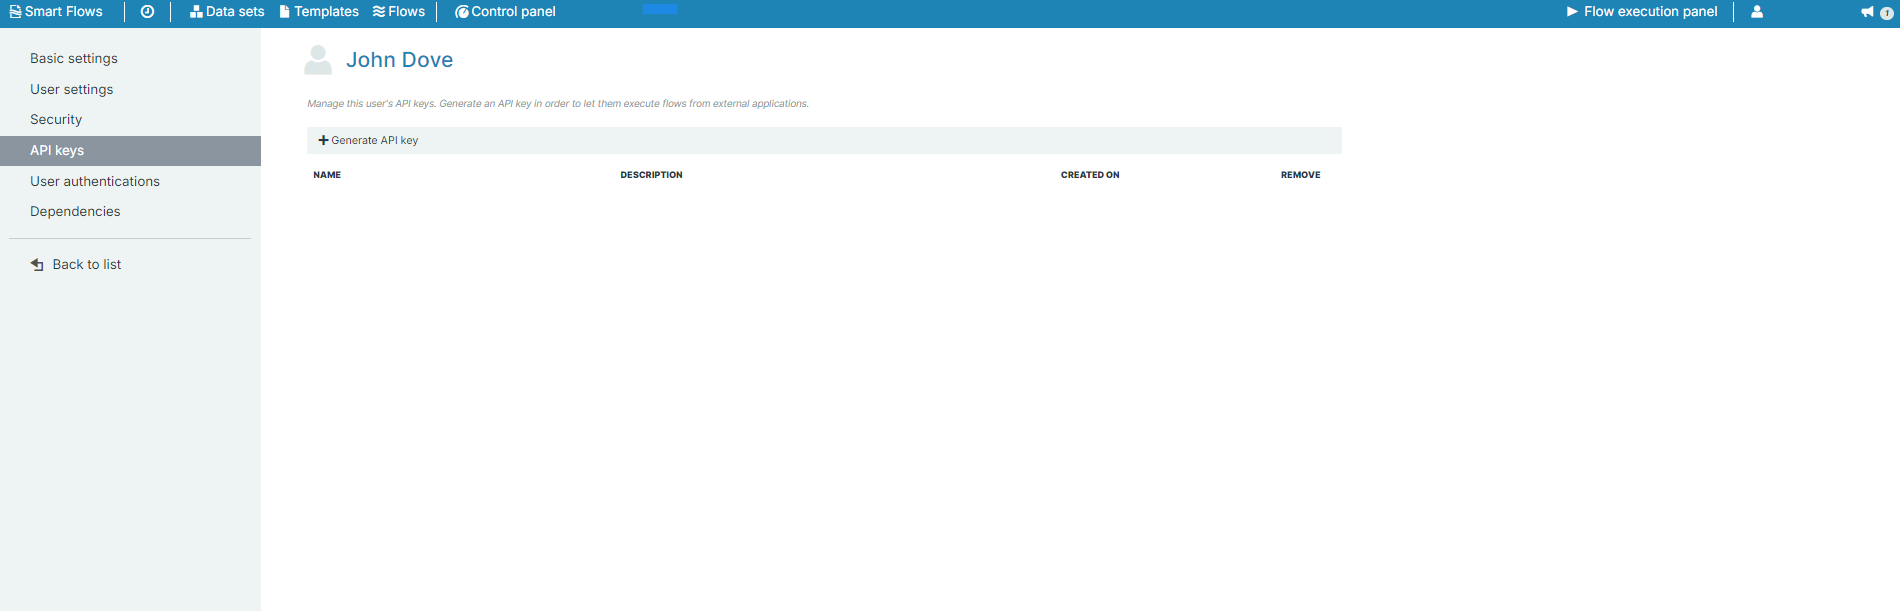
Administrators can use API keys to authenticate API access. See Using the API for more information.
| Setting | Field Name | Description |
|---|---|---|
| API Keys | Generate API key | Button to generate a new API key for external integrations. |
| Name | Name of the API key generated. | |
| Description | Description of the API key. | |
| Created on | Timestamp showing when the API key was generated. | |
| Remove | Option to remove the API key. |
The User Authentications tab displays connectors through which the user is authenticated.

| Setting | Field Name | Description |
|---|---|---|
| User Authentications | Connector | Displays the connector used for user authentication (e.g., Docusign). |
| Expires on | The expiration date for the user authentication. | |
| Status | Status of the authentication (e.g., Unavailable, Enabled), disconnected (tokens have expired - the user needs to log in again). | |
| Enabled | Indicates if the authentication is currently enabled. |
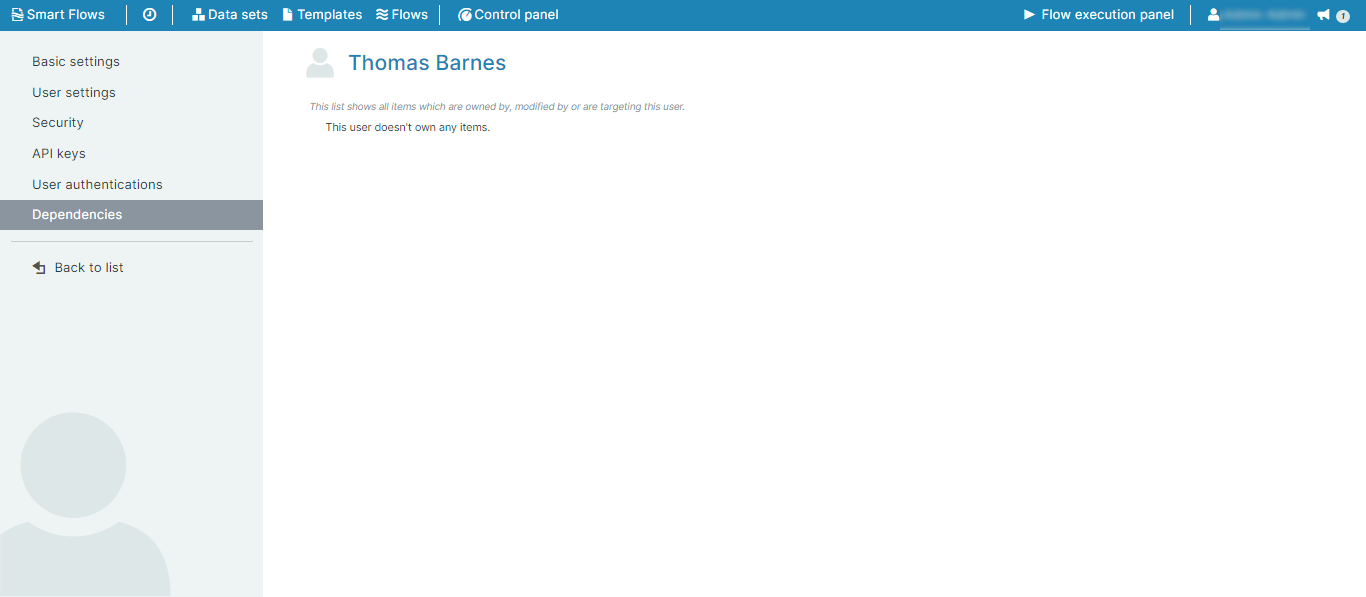
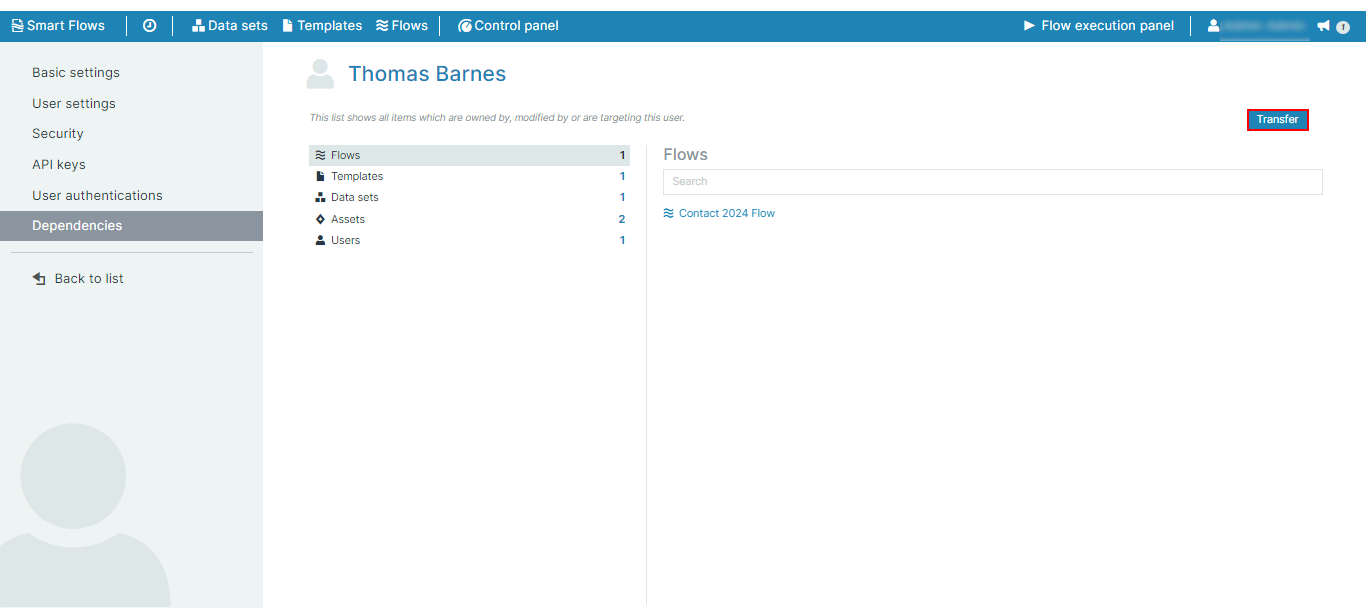
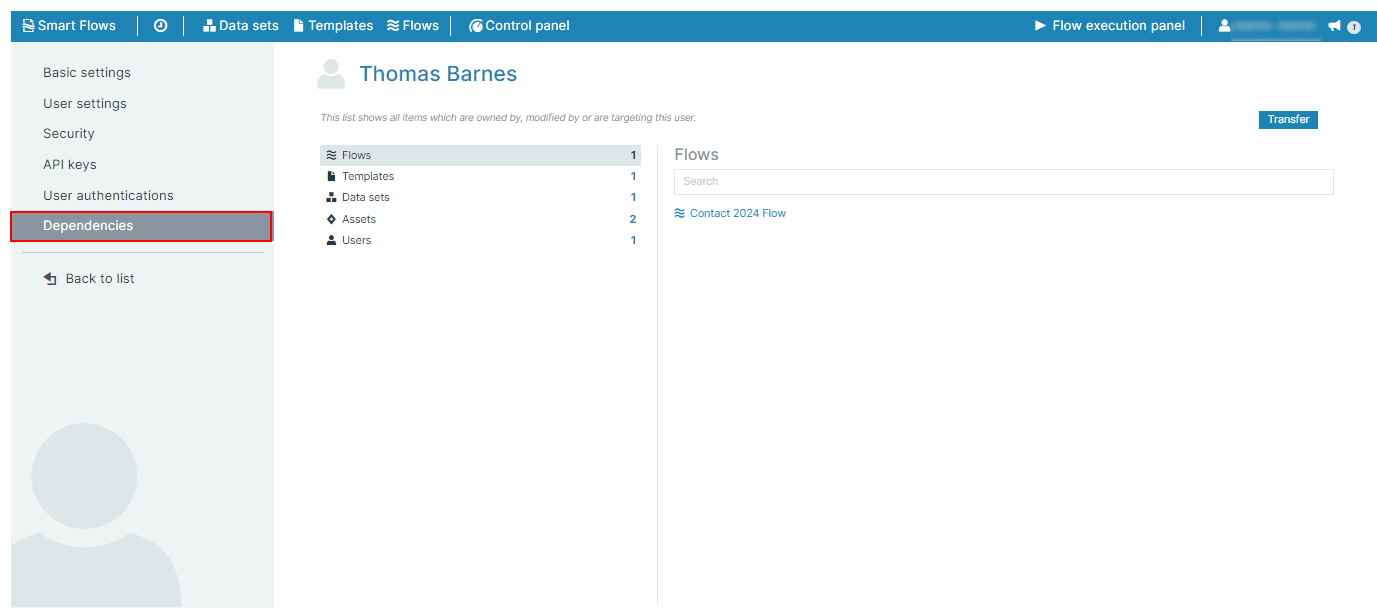
The Dependencies tab displays all dependencies between project items and a selected user. Dependencies can also be transferred to another user.
| Setting | Field Name | Description |
|---|---|---|
| Dependencies | Flows | Lists the flows owned by or assigned to the user. |
| Templates | Lists the templates associated with the user. | |
| Data sets | Shows data sets owned or modified by the user. | |
| Flow executions | Displays flow executions the user is involved in. | |
| Documents | Lists documents the user has access to. | |
| Samples & data | Displays samples and data connected to the user. |
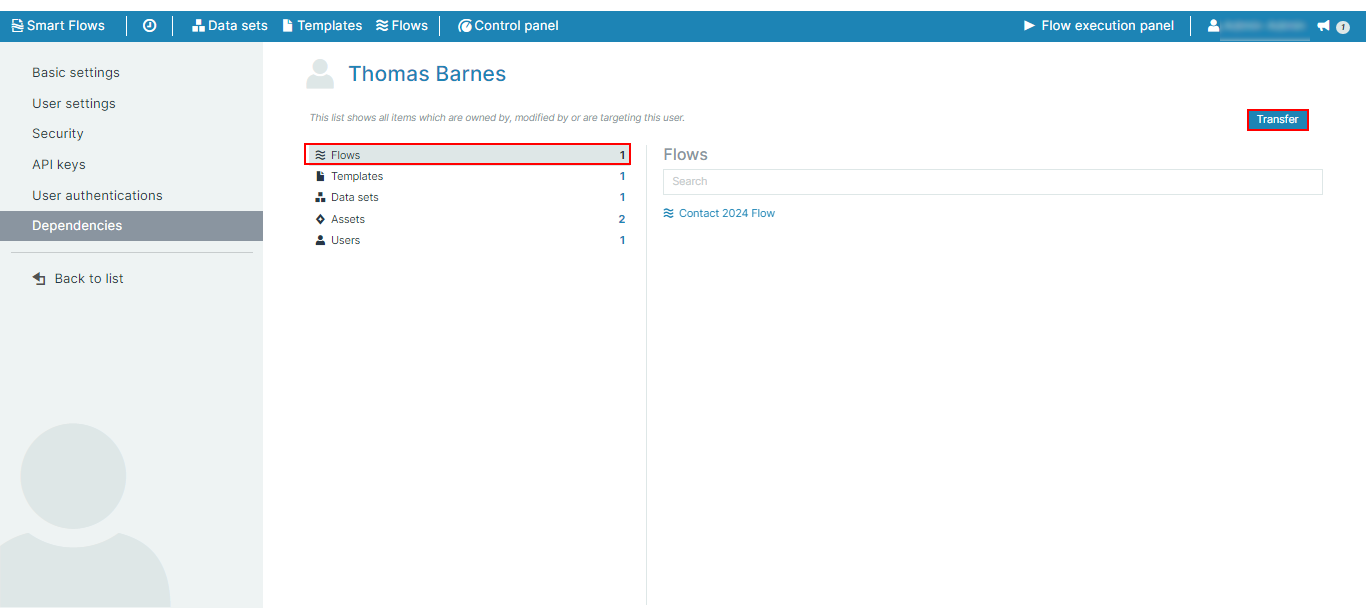
Transferring User Dependencies
A single user may have many dependencies. If such a user leaves the company their dependencies are lost. In order for these dependencies to stay in the company you can transfer dependencies from one user to another user.
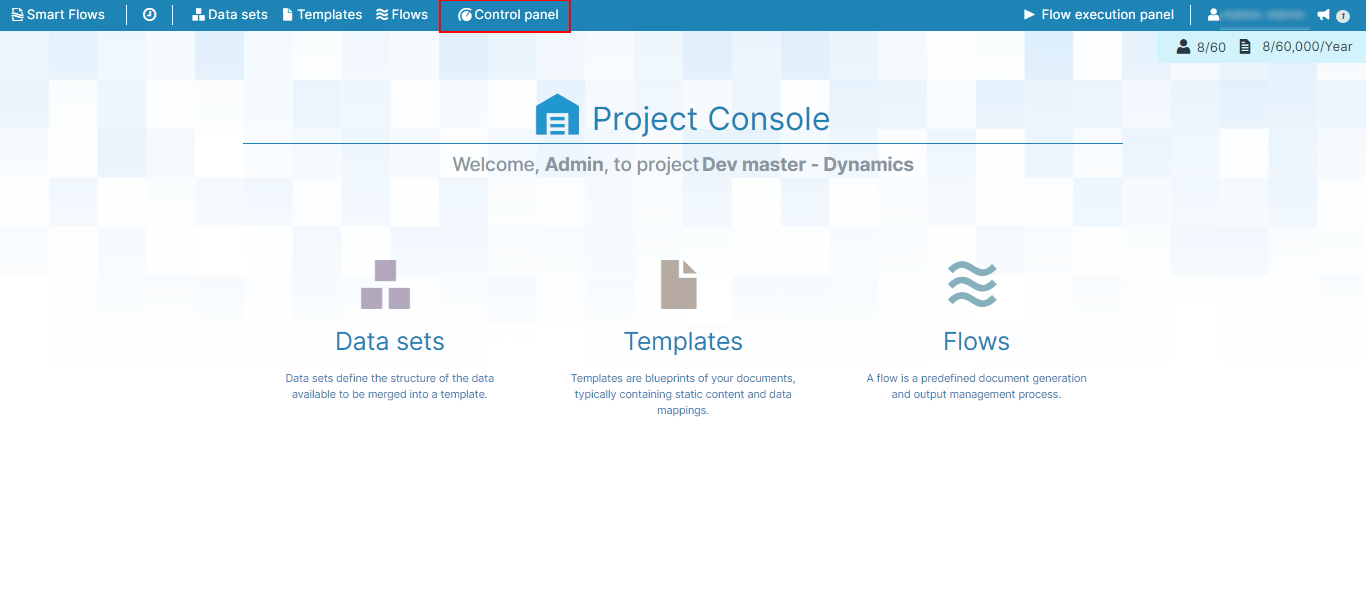
| 1. | In the Project Console, select the Control panel button. |
The Control panel displays.
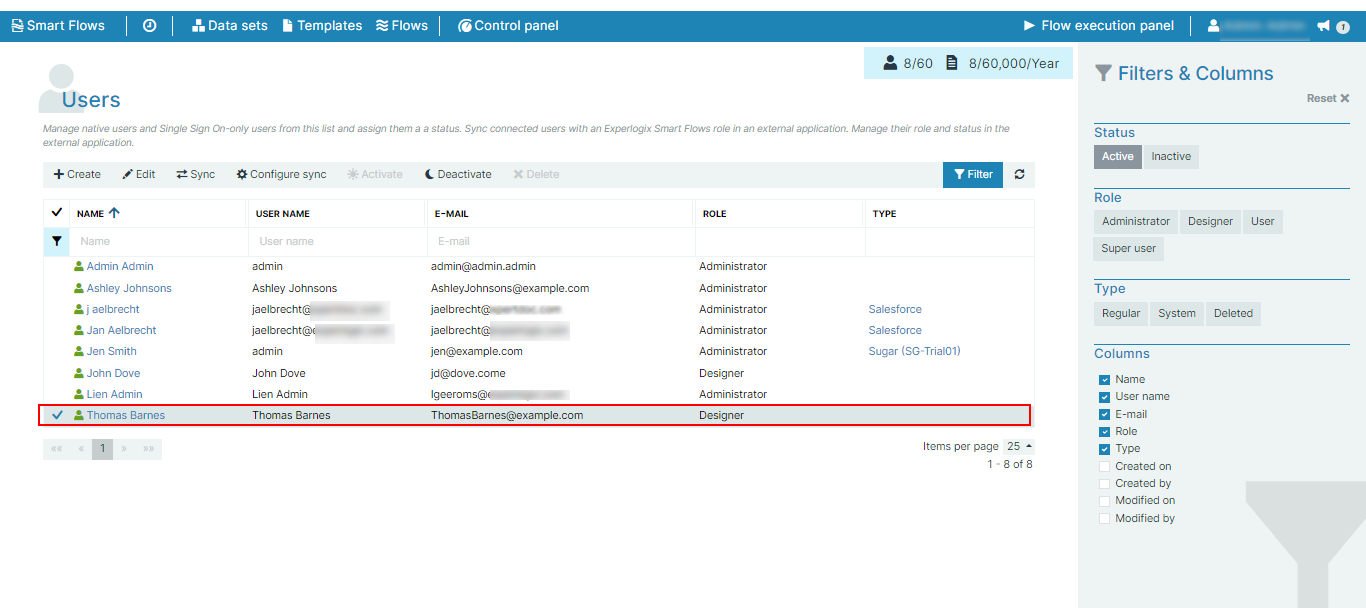
| 2. | In the Control panel, select the Users button. |

| 3. | In the Users page, select a user. |
| 4. | On the left-hand navigation, select Dependencies. |
The list of the user's dependencies is shown.
| 5. | To transfer all dependencies to another user, select Transfer. |
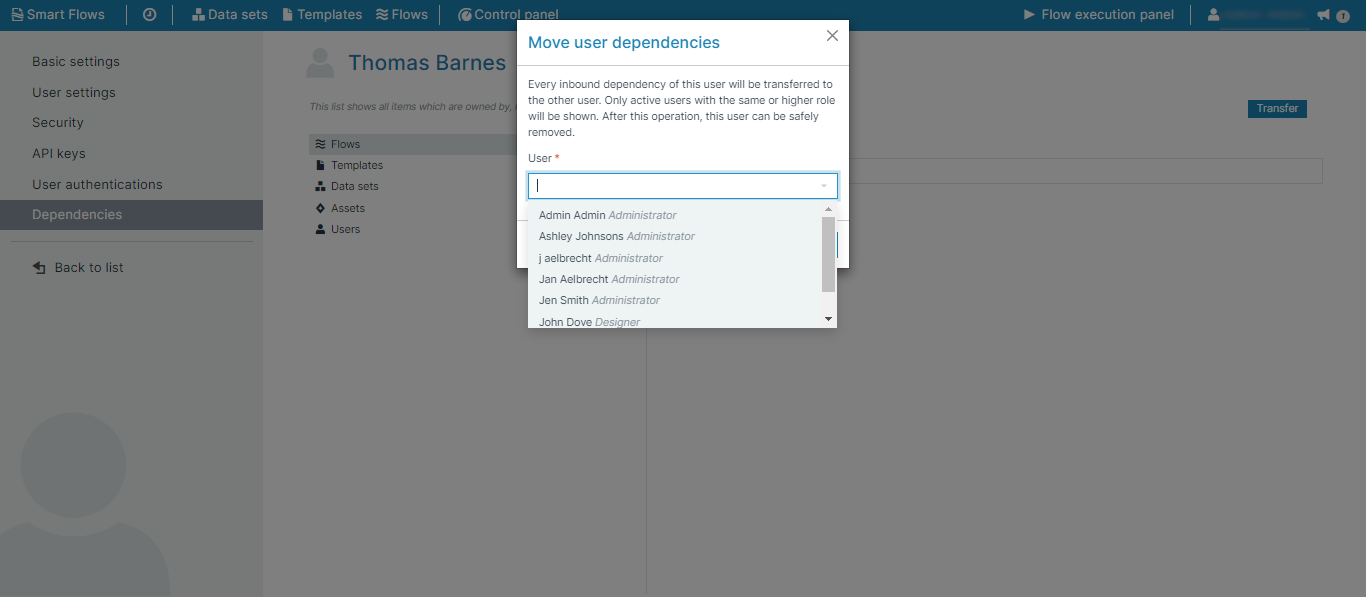
| 6. | From the Move user dependencies dialog, select a user to transfer the dependencies. |
| 7. | Select Transfer. |

| 8. | From the Relink inbound dependencies dialog, select Confirm. |
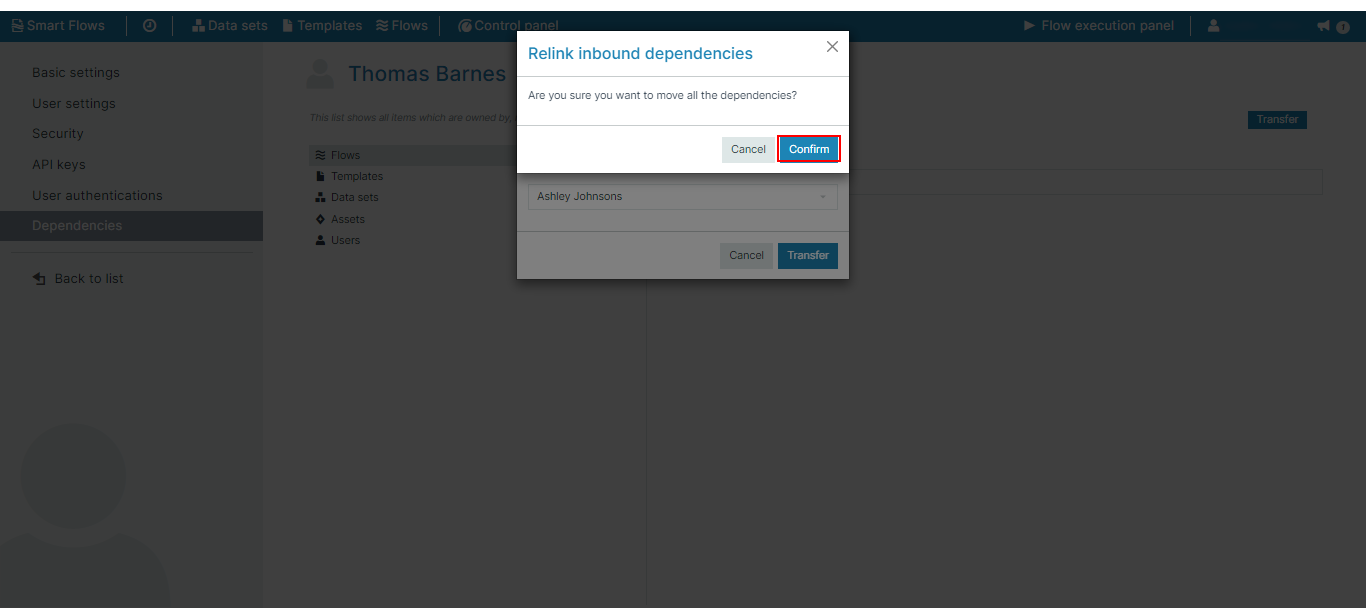
All the dependencies have been transferred out to the new user. No dependencies are left with the user.