Connect to the Project
Anyone can install the add‑in; however, valid Smart Flows project credentials are required to use it. Document generation is executed on the Smart Flows server, while the add‑in runs locally on the designer’s machine. Therefore, a server connection is required to create or edit templates. Multiple connections can be configured if access to several projects is needed. Each connection must authenticate with a user account that is registered in the project with Designer or Administrator permissions. For more information on user roles, refer to the user management documentation.
Creating connections
When a Word document is opened with the Template Builder add‑in, the Smart Flows ribbon initially loads with no available commands:
Follow these steps to set up a connection:
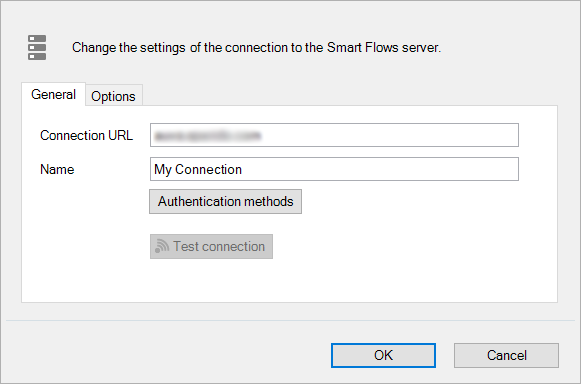
| 1. | Select Options, then Server Instances to bring up your connections: |
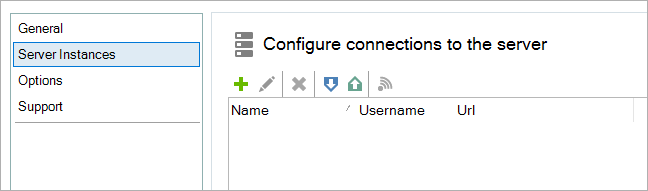
| 2. | Select + to add a new connection: |
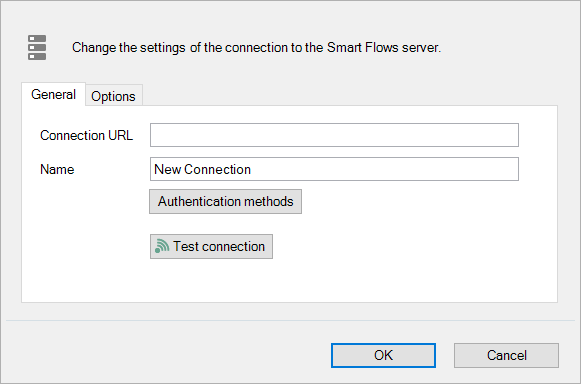
| 3. | Enter the URL that points to where the Smart Flows project is hosted: |
Note: If you do not see any options after selecting Authentication Methods, enlarge the window to display the dropdown options.
| 4. | Select Authentication methods. |
Smart Flows will now check what the possible authentication methods are for your project. For instance, if you have a Dynamics CRM connector, you can use your Dynamics user (if it's synced with your project) to log in to the Template Builder. Smart Flows will show you all methods, so choose which you want to use:
Native authentication uses native users. In the screenshot below, selecting Dynamics would require a connected user.
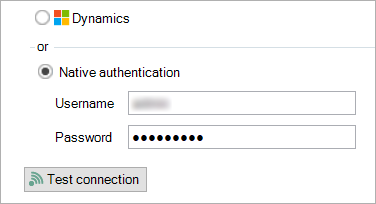
| 5. | Select a connector or use native authentication and enter your username/password). |
| 6. | Select Test connection. In the case of a connector, this will bring up a browser window where you can enter your personal details.imgIn the case of native authentication, the entered username and password will be tested for validity. If all went well, you'll see something like this: |
Example:
Starting to connect to https://mycoolproject.smart.flows.xpertdoc.com
Connected to server, version is 4.0.0.999
Project: MyCoolProject
The credentials specified are valid and the connection test is successfully completed.
| 7. | Select OK again to return to the list of connections. You can now use this connection to access the templates in your project. |
Editing or removing connections
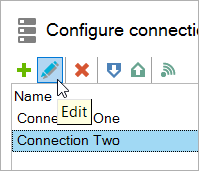
You can change an existing connection's details by selecting it in the List view and clicking the pencil:
Select the x to remove the connection.
Exporting or importing connections
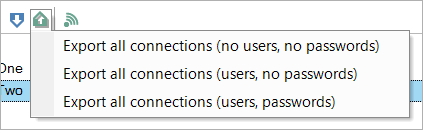
In the list of connections, select a connection and select Export:
An XML file is generated, which you can then import using the Import option in the same list. This file can be used to back up your connections or share them with another user.
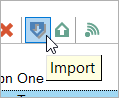
Select Import to import the exported XML file:
Note: Connected user's credentials will not be exported since Smart Flows doesn't store them.
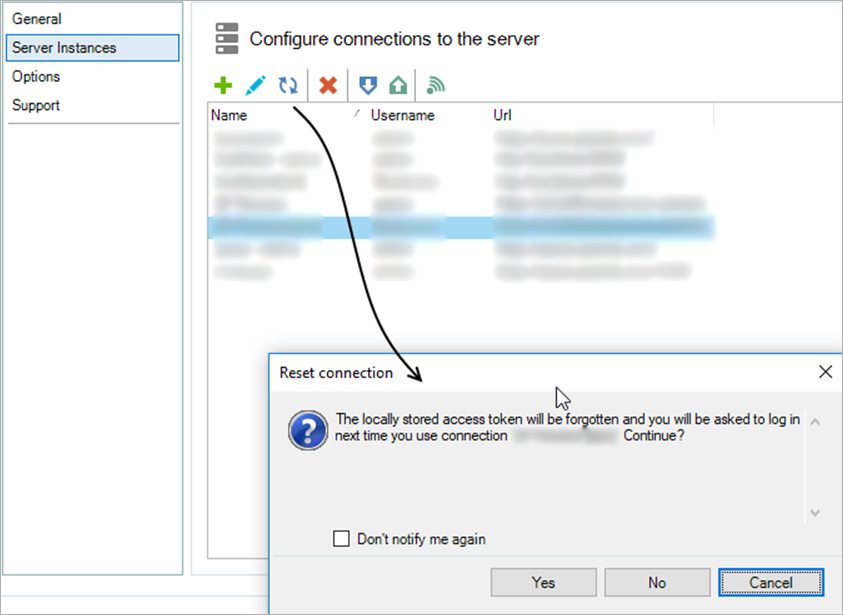
Resetting connections
It can be a good idea to Reset your connection. A common issue is that you want to use a different user to log in to CRM (or a user from a different CRM) than the one the Template Builder has stored in a token.
You can remove that token (and thus get asked for credentials the next time you connect using that connection) by clicking the Reset button: