Samples in Project Console
Data sets![]() Software as a service is a software licensing and delivery model in which software is licensed on a subscription basis and is centrally hosted. define the fields
Software as a service is a software licensing and delivery model in which software is licensed on a subscription basis and is centrally hosted. define the fields![]() Non-interactive flow executions skip all user input and are triggered through the flows/executions/start endpoint of the Experlogix Smart Flows API. mapped into templates. While creating and viewing Samples is still available in the Samples tab in Data Sets, users can also create a quick preview directly in the Data Sets Builder. These quick Previews allow designers to preview the data pulled based on the fields and entities they select and can be saved for future use.
Non-interactive flow executions skip all user input and are triggered through the flows/executions/start endpoint of the Experlogix Smart Flows API. mapped into templates. While creating and viewing Samples is still available in the Samples tab in Data Sets, users can also create a quick preview directly in the Data Sets Builder. These quick Previews allow designers to preview the data pulled based on the fields and entities they select and can be saved for future use.
Create a Sample
Creating a Sample within a data set is a crucial step in the design phase of Smart Flows. It offers a preview of how data is structured and will appear in your final documents. This process not only facilitates a better understanding of the data's practical application, but it also enables designers to refine and optimize the data set to meet specific requirements.
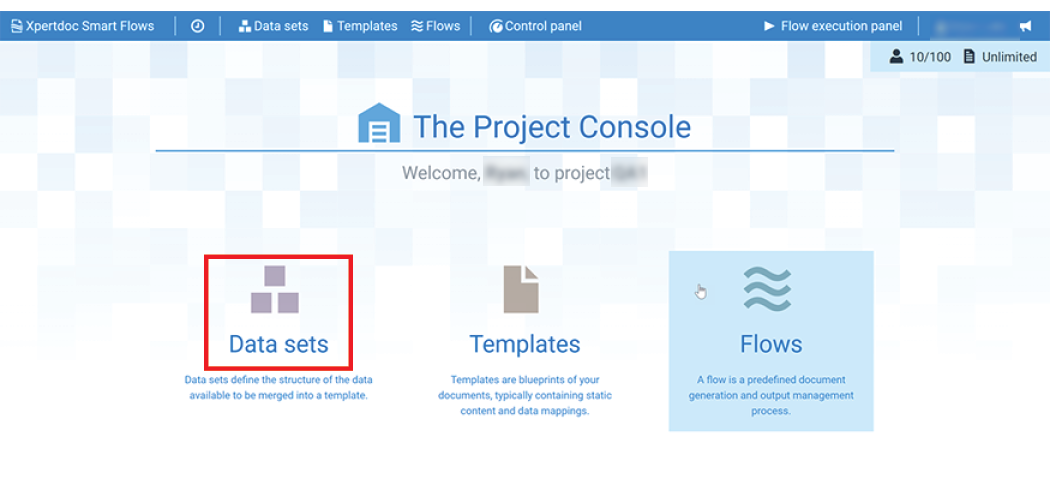
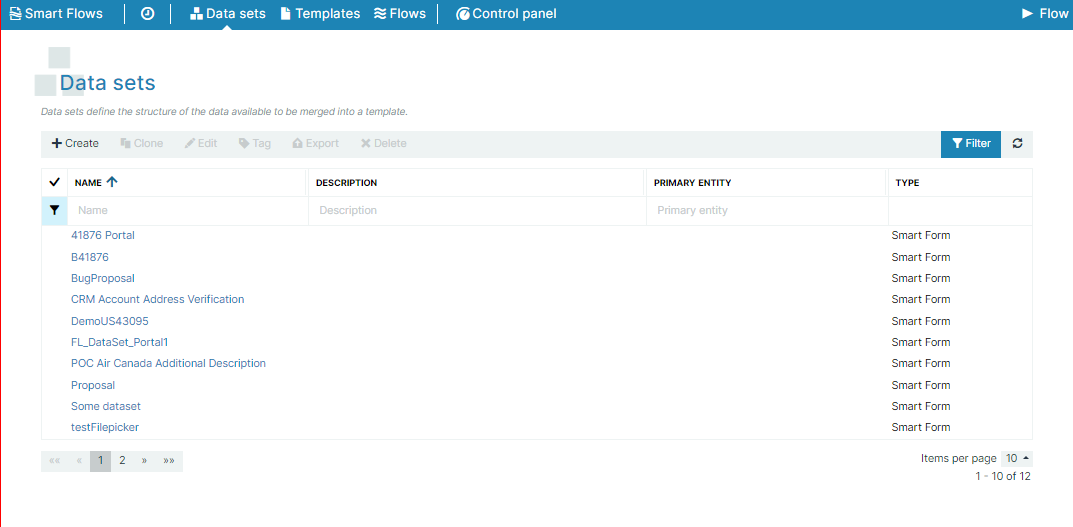
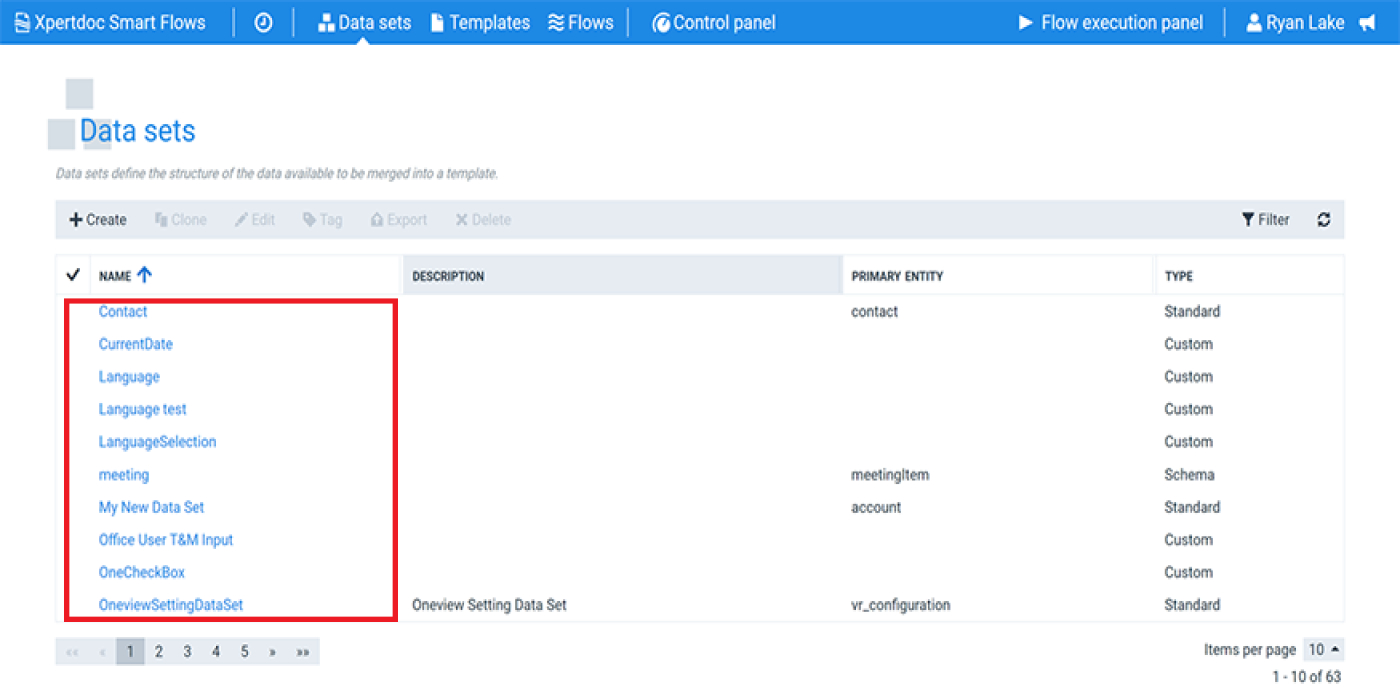
| 1. | Select the Data sets button. |
The Data sets page displays.
| 2. | In the Data set List view, select a Data Set. |

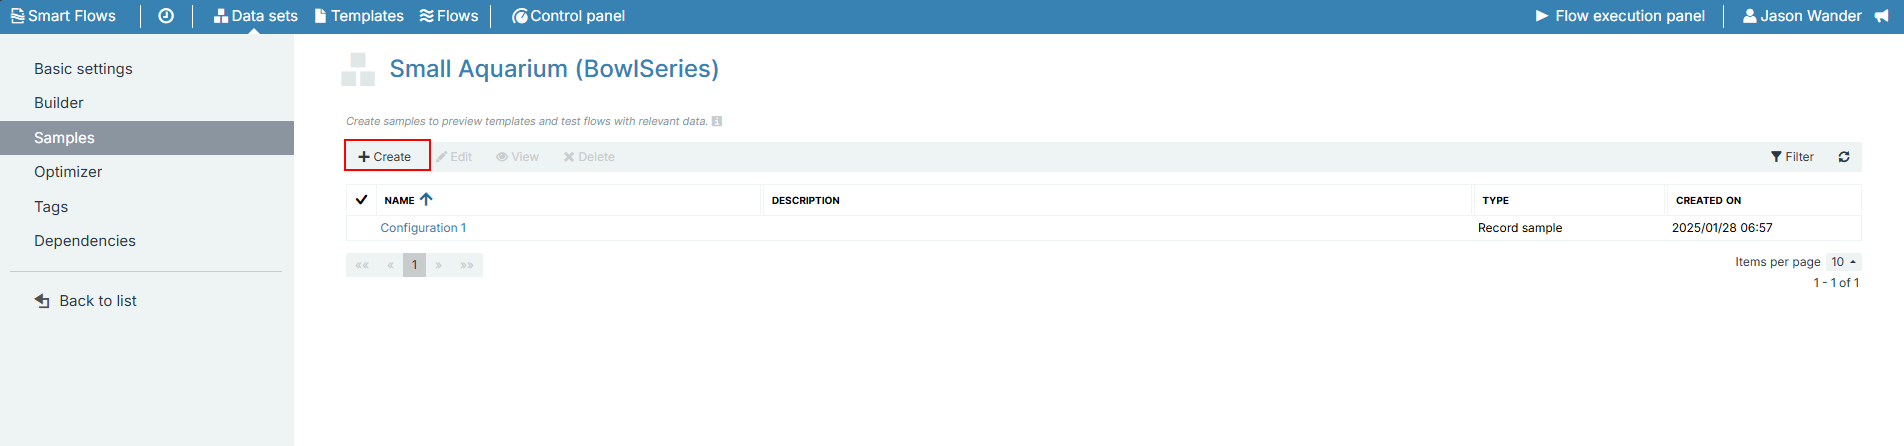
| 3. | Select Samples. |

| 4. | Select the +Create button. |
| 5. | In the Name field, enter a name for the Sample. |
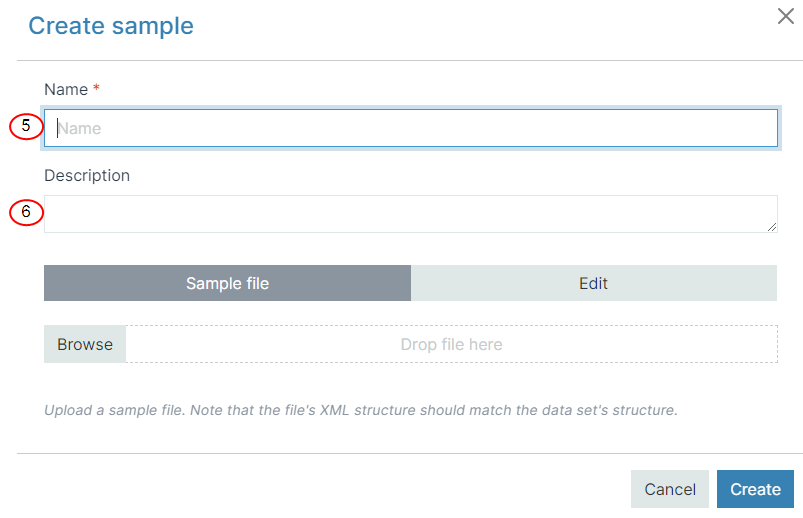
| 6. | (Optional) In the Description field, enter a description for the Sample. |
Once you reach the Create a Sample dialog, you have two options on how to proceed.
You can upload a sample file via the File Explorer browser and upload the sample file before you begin editing it, see Upload and Edit a Schema Method.
You can type or paste your sample data via the Edit tab, edit the sample and upload the edited Sample, see Edit and Create a Sample Method.
Upload and Edit a Schema Method
| 1. | Select Browse and select your schema file in the File Explorer. |
If you are using the upload and edit schema method, you can't switch to the Edit tab to make changes before saving. If you make edits and switch back to the Sample file tab, the edited file no longer matches the file you've selected in the File Explorer and therefore does not display.
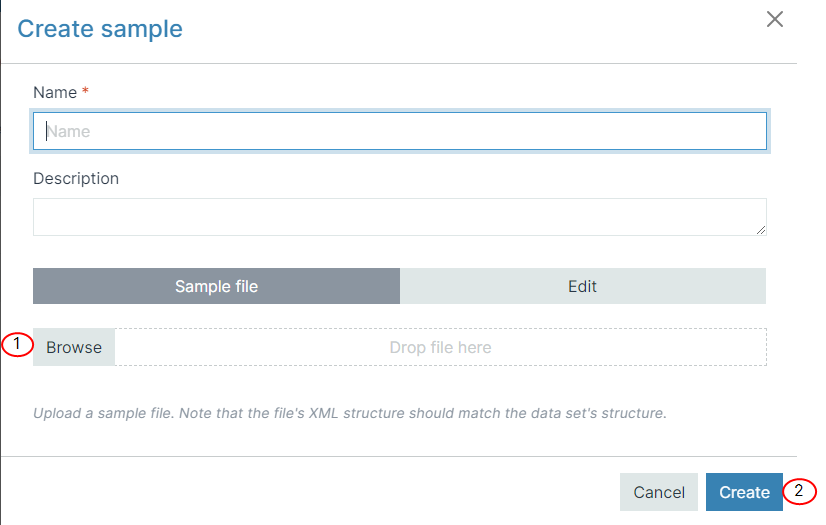
| 2. | Select Create. |
Your Sample displays in the List view.
| 3. | In the List view, select your Sample. |
The Edit sample tab displays.
| 4. | In the Edit tab, make any required changes to your Sample. |
You can use Pretty print to make the XML easier to read. It restructures the spacing and indentation of the data to make hierarchy clearer.
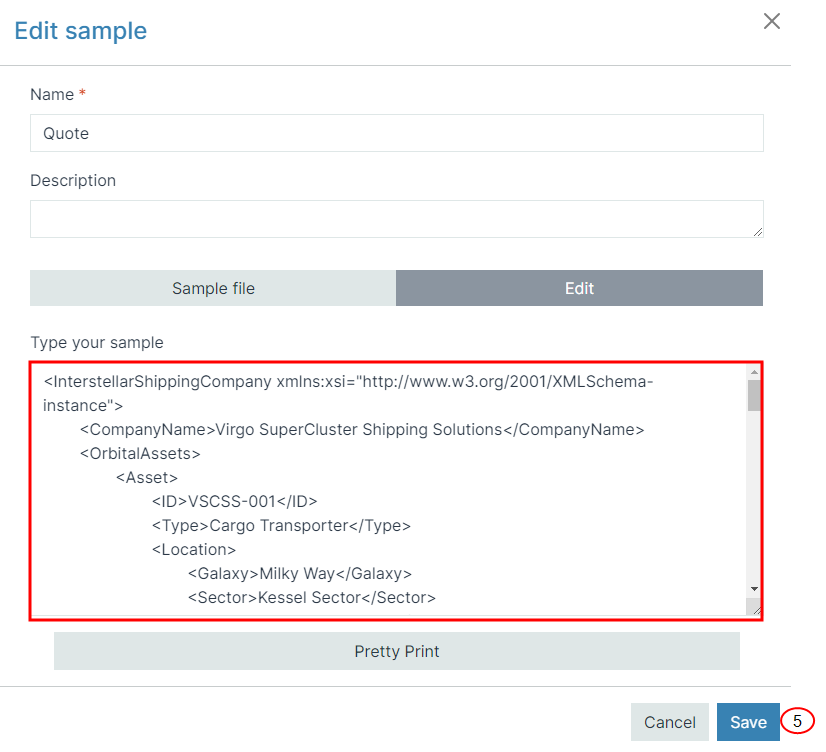
| 5. | Select Save. |
The changes to your Sample are saved.
Edit and Create a Sample Method
| 1. | Select the Edit tab. |
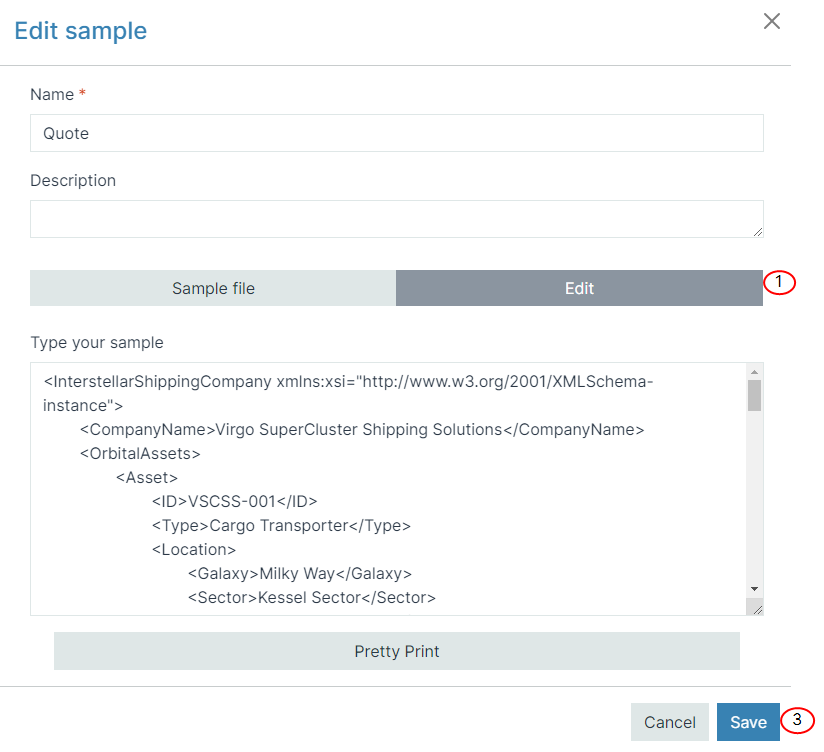
| 2. | In the Edit tab, type or paste your data. |
| 3. | Select Save. |
The edited Sample displays in the List view.
| 1. | Select the Data sets button. |
The Data sets page displays.
| 2. | In the Data set List view, select a Data Set. |
| 3. | Select Samples. |
| 4. | Select the +Create button. |
| 5. | In the Name field, enter a name for the Sample. |
| 6. | (Optional) In the Description field, enter a description for the Sample. |
| 7. | (Optional) In the Comment field, enter a comment for the Sample. |
| 8. | Select Create. |
Schema data set samples support multi-level filters that allow you to differentiate between samples with similarities by presenting them both to you simultaneously. You can then drill down an additional level, see the example below for more details.
Primary Filter:
Imagine you’re looking for a client in the dropdown menu. You can now select a search property such as the client's Display Name or Internal View.
Start typing the client’s name, and the dropdown continuously update to show relevant matches. If there are clients with similar names, they will be differentiated by additional details like an ID number displayed in light grey.
Example: You type A. Datum Corp. and immediately see:
-
A. Datum Corp. - 1234567890 (grey text)
-
A. Datum Corp. - 1234567891 (grey text)
Secondary Filter:
To filter down further, set a secondary filter based on another property, such as the city where the client is located, and choose how you want the results to match (like “Contains” or “Equals”).
Now, when you type in the city name alongside the client's name, the dropdown will refine the list even more, displaying both the city and the ID in grey to keep your results clear and organized.
Example: You've already set the primary filter to A. Datum Corp. and add a secondary filter for the city Boston:
-
A. Datum Corp. - Boston - 1234567890 (all grey text)
-
A. Datum Corp. - Boston - 1234567891 (all grey text)
Text Formatting in Results:
First Filter Applied: Bold text for the primary search term with any identifiers in grey to help you spot differences at a glance.
Second Filter Applied: Continued bold text for the primary search term, with secondary filter details and identifiers in grey for additional clarity.
Empty Filter Behavior:
If you do not use keywords in the primary filter, you can scroll through the complete list as usual.
If you only use the secondary filter, the dropdown adjusts to filter based on this secondary criteria alone, simplifying your search when you know exactly what detail you’re looking for.
| 1. | Select the Data sets button. |
The Data sets page displays.
| 2. | In the Data set List view, select a Data Set. |
| 3. | Select Samples. |
| 4. | Select the +Create button. |
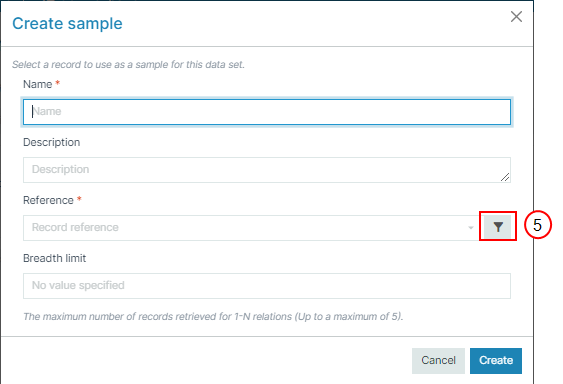
| 5. | In the Name field, enter a name for the Sample, or select the filter icon. |
Selecting the filter icon expands the Reference field, and you see the multi-level filters for drop-downs.
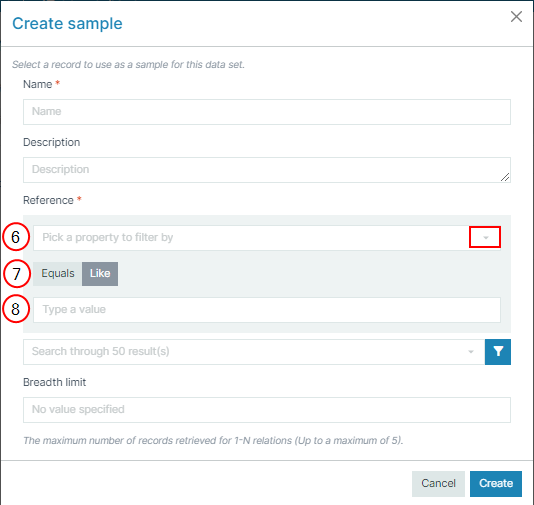
| 6. | From the Reference field's dropdown menu pick a property to filter by. |
 .
.
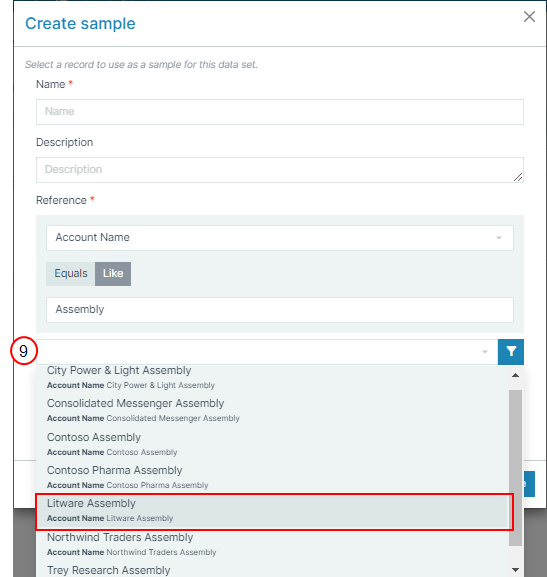
| 7. | Determine if you want to search for the property type with words that are directly equivalent to the property type (Equal), or with words that are similar to (Like). |
In this example, we have chosen Like.
| 8. | Type a word or phrase that is similar to what you are looking for. |
In our example, we have entered the word Assembly.
| 9. | From the filter icon dropdown menu, select the property. |
In our example, we have chosen Litware Assembly.
Notice that the name we chose as our Reference by default also becomes the Name of the sample. If you choose to you can also change the name.
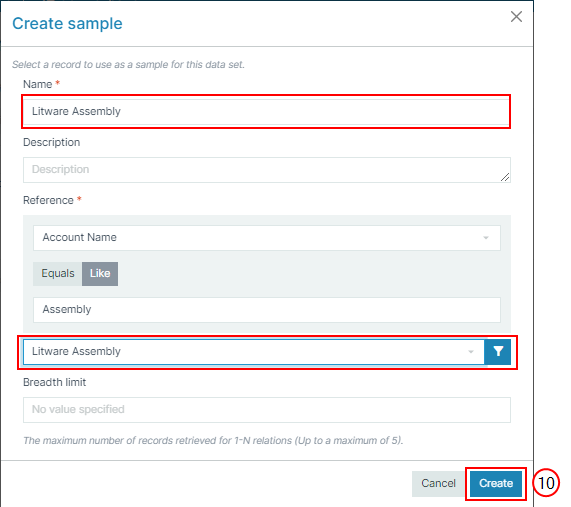
| 10. | Select Create. |
The Sample is created and is listed under the account.

| 1. | Navigate to the Samples tab for your Experlogix CPQ (Preview) connector. |
| 2. | Select the +Create button. |
| 3. | In the Name field, enter a name for the sample. |
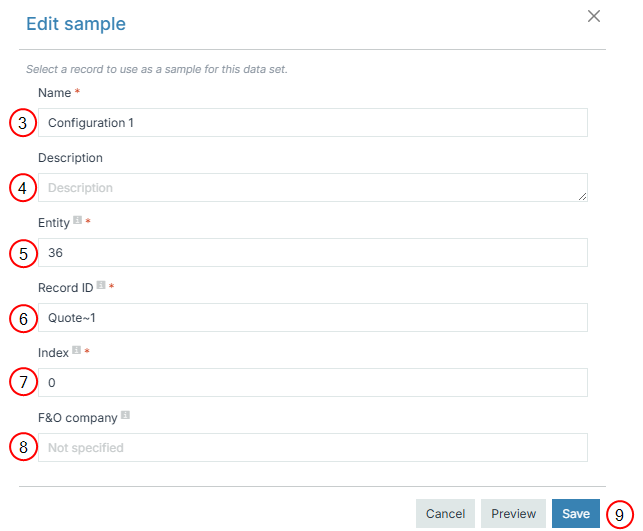
| 4. | (Optional) In the Description field, enter a description for the sample. |
| 5. | In the Entity field, enter primary the entity to use for the sample. |
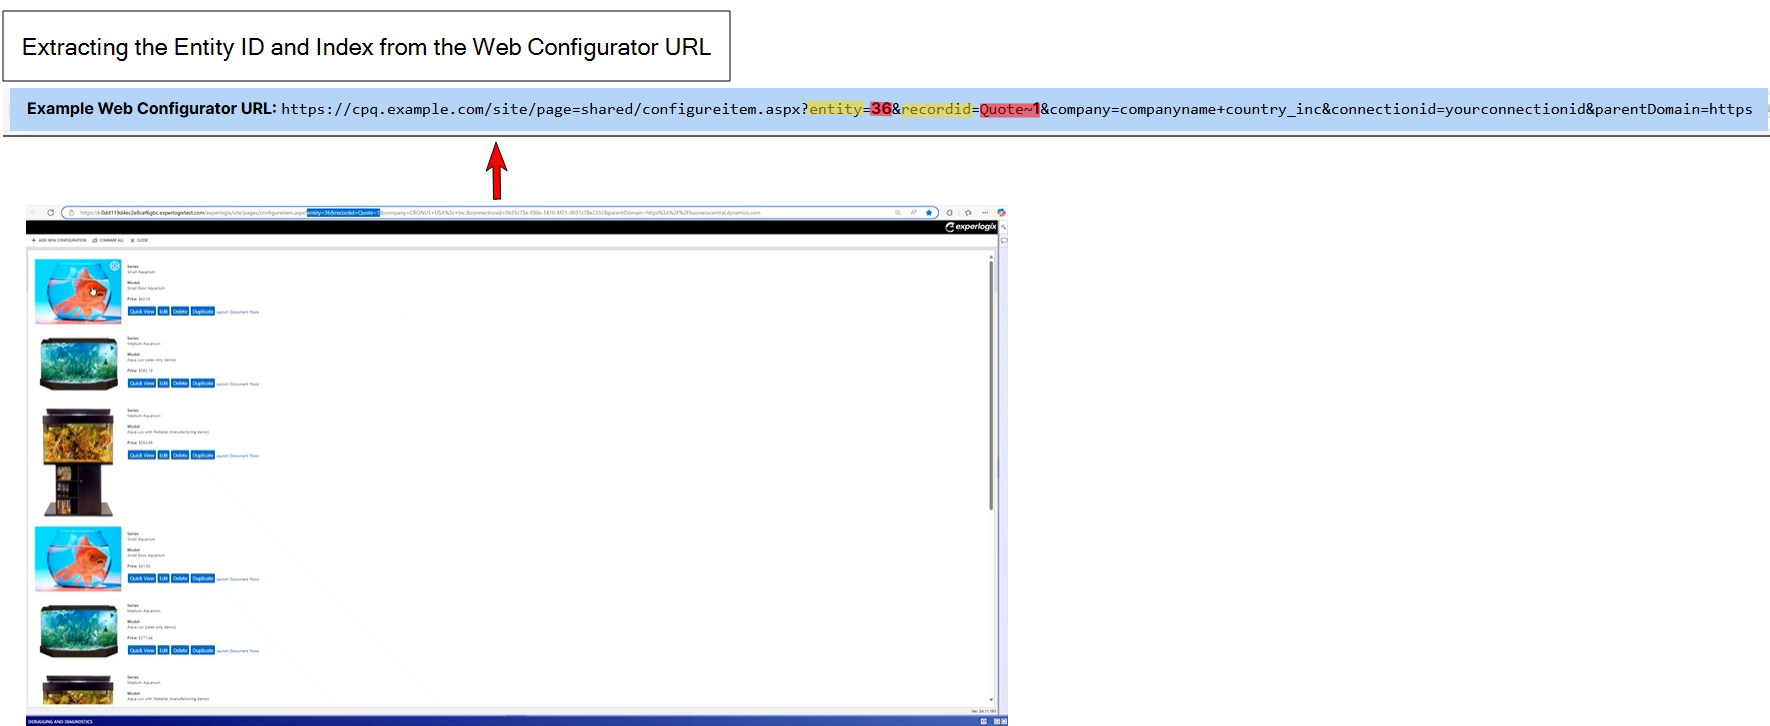
Extracting the Entity ID and Index from the Web Configurator URL
When you launch the CPQ configuration from your Configurator, the URL contains parameters such as the entity ID and the recordid you can use to create samples. So, when you open the Web Configurator from your connector system, you can use the URL in your address bar to extract the required values to create your sample. For example, you might see something like:
Example Web Configurator URL: https://cpq.example.com/site/page=shared/configureitem.aspx?entity=36&recordid=Quote~1&company=companyname+country_inc&connectionid=yourconnectionid&parentDomain=https
-
Entity ID
-
The unique identifier for the entity.
-
In this example, the entity value is 36.
-
-
Recordid
-
Indicates the type of record being referenced and the unique identifier for that record type.
-
In this example, the record type is Quote, and the value for recordid for that quote is 1.
-
| 6. | In the Record ID field, enter the ID for the record in your Experlogix Configurator URL that contains the configuration data. |
| 7. | In the Index field, enter the index |
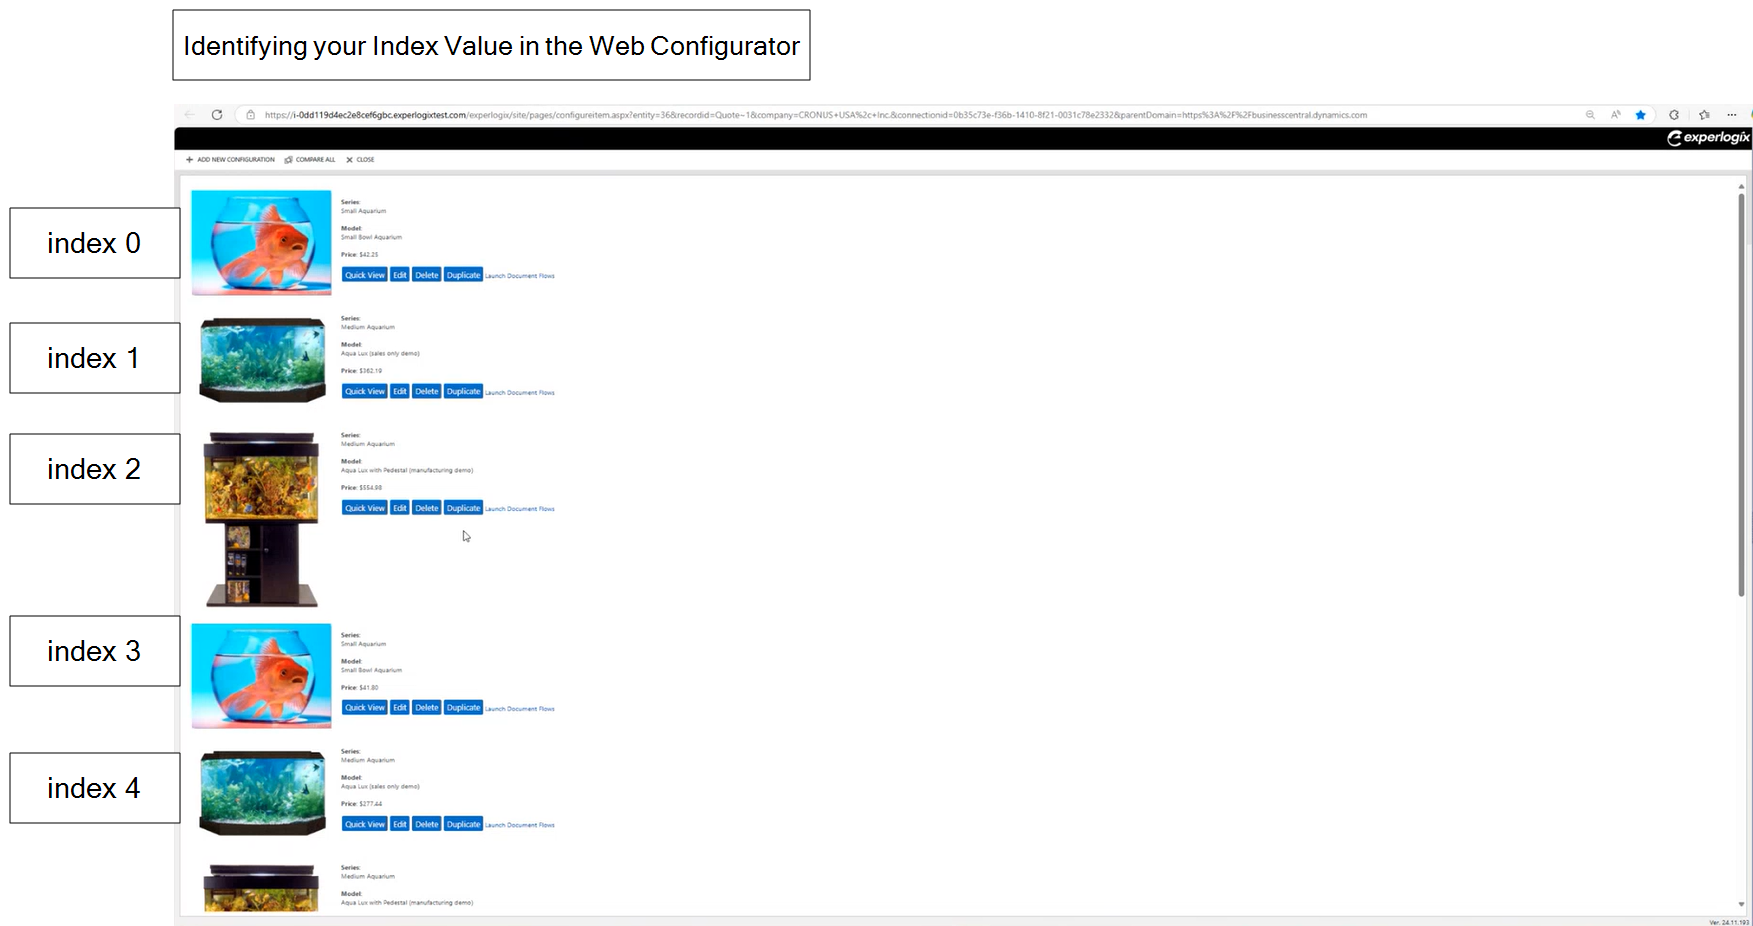
Identifying your Index Value
The CPQ connector uses zero-based indexing for configurations. In the Web Configurator, this means:
-
The first configuration is indexed as 0.
-
The second configuration is indexed as 1.
-
The third configuration is indexed as 2, and so on.
| 8. | (Optional)In the F&O company field, indicate which Microsoft Dynamics 365 F&O company to use for the sample if you work in an multi-company/Intercompany environment. This field is only required for Microsoft Dynamics 365 F&O CPQ environments. |
Before saving, you can select Preview to review how your sample data will appear based on the data you've configured in the Sample Dialog. Designers can leverage this functionality to test the data sample before designing and producing templates based on the data set.
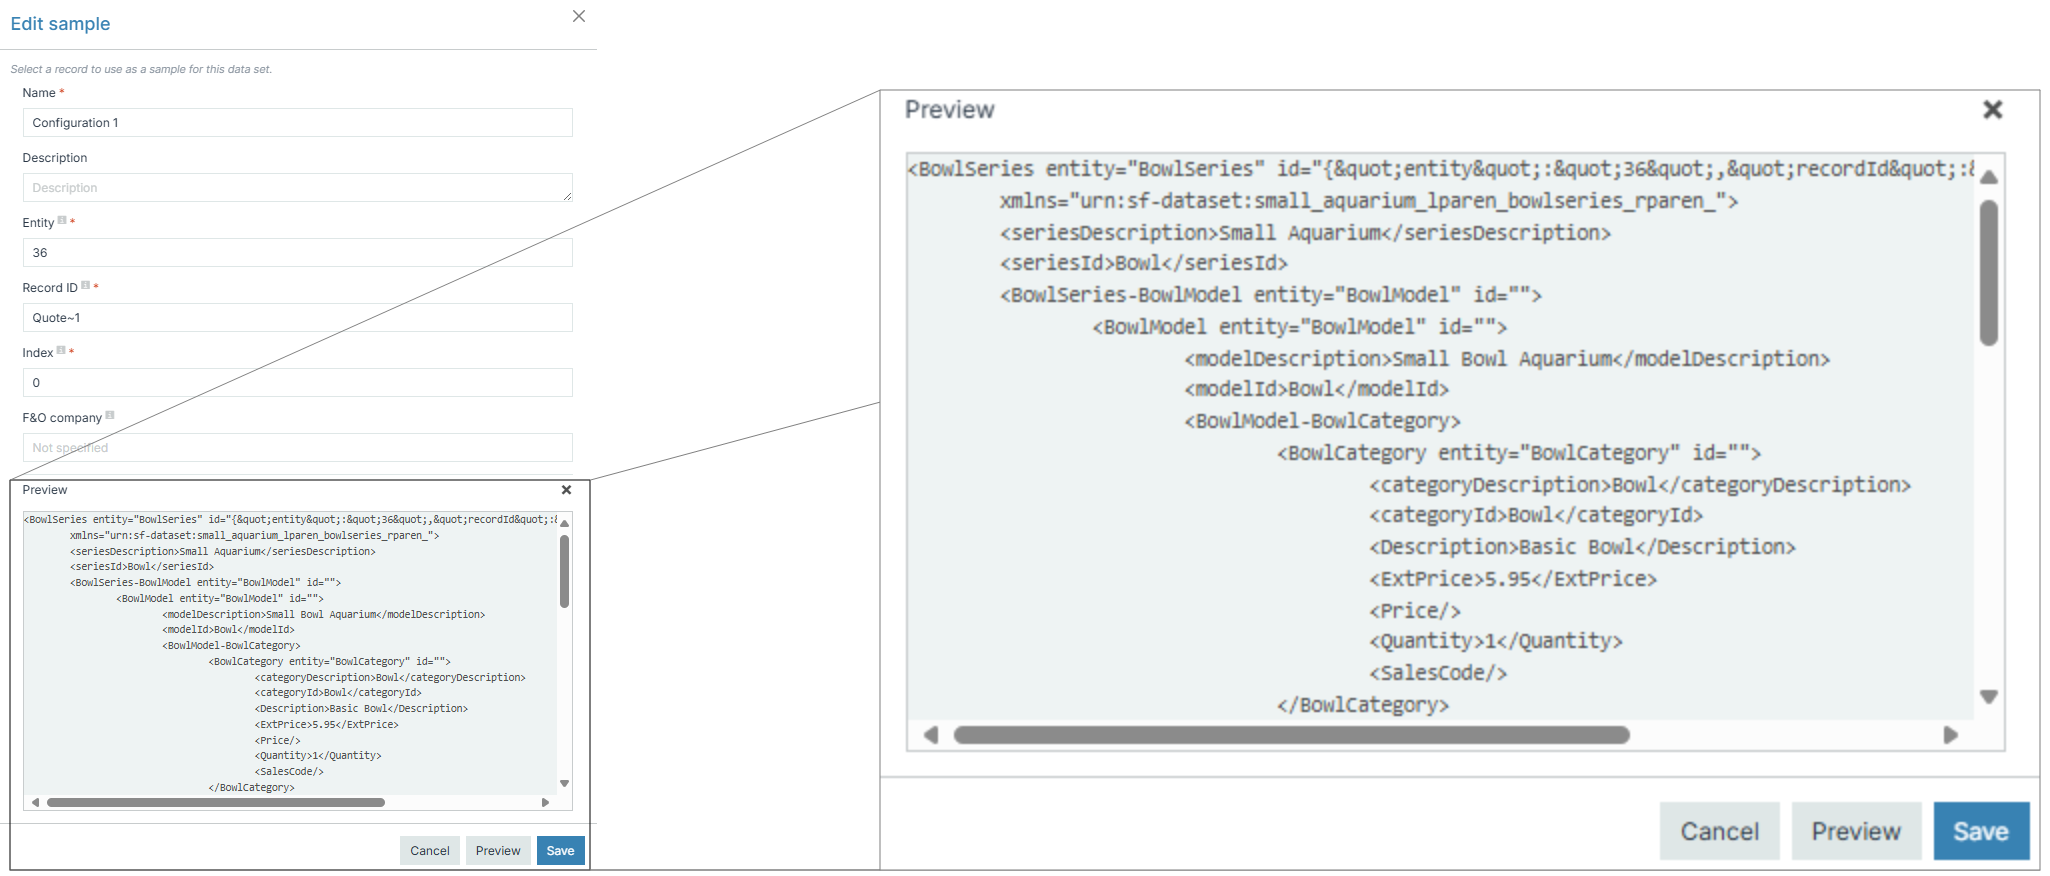
| 9. | Select Save. |
Your sample displays in the Sample List view.
Now that you've confirmed with your Sample that you are pulling the expected data, you can design a template based on that data. See Templates for more details.
Configure a Preview
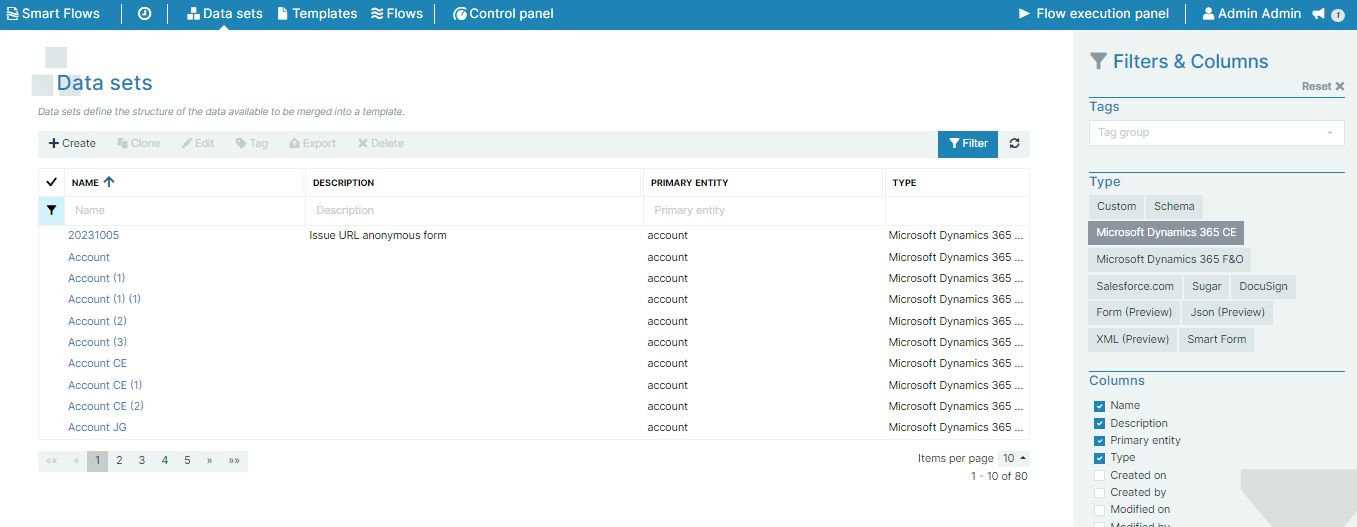
| 1. | Select the Data sets button. |
The Data sets page displays.
| 2. | Select a Data Set to filter from the available options. |
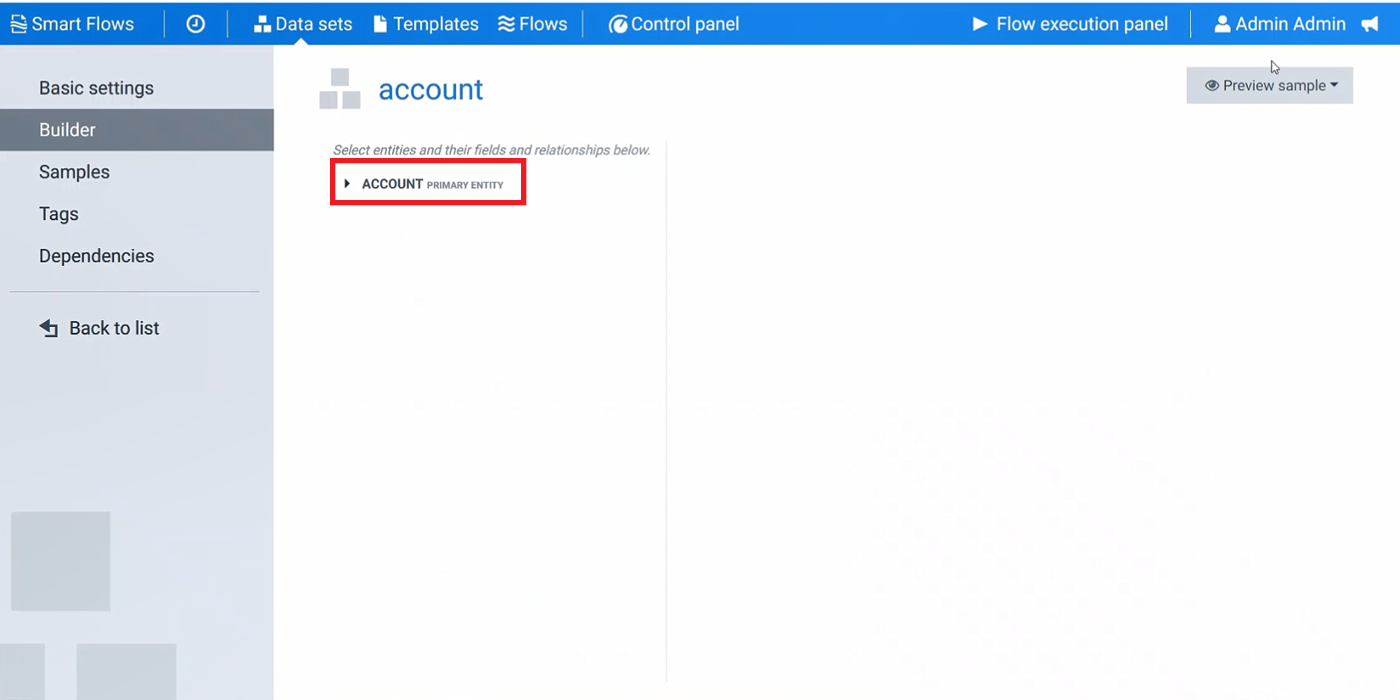
The Data Set Builder displays.
| 3. | Select the PRIMARY ENTITY button. |
The dropdown menu displays.
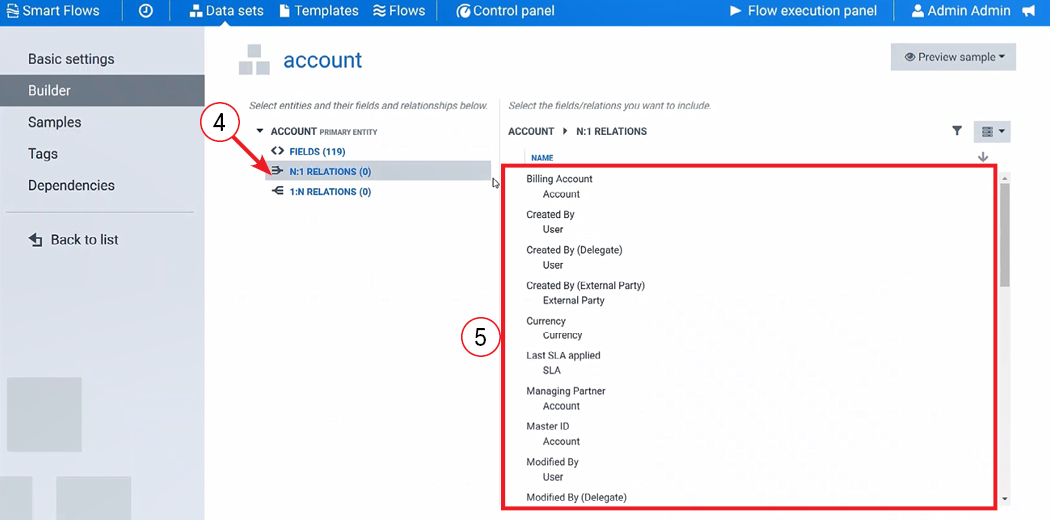
| 4. | Select the N:1 Relations button. |
On the right, the N:1 RELATIONS display.
| 5. | Select the N:1 RELATIONSto use in your preview. |
A (1) displays next to N:1 RELATIONS.
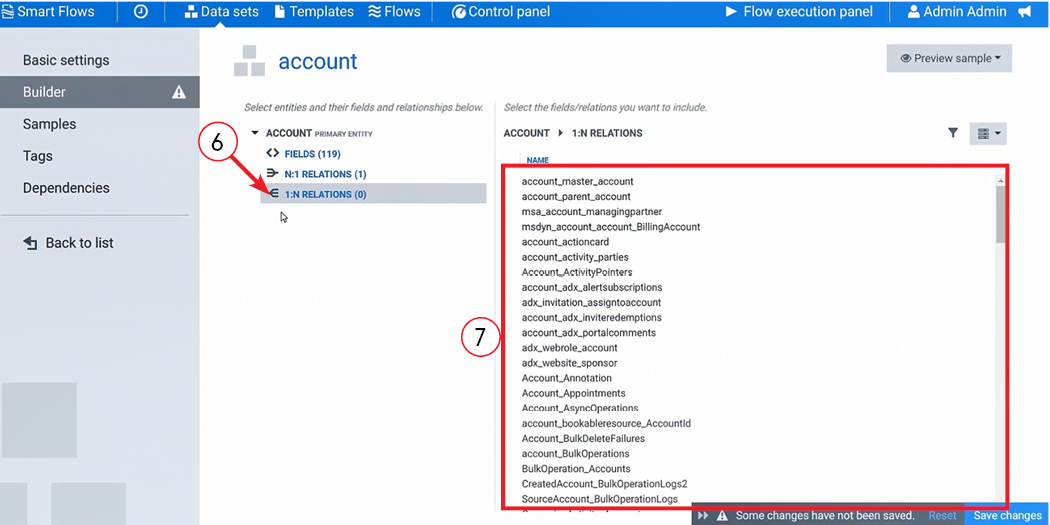
| 6. | Select the 1:N RELATIONS button. |
On the right, the 1:N RELATIONS display.
| 7. | Select the 1:N RELATIONSto use in your preview. |
A (1) displays next to 1:N RELATIONS.
Under 1:N RELATIONS, the 1:N relation selected displays.
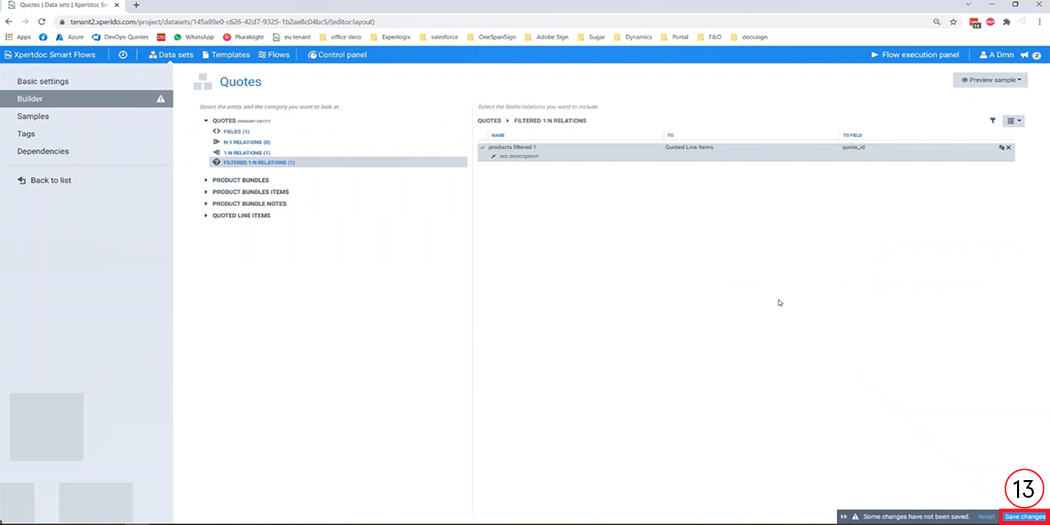
Generate Sample Preview
| 8. | In the top right, select the Preview sample button. |
The dropdown menu displays.
| 9. | Select the Sample to generate. |
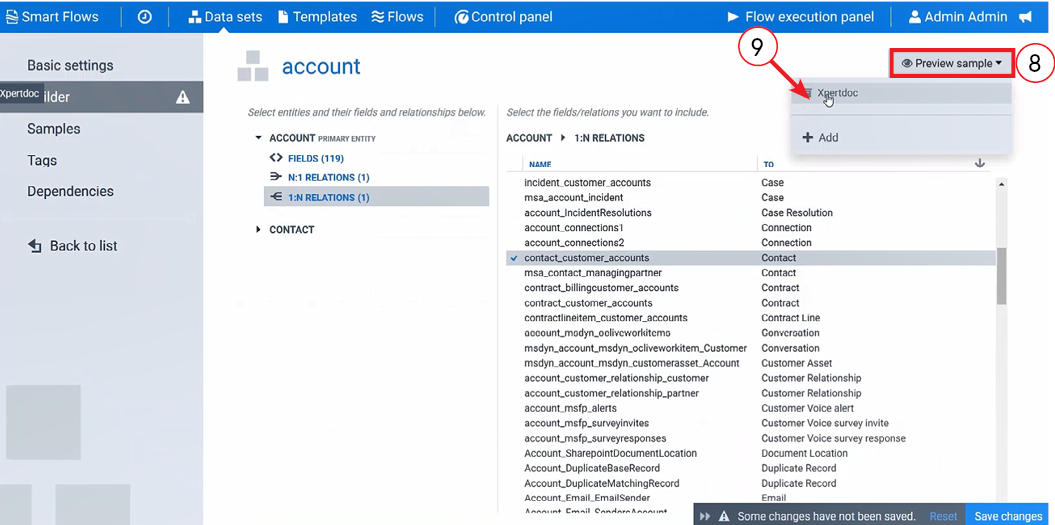
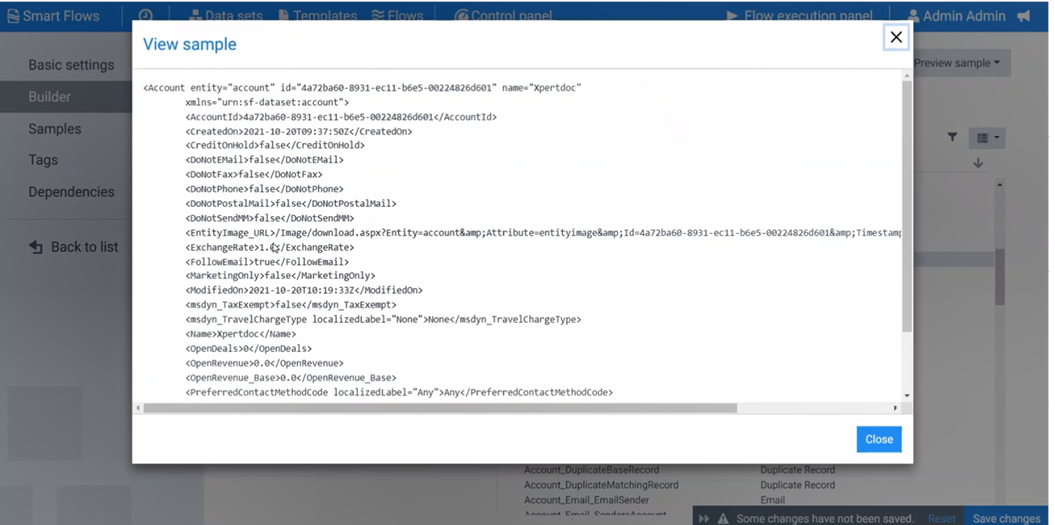
The View Sample window displays.
Generate Additional Samples Based on Selected Relations
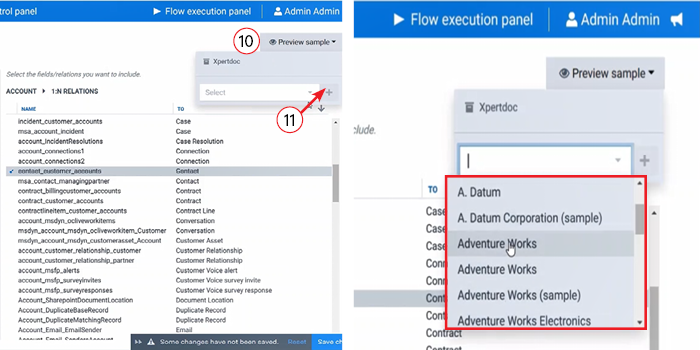
| 10. | Select the Preview sample button. |
The dropdown menu displays.
| 11. | Select the Add button. |
The Select bar displays.
| 12. | Type to filter or scroll and select a preview. |
| 13. | At the bottom right, select the Save changes button. |
At the top right, Changes saved displays in green.
The Sample displays in the Samples tab.