Creating an SMTP Connector
The create connector wizard guides you through the creation and configuration of an connector. You can create multiple SMTP-type connectors, each connecting to a different SMPT server.
|
1.
|
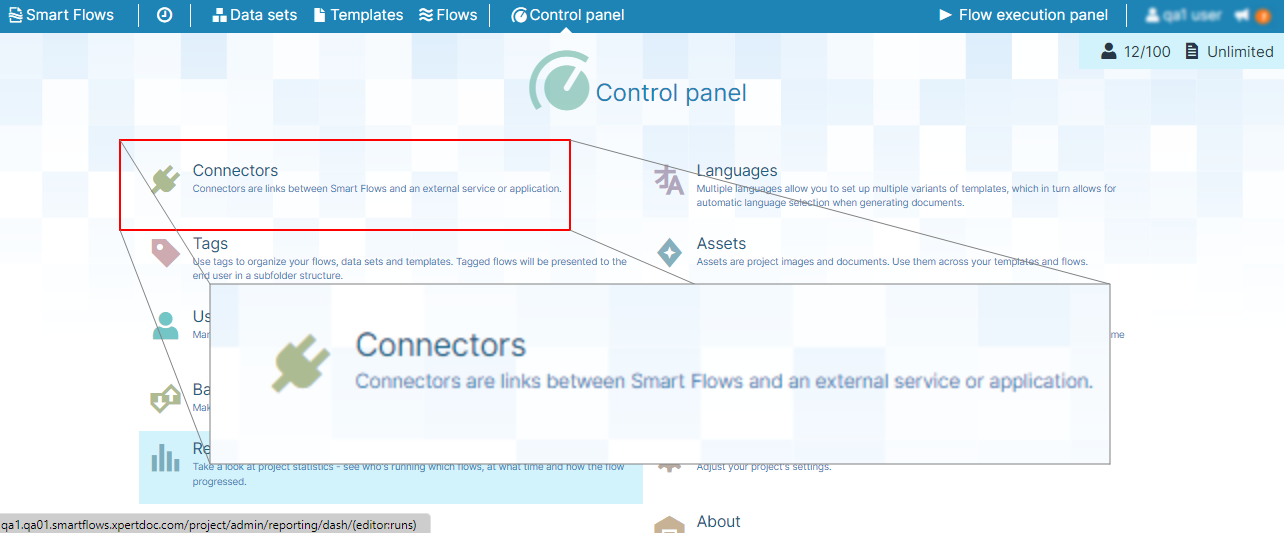
In the Project Console's Control panel, select the Connectors button. |
The Connectors List view displays.
|
2.
|
Select the +Create button. |
The Create connector wizard displays.
|
3.
|
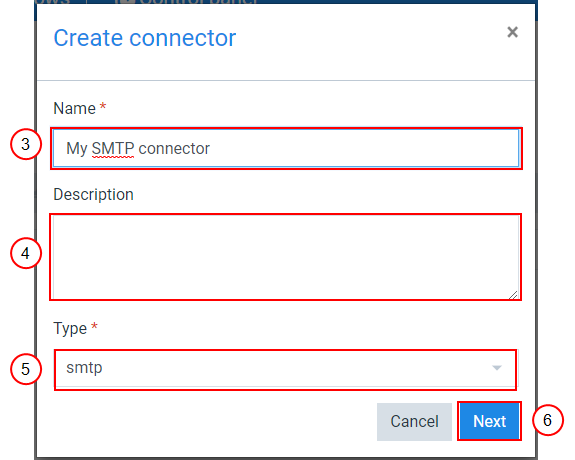
In the Name field, input the name of your connector. |
|
4.
|
(Optional) In the Description field, input a description for your connector. |
|
5.
|
In the Type dropdown menu, select smtp. |
|
6.
|
Select the Next button. |
The Create connector Serverwindow displays.
|
7.
|
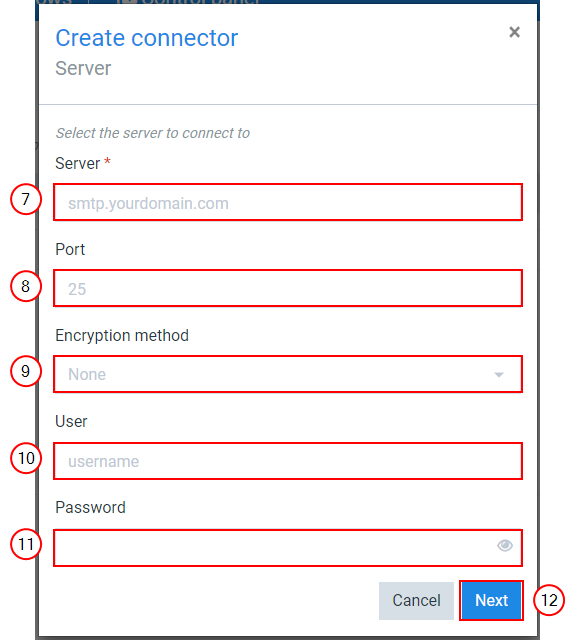
In the Server field, input the server name. |
|
8.
|
(Optional) In the Port field, input the server's port number. |
|
9.
|
(Optional) In the Encryption method dropdown menu, select the way to encrypt the communication channel. |
Encryption Methods Overview
-
SSL/TLS - Secure Sockets Layer (SSL) or Transport Layer Security (TLS) is a protocol for securing client and server communications. For more details, please refer to TLS.
-
STARTTLS - StartTLS command is an extension of the SMTP protocol that tells the e-mail server that the e-mail client wants to use a secure connection using TLS or SSL. For more details, please refer to StartTLS.
|
10.
|
(Optional) In the User field, input the username of your SMTP account. |
|
11.
|
(Optional) In the Password field, input the password of your account. |
|
12.
|
Select the blue Next button. |
The Create Connector Test configuration window displays.
|
13.
|
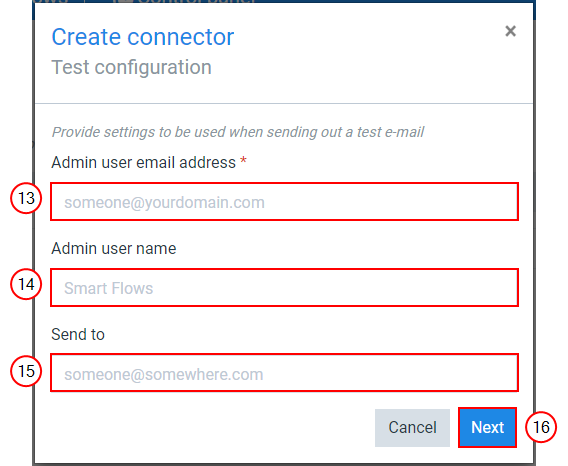
In the Admin user email address field, input the e-mail address of an administrator. |
|
14.
|
(Optional) In the Admin user name field, input the name of the administrator. |
|
15.
|
(Optional) In the Send to field, input the e-mail address that receives the test e-mail. |
|
16.
|
Select the blue Next button. |
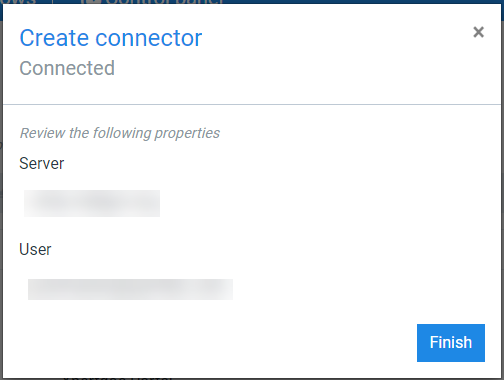
The Create Connector Connected window displays a summary of the configuration.
|
17.
|
Select the Finish button to conclude the creation of your SMTP connector. |
![]() Designers have a reduced number of Project Console abilities- they are unable to make major changes that could break the project. They can also access the Template Builder add-in for designing templates. connector. You can create multiple SMTP-type connectors, each connecting to a different SMPT server.
Designers have a reduced number of Project Console abilities- they are unable to make major changes that could break the project. They can also access the Template Builder add-in for designing templates. connector. You can create multiple SMTP-type connectors, each connecting to a different SMPT server.