Creating a custom data set
Custom data sets allow you to set the type, name and values of for fields in the data set. This can be used to define or expand features within Smart Flows such as improving Docusign functionality or adding questions for the Get user input flow block.
|
1.
|
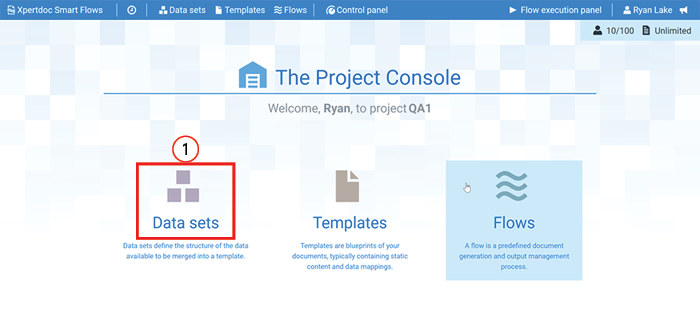
Log in to your project's Flow Execution Panel. |
|
2.
|
Select the Data sets button. |
The Data sets List view displays.
|
3.
|
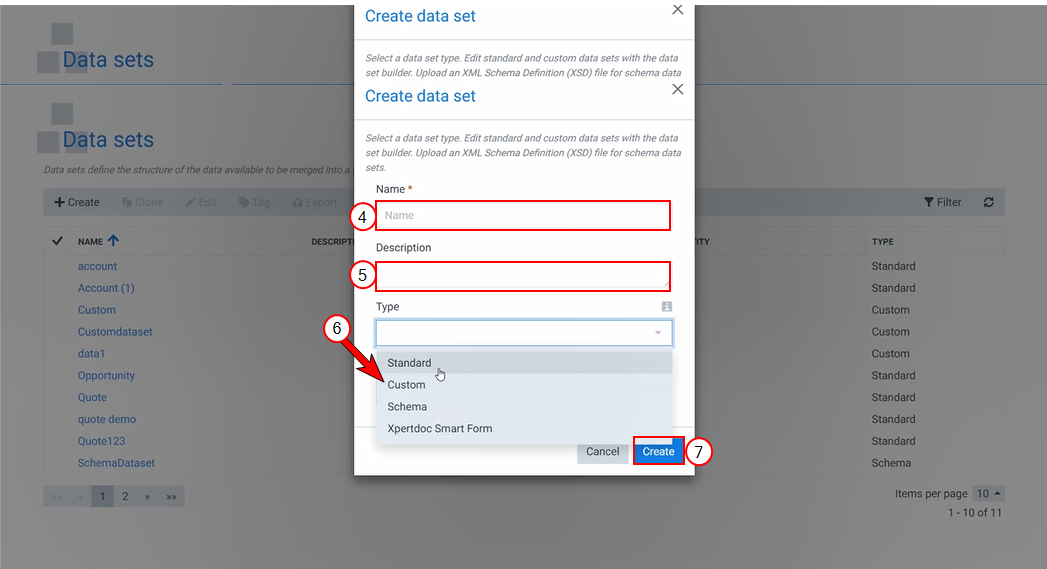
Select the +Create button. |
The Create data set wizard displays.
|
4.
|
In the Name field, input descriptive name for your data set standard fields. |
|
5.
|
In the Description field, input a description that describes what fields or information is contained in the data set. |
|
6.
|
In the Type dropdown menu, select Custom. |
|
7.
|
Select the Create button. |
The Builder page displays.
Adding fields to a custom data set
|
8.
|
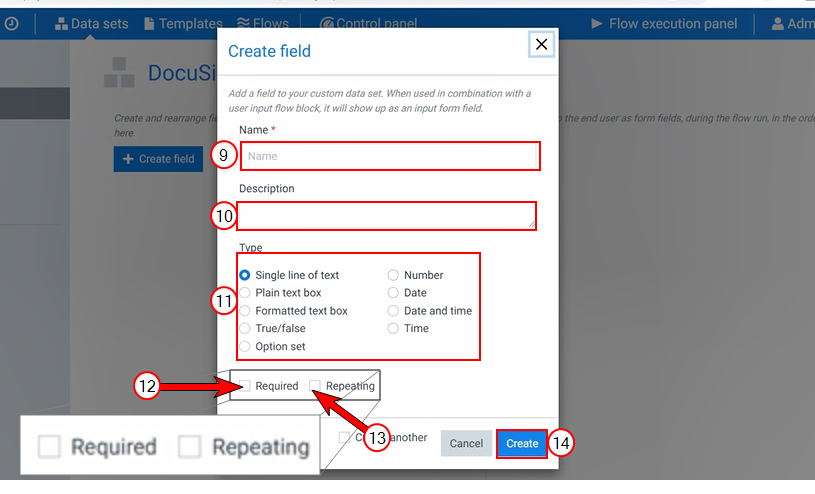
Select the +Create field button. |
The Create field wizard displays.
Note: If your using the customer data set for a Get user input function, use the question to ask as the name of the field.
|
9.
|
In the Name field, input the name of the field |
|
10.
|
(Optional) In the Description field, input a helpful guide on what your users should use this field for or what data should be linked to it. |
|
NOTE
|
 Field Types Field Types
There are several field types to choose from when creating a field. You can use this reference table to select the option that best suits your application.
|
Single line of text
|
Field that accepts any type of text up to 255 characters, recommended if your expected value is under 255 characters.
|
|
Plain text box
|
Field that accepts multiple lines of text. Recommended if you expect the value to contain multiple sentences
|
|
Formatted text box
|
Field that accepts multiple lines of text and allows Designers to specify the valid set of characters.
|
|
True/False
|
Field that provides a choice between selecting true or false.
|
|
Option set
|
Field that provides a list of selectable options.
|
|
Number
|
Field that only accepts numbers
|
|
Date
|
Field that only accepts calendar dates.
|
|
Date and Time
|
Field that only accepts the combined calendar date and time.
|
|
Time
|
Field that only accepts the time value.
|
|
|
11.
|
Select the field type to add by clicking the bubble next it to it. |
|
12.
|
(Optional) Select whether the field is a required. |
|
13.
|
(Optional) Select whether the field should be repeating. |
|
14.
|
Select the Create button. |
The +Create field wizards no longer displays.