Project Settings Storage Tab
This document provides a guide on implementing automatic cleanup of temporary files and monitoring storage usage in Experlogix Documents. It covers enabling automatic cleanup, manual cleanup, and monitoring storage usage.
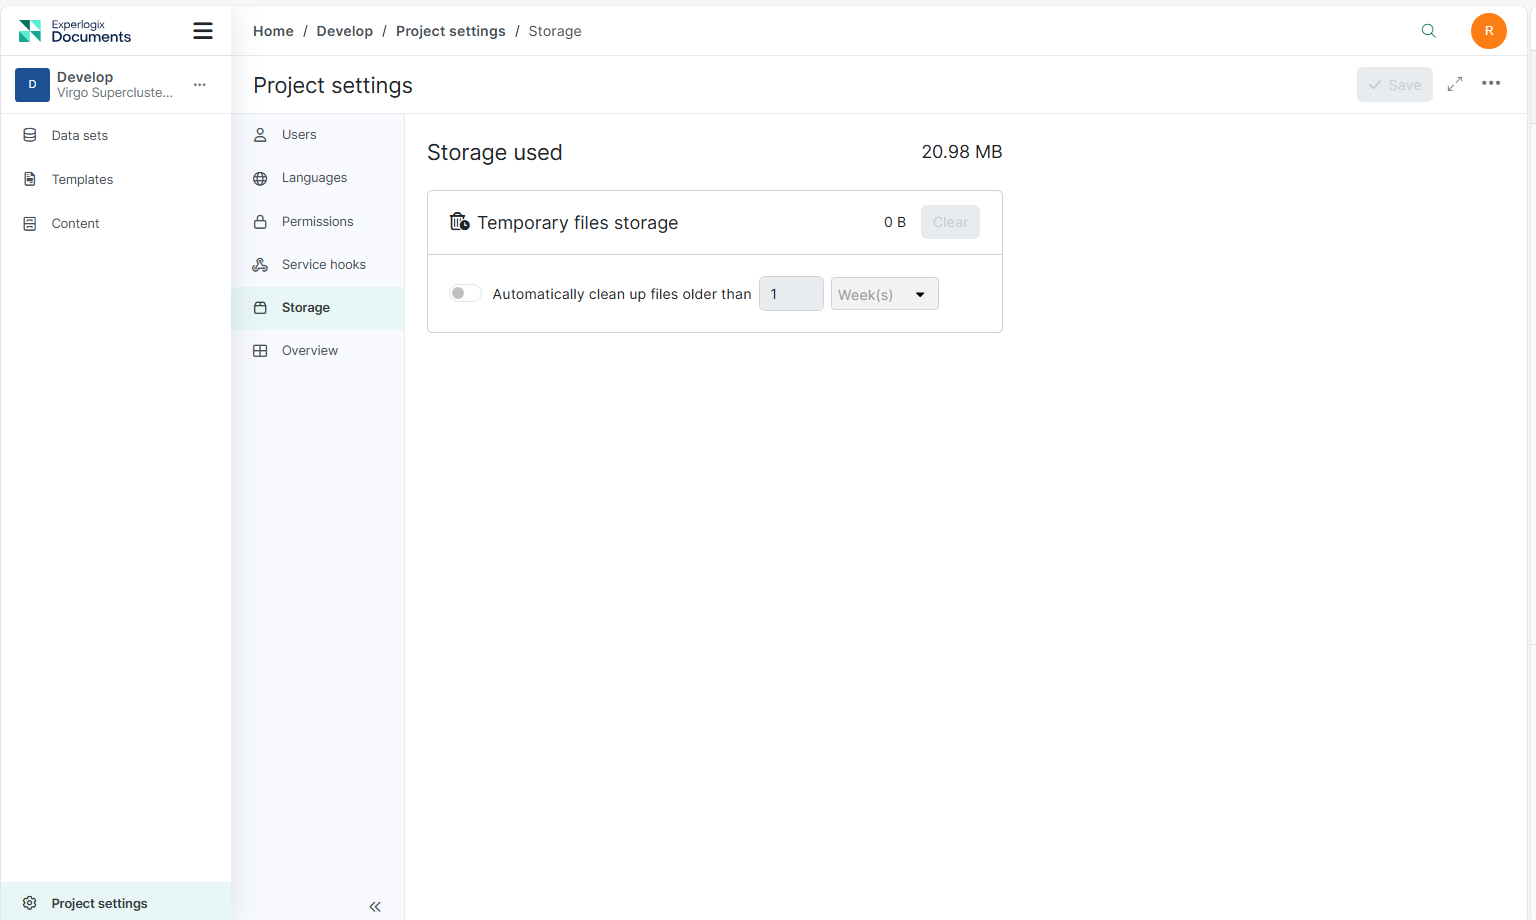
Whenever a file is uploaded as part of a form data set, a corresponding temporary file is stored within Experlogix Documents if the temporary storage option is selected. These temporary files, uploaded through forms, samples, or other processes, can accumulate and consume significant amounts of the total organization storage, as they are stored in Azure Storage.
|
Index No. |
Field Name |
Description |
|---|---|---|
|
1 |
Storage used |
Displays the total storage your project uses inside Experlogix Documents, including all files and data. |
|
2 |
Temporary files storage |
Displays the amount of storage out of the total organization storage used by temporary files. |
|
3 |
Clear |
A button to delete all the temporary files manually. |
|
4 |
Automatic Cleanup Toggle |
Enable or disable automatic cleanup of temporary files older than a specified retention period. |
|
5 |
Retention period combo box |
Sets the retention period for automatic cleanup of temporary files (minimum 24 hours, maximum 36 months). |
Procedures
Deleting Files in Temporary Storage
Deleting files within the Project Settings Storage tab permanently removes them, making it a destructive action. There are two ways to delete and empty the temporary storage: manual cleanup of the files or setting up an automatic cleanup to delete temporary files.
The manual cleanup deletes all temporary files immediately, regardless of age.
Automatic cleanup removes files older than a specified age, keeping storage tidy over time. You can schedule regular temporary file deletion by creating an automatic cleanup schedule.
Enabling Automatic Cleanup
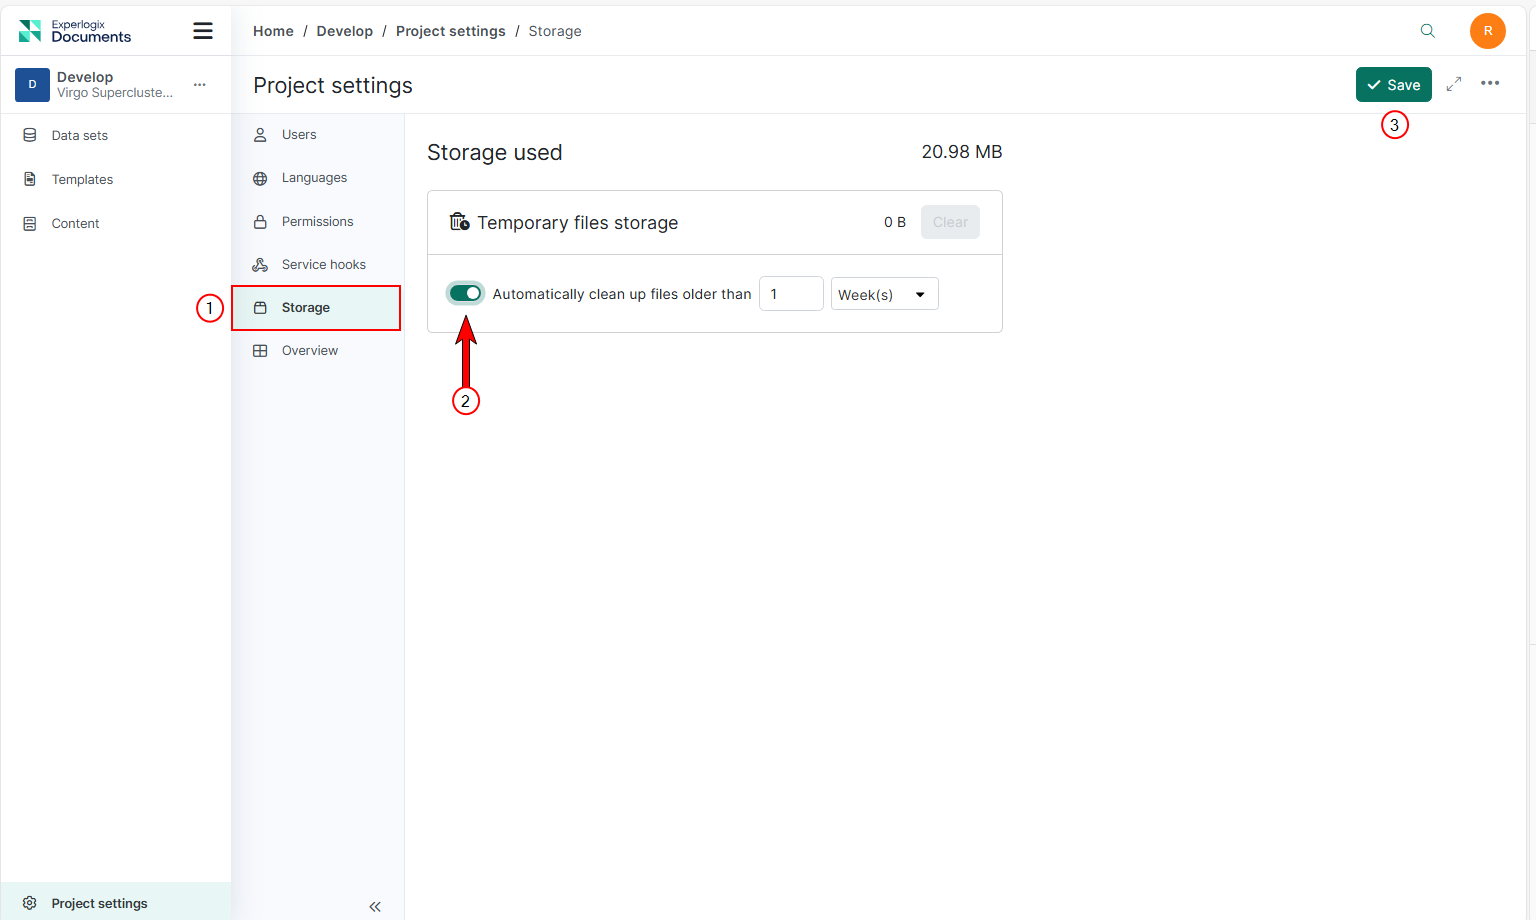
| 1. | Navigate to the Project Settings Storage tab. |
| 2. | Toggle the Automatically clean up files older than option. |
| 3. | Set the desired retention period (minimum 24 hours, maximum 36 months). |
| 4. | Select Save. |
The success message displays.
Manual Cleanup
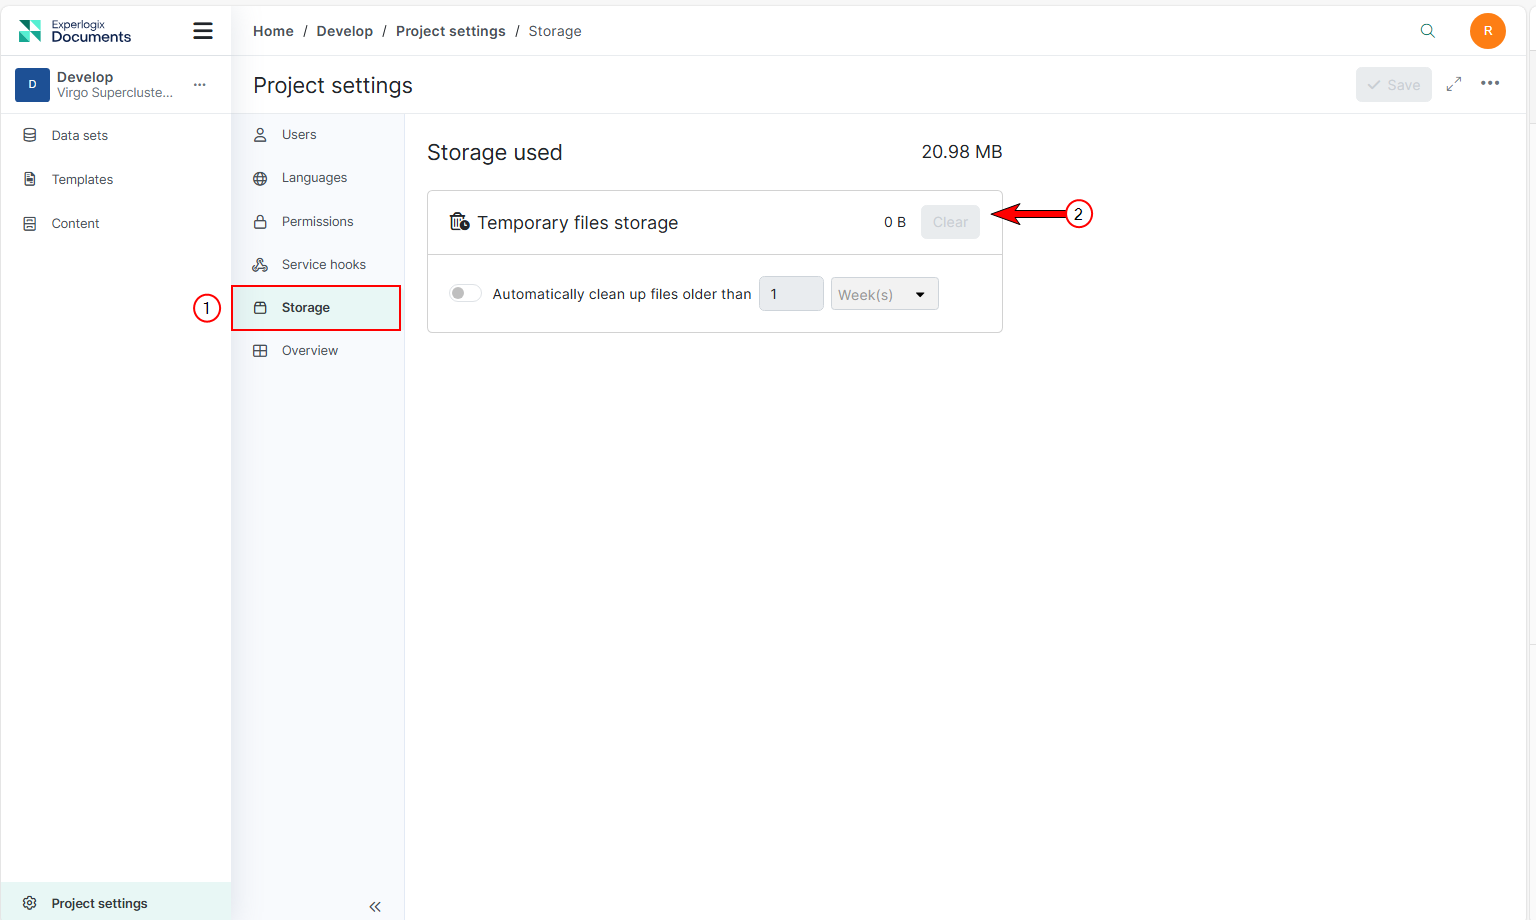
| 1. | In the Project Settings Storage tab, select the Clear button. |
| 2. | Confirm the action in the warning dialog to delete all temporary files. |
By following these steps, you can manage temporary storage and ensure that old files are automatically cleaned up, keeping your storage usage optimized.


