Project Settings: Import
Importing and exporting items, along with their dependencies, between projects provides flexibility and simplifies collaboration. This feature allows you to quickly move items between projects and create backups with ease. This is especially useful when you want to share data with other projects or keep environments in sync. For example, you can seamlessly import Data Sets from a staging environment into production to ensure both projects use the same data.
Importing items allows you transfer exported data where it’s needed. Users can import items with or without their dependencies. This section provides a brief outline of the import workflow, describing the steps for adding items into the system and managing their dependencies during the import process.
Permissions
To import items, users must have the "Import a package" permission. This permission is granted by default to the Project's Owners and Administrators.
See Permissions for more details.
Import Items
Users can import packages with valid content from a zip archive.
To import a package:
| 1. | Go to Project Settings |
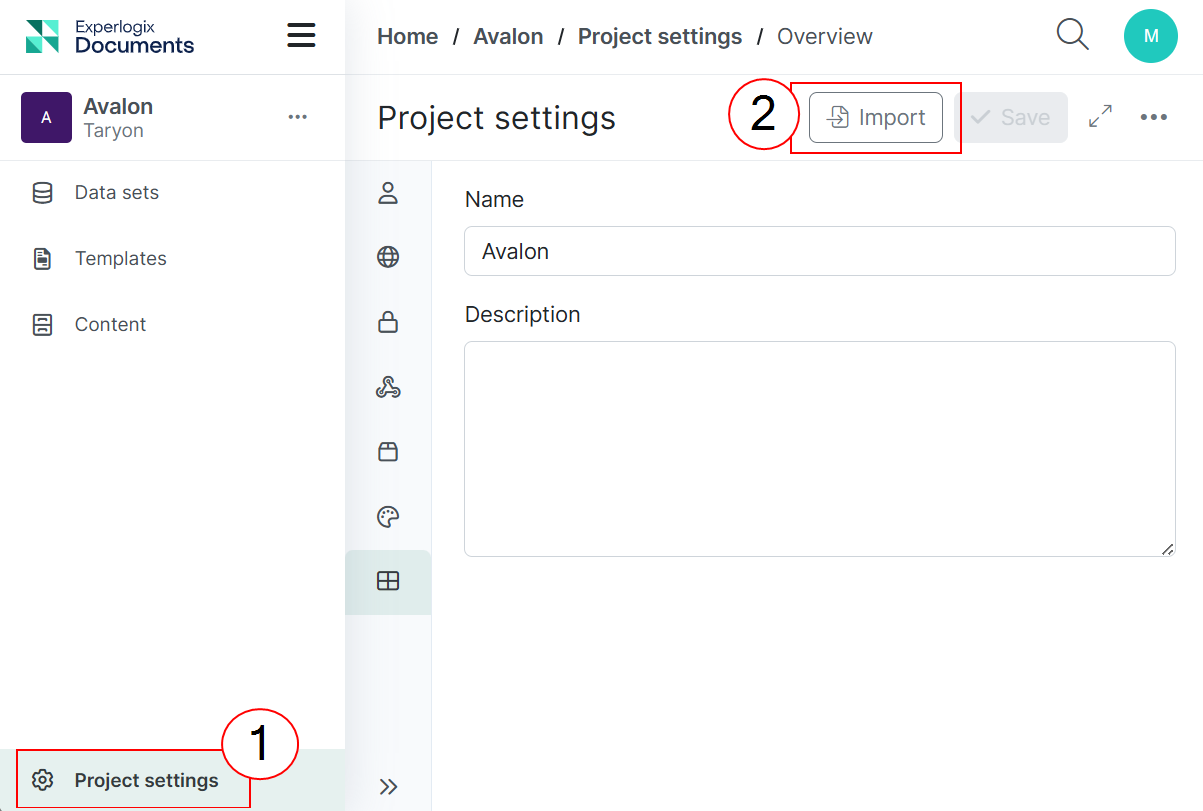
| 2. | Select the Import button. |
The Import wizard window appears.
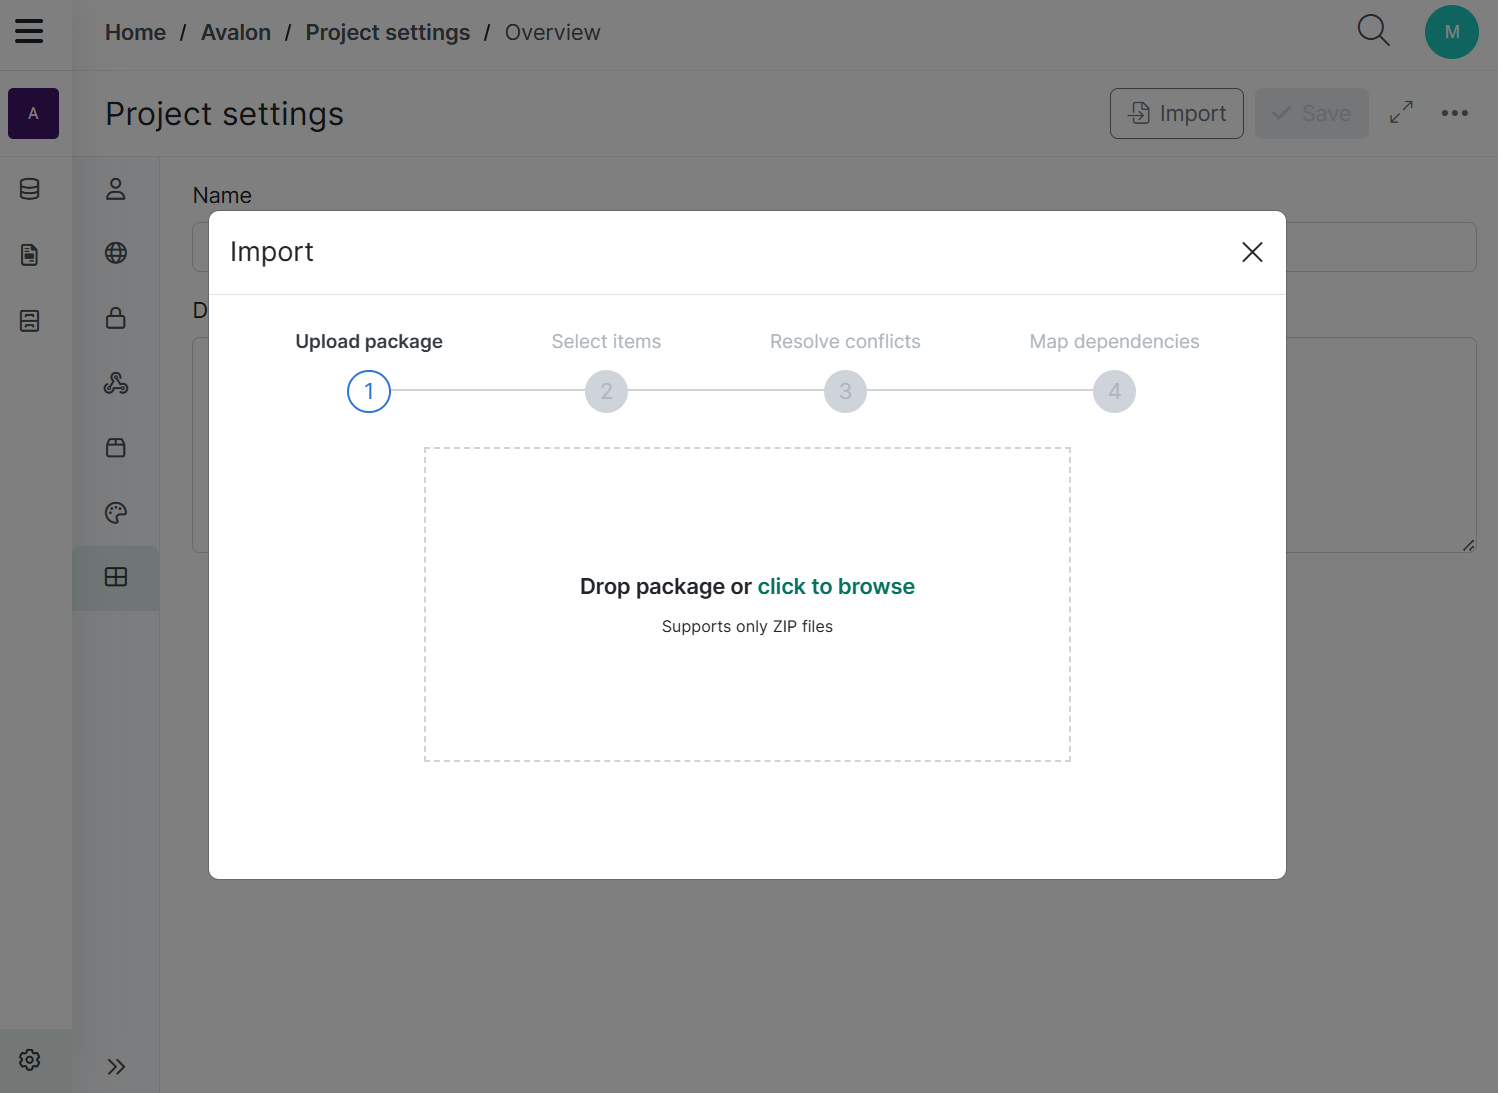
| 3. | Upload the package by dragging and droping or use the Browse option to upload a package you want to import. |
If the package content is invalid or the file format is incorrect, the import will fail, and a message indicating the reason for the failure will be displayed.
To prevent this, ensure that you have uploaded a valid export package and that the import package is a ZIP archive.
Only ZIP files are supported.
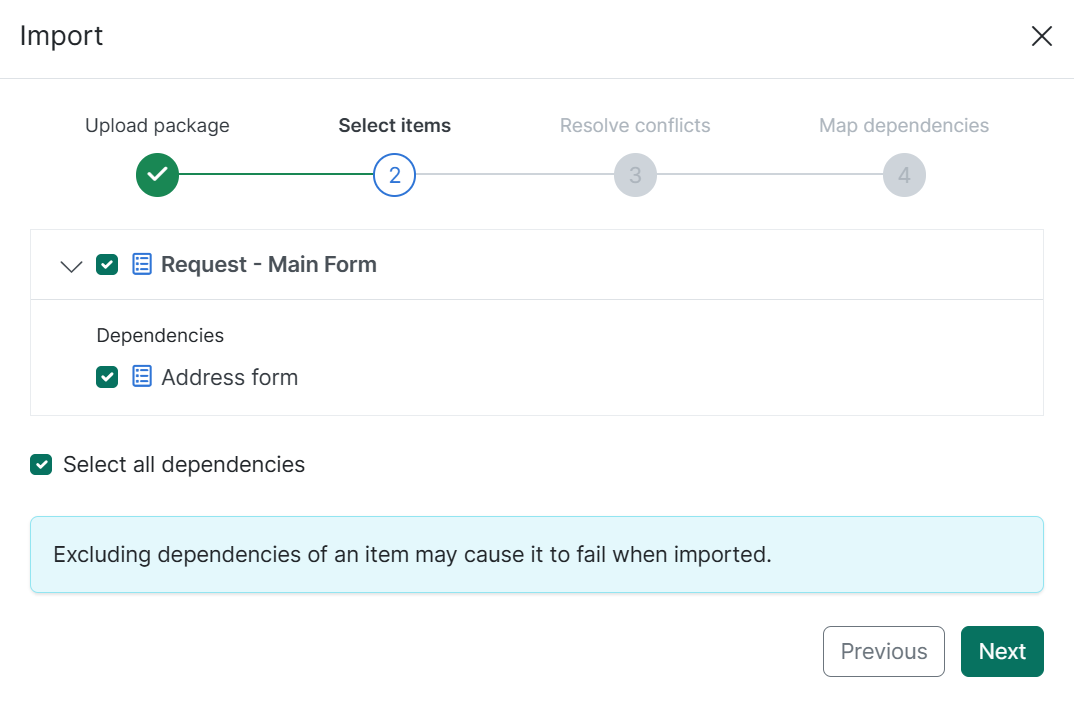
| 4. | Review the items to include in the import. Items are listed alphabetically and are preselected by default. You can choose whether to include or exclude items in the import, and select or deselect their dependencies. |
Use the Select all dependencies checkbox to include or exclude all dependencies with a single click.
| 5. | If one or more items already exist in the import destination, choose whether to "Overwrite", "Create new" or "Skip". The selected option will be applied to all imported items. |
|
Option |
Description |
|---|---|
|
Overwrite |
Replaces existing items in the target location with imported items. This applies only to items with matching name and type. The replacement adds an "Update" entry to the item’s history. |
|
Create new |
Creates a new copy of the imported item while preserving the original record in the destination project. Adds a "Create" entry to the item’s history. |
|
Skip |
Excludes the item and its dependencies from import. |
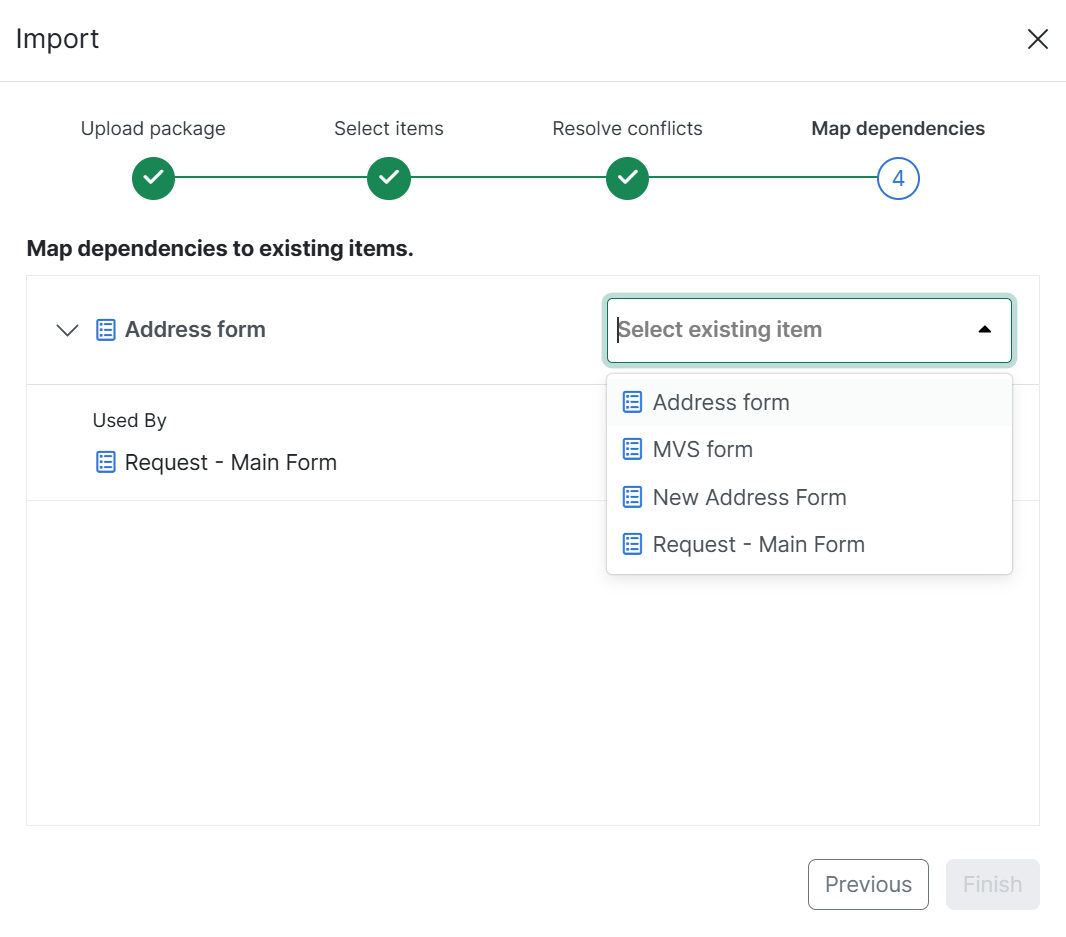
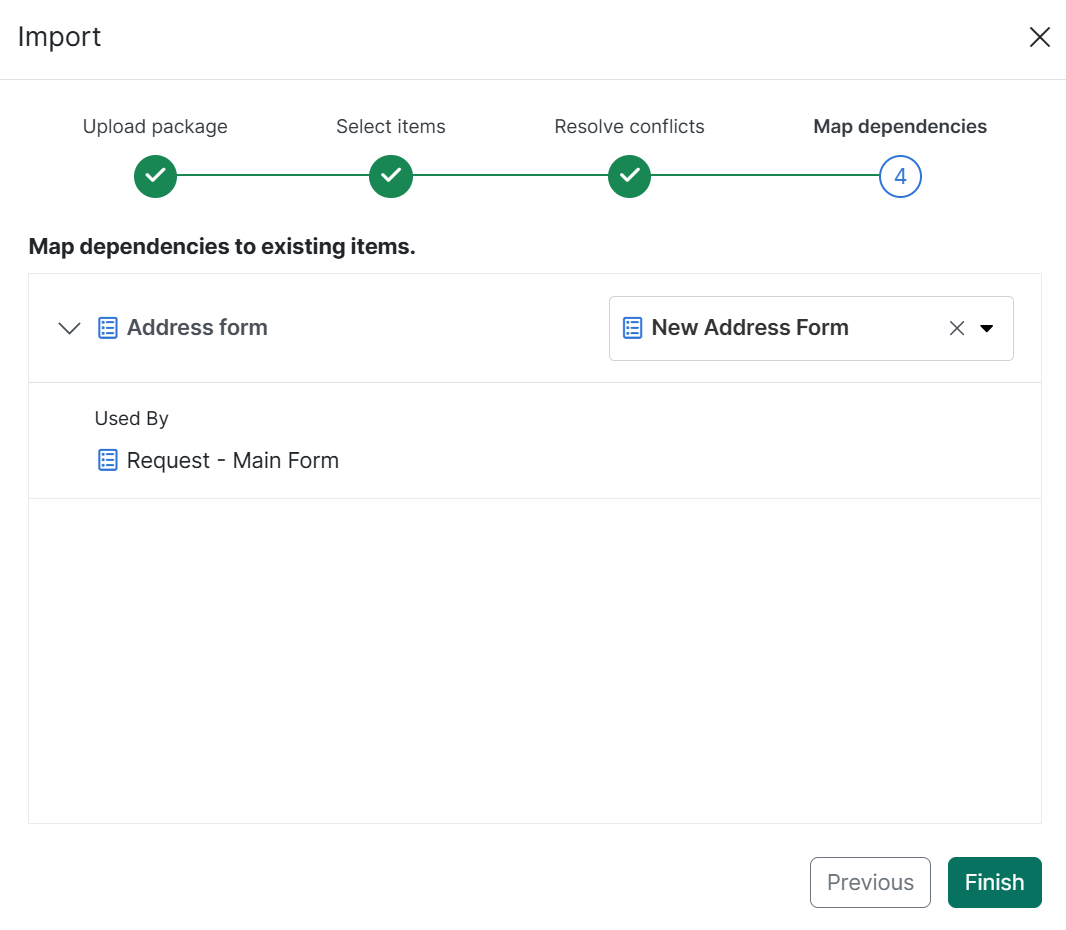
| 6. | In this step, users can replace any excluded dependencies with existing dependencies in the import destination project. Mapping dependencies ensures that excluded items are correctly substituted and prevents broken or incomplete states after the import. |

Each excluded dependency includes a dropdown menu that lists destination items, allowing the user to map it to an existing dependency in the target project.
By default, the dropdown preselects the destination dependency that matches the excluded one by name and type.
If no exact match is found, the user can manually choose another dependency of the same type: remaining candidates are shown alphabetically.
Mapping every excluded dependency is mandatory. The import cannot continue until all mappings are completed
Example: Mapping an excluded nested form during import
You are importing a Request - Main Form but decide not to include its nested Address Form from the package, because you already have a New Address form in the destination project and want to use it instead.
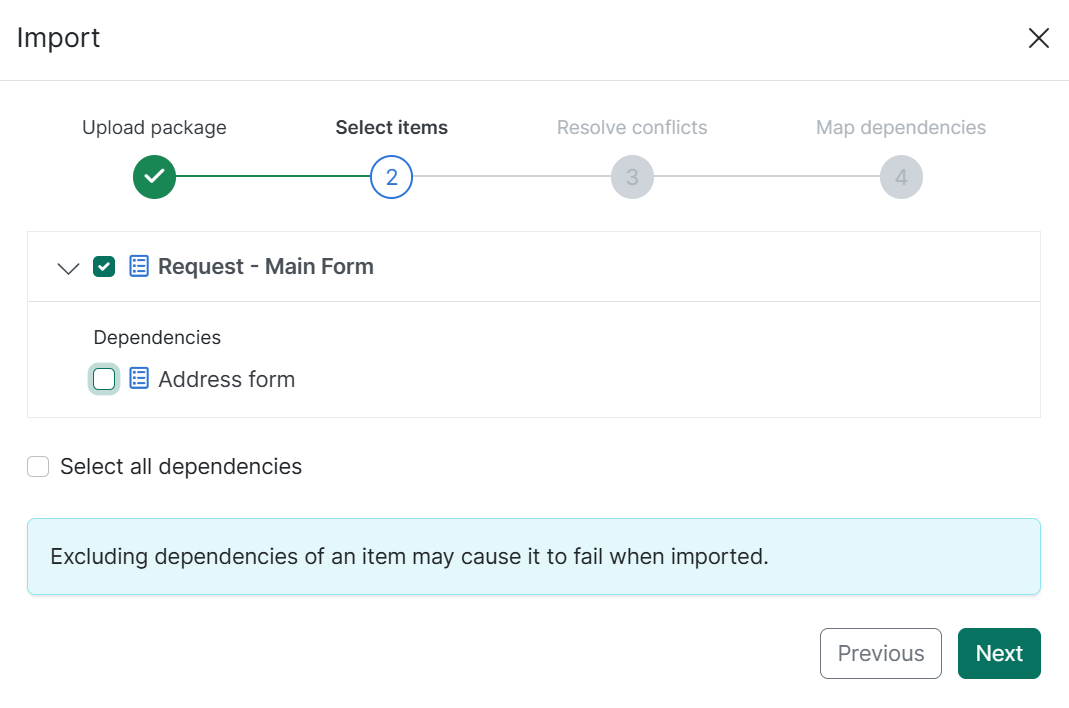
To ensure the import is successful, the system prompts you to map this dependency to an existing resource. At the "Map Dependencies" step, simply pick a replacement from the list of forms available in the destination to link it to your Request - Main Form.
The dropdown preselects a destination resource matching the name and type of the excluded dependency. If no exact match exists, you can choose another item of the same type from the alphabetical list.
Once a new dependency is mapped, the "Finish" button becomes active, allowing you to complete the import.
| 7. | Select Finish to confirm the import and wait for the system to finish importing the package. Do not refresh the browser window. |
When the import is complete, the Import Summary is displayed, including:
-
The number of items imported, skipped, or failed
-
The timestamp indicating when the import was processed and its duration
-
A list of imported items and their dependencies (either imported or mapped)
-
If an import fails, the item that caused the failure (whether the primary item or one of its dependencies) will display an error message.
-
If the failure is caused by an item with the same name but a different type already existing in the destination project, the following message is shown: "Import Failed: Item with the same name but a different type already exists."