Inviting Users
Users with sufficient permissions can invite users at multiple levels with Experlogix Documents.
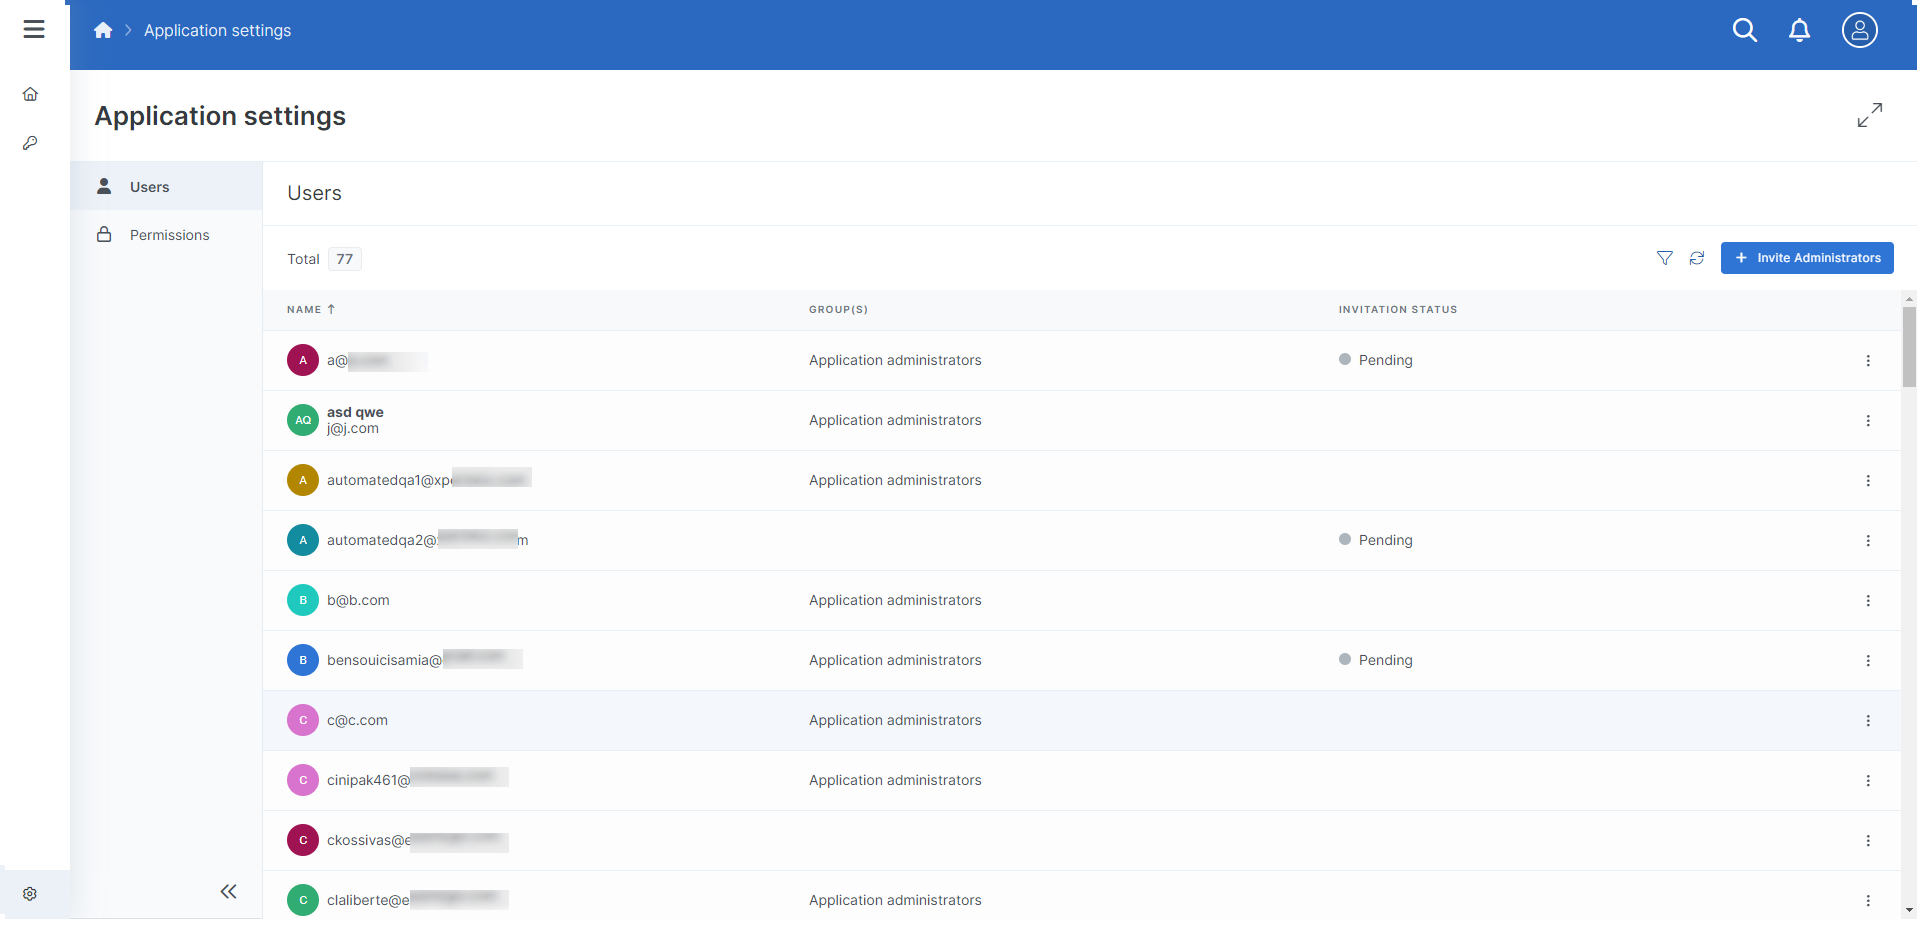
Inviting Administrators to an Application
Users with sufficient permissions can invite users to the Application as an Application Administrator.
At the Application level, you can only invite users as Application Administrators.
| 1. | In the Application Settings Users Tab, select the + Invite Administrators button. |
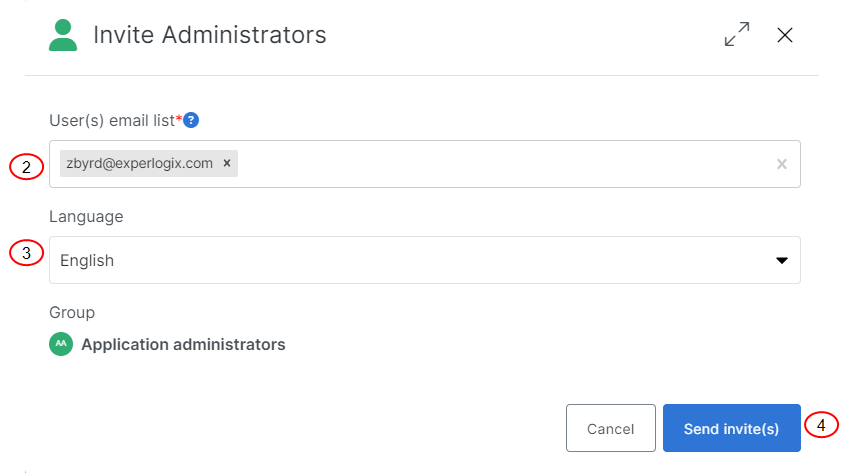
The Invite Administrators window displays.
When adding user e-mails, separate e-mails via commas, semi-colons, and spaces. The User(s) e-mail list field supports both typed and pasted responses. Use the Enter or Tab key to add additional e-mails to your list.
| 2. | In the User(s) email list, input the e-mails for the user(s) you wish to invite. |
| 3. | In the Language drop-drop menu, select a language for the user. |
| 4. | Select the Send invite(s) button. |
The confirmation message "The users invitations have been sent successfully" displays. The invited user(s) display in the Users List view as pending.
The invited user(s) receive a link with an invitation to register.
| Invitation Status | Description |
|---|---|
| Pending | The invitation has been sent to the user but the user has not accepted the registration. |
| Accepted | The user completed registration via the invitation. |
Inviting Users to a Organization
Users with sufficient permissions can invite users to the organization as a Organization Administrator.
At the Organization level, you can only invite users as Organization Administrators. See Permissions for more information.
| 1. | In the Organization Users Tab, select the + Invite Administrators button. |
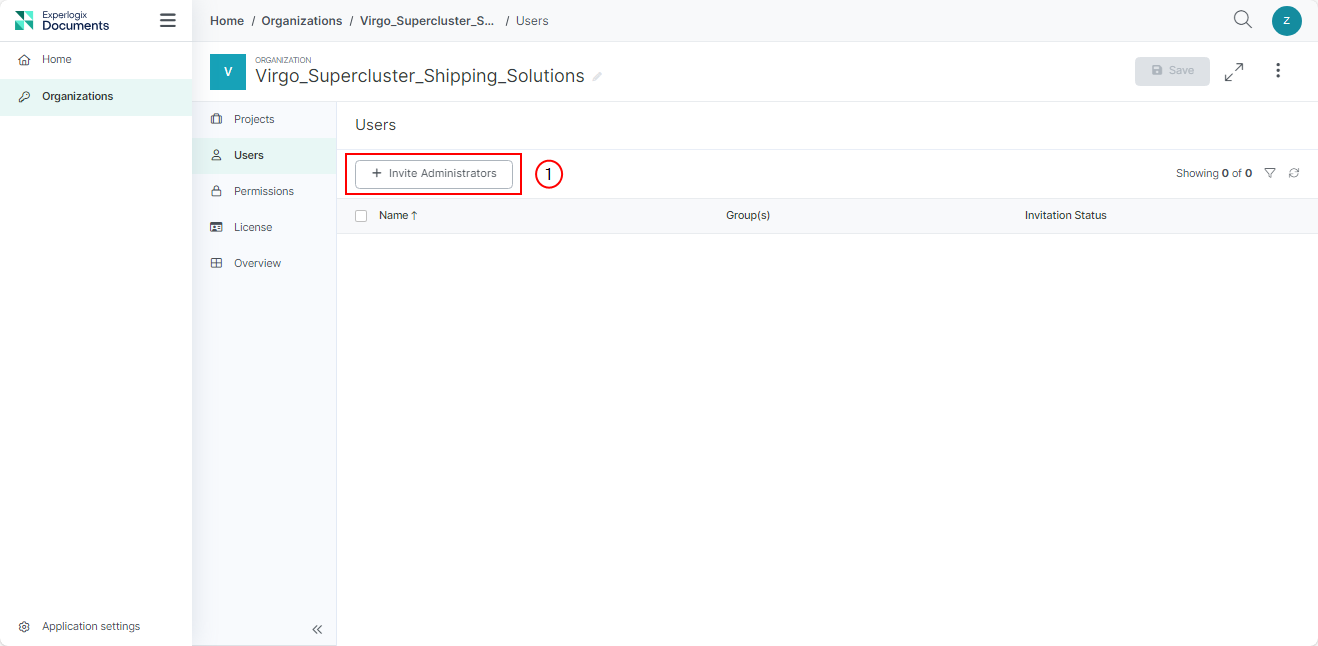
The Invite Administrators window displays.
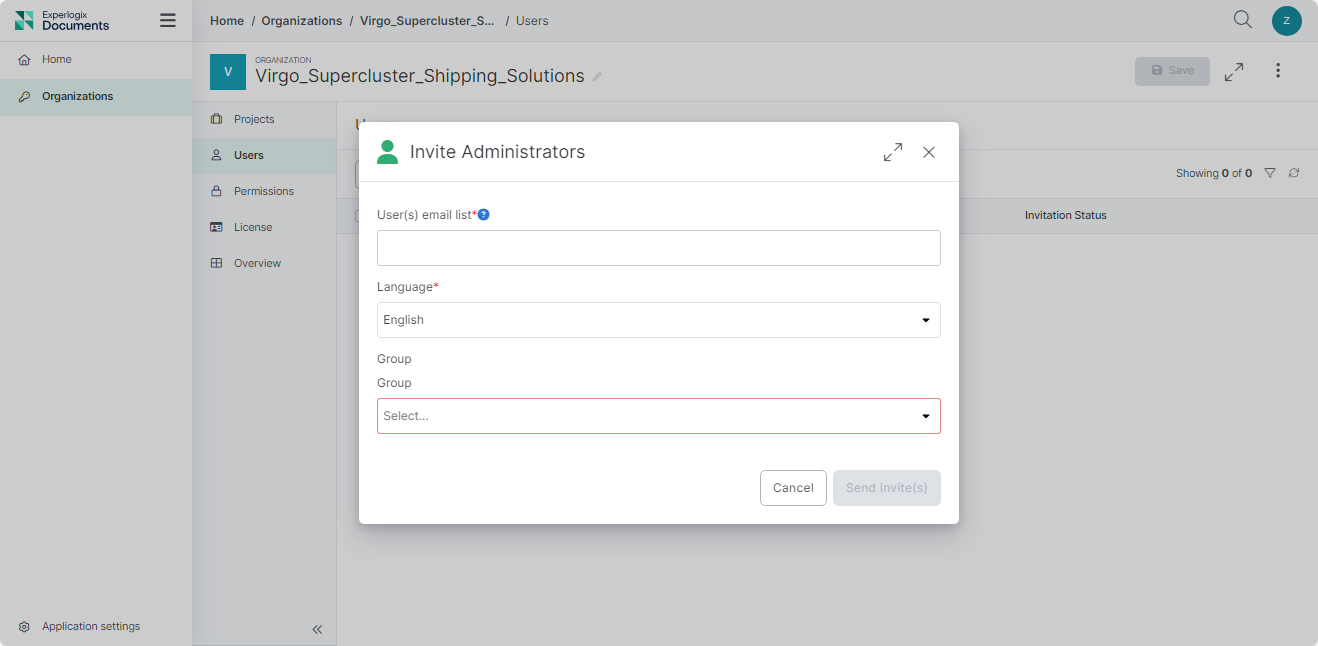
When adding user e-mails, separate e-mails via commas, semi-colons, and spaces. The User(s) e-mail list field supports both typed and pasted responses. Use the Enter or Tab key to add additional e-mails to your list.
| 2. | In the User(s) email list, input the e-mails for the user(s) you wish to invite. |
| 3. | In theLanguage drop-drop menu, select a language for the user. |
The language selected in the drop-down defines the language of the email invite and the link in the invite loads the registration page with the selected language. The user can change the language and register with the desired language during the registration process.
| 4. | Select the Send invite(s) button. |
The confirmation message "The users invitations have been sent successfully" displays. The invited user(s) display in theUsers List view as pending. The invited user(s) receive a link with an invitation to register.
The invited user(s) receive a link with an invitation to register.
| Invitation Status | Description |
|---|---|
| Pending | The invitation has been sent to the user but the user has not accepted the registration. |
| Accepted | The user completed registration via the invitation. |
Inviting Users to a Project
Users with sufficient permissions can invite additional users to the project via e-mail.
Users can only be invited once within the same scope(application, organization, project.) For example, if an administrator wishes to invite a user with a different access level to the same scope (same project, same application, same organization). Instead, they you should add the user to a different permissions group via the Permissions tab.
Example 1: The Organization Administrator has invited Jean Yannick as a project owner to project ABC, and the invitation status is pending. If they invite Jean Yannick again as a Project contributor within the same project ABC , the invitation fails to send because Jean Yannick already exists at the project level. They should instead go to Permissions tab and add Jean Yannick to the Project Contributors group.
Example 2: The Organization Administrator has invited Sarra Willson as a project owner to project ABC, and the invitation status is pending or accepted. If they invite Sarra to Project DEF of the same organization, the system successfully sends the invitation because Sarra has been invited to a different project under the same organization.
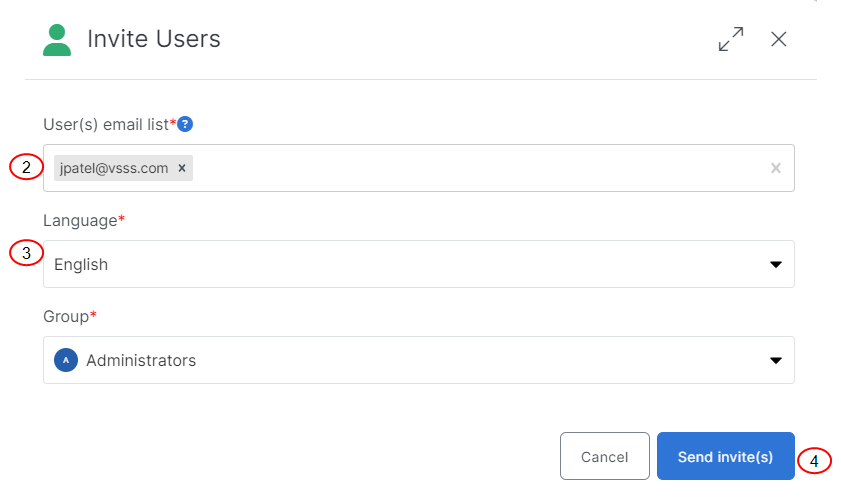
| 1. | Select the + Invite Users button. |
The Invite users window displays.
When adding user e-mails, separate e-mails via commas, semi-colons, and spaces. The User(s) e-mail list field supports both typed and pasted responses. Use the Enter or Tab key to add additional e-mails to your list.
| 2. | In the User(s) email list field, input the users to be added . |
| 3. | In the Language drop-drop menu, select a language for the user. |
| 4. | In the Group drop-drop menu, select a group for the user(s). |
| 5. | Select the Send invite(s) button. |
 .
.
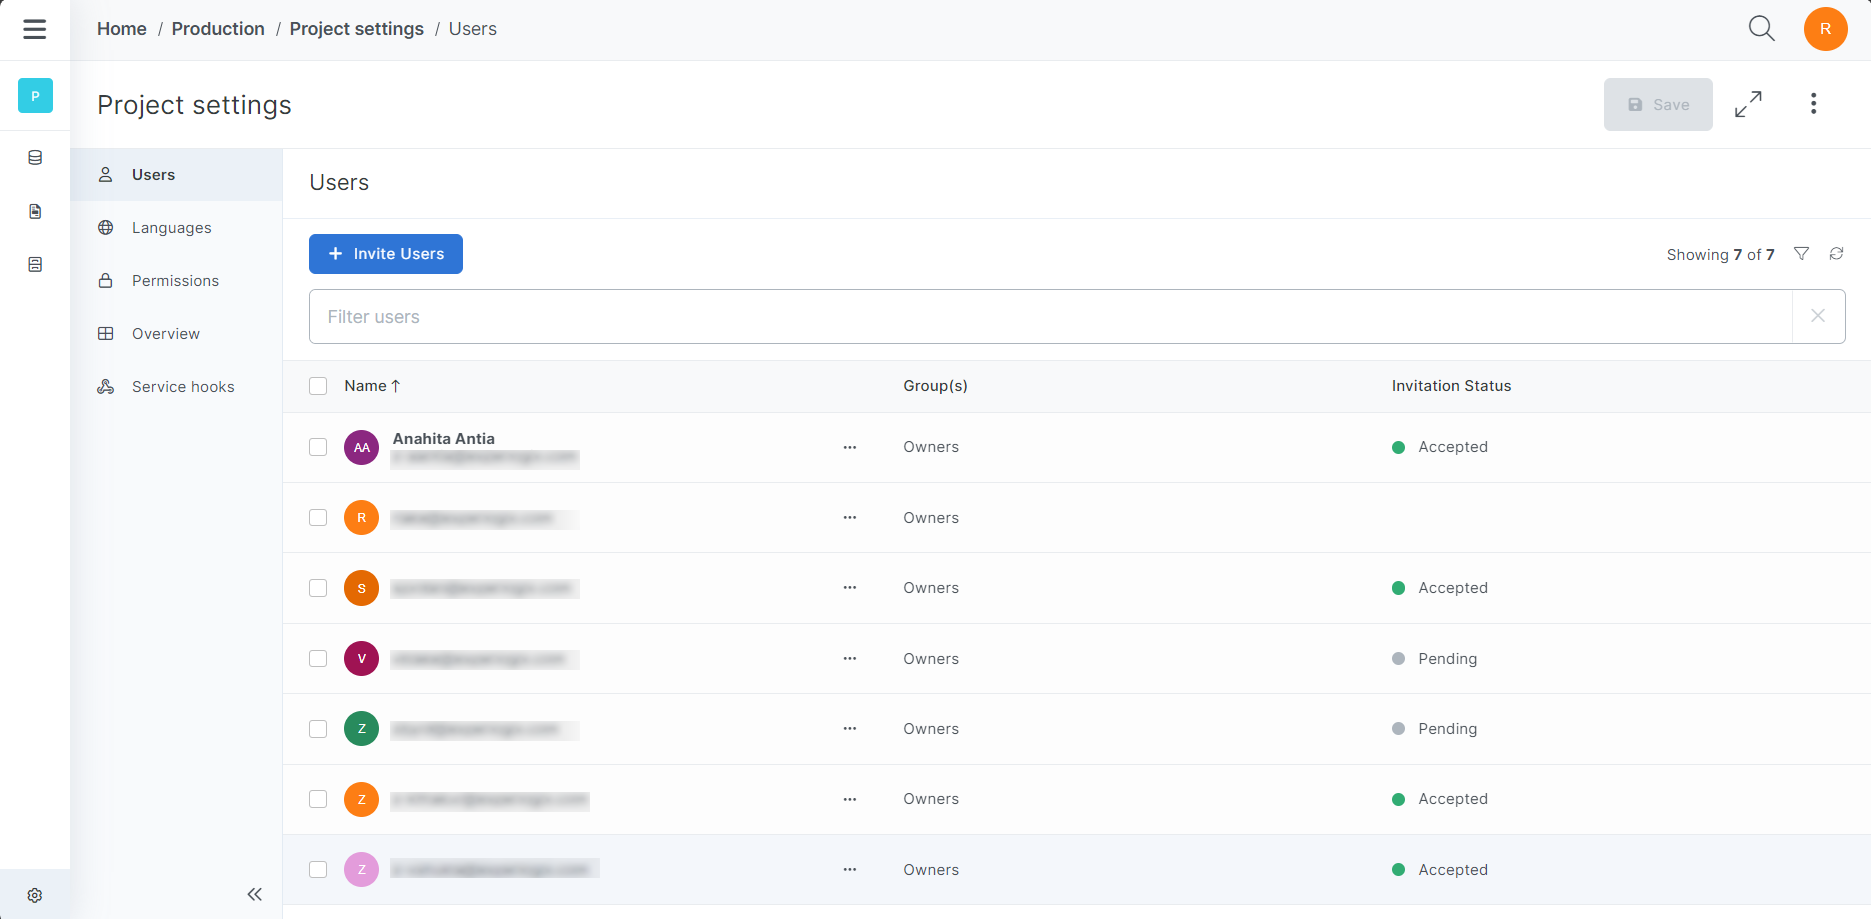
The confirmation message "The users invitations have been sent successfully," displays.
The invited user(s) display in the Users List view as pending.The invited user(s) receive a link with an invitation to register.
| Invitation Status | Description |
|---|---|
| Pending | The invitation has been sent to the user but the user has not accepted the registration. |
| Accepted | The user completed registration via the invitation. |