Support
The Experlogix Support Portal is your go-to resource for getting support for all Experlogix products. This guide provides an overview of navigating the Support Portal, submitting detailed support tickets, and following best practices to ensure timely and effective resolutions to your concerns.
By leveraging the Support Portal, you can access tailored resources, track ticket statuses, and collaborate with the support team to address your needs. Follow the outlined steps and tips to optimize your experience and achieve faster issue resolution.
How to Report an Issue
When encountering an issue, providing comprehensive information helps our support team address your concerns efficiently. This guide outlines the required steps, information, and best practices for ticket submission.
Steps to Submit a Ticket
| 1. | Navigate to the Support Portal. |
| 2. | On the landing page, identify the product line you need help with. The options include: |
-
Experlogix Document Automation (e.g., Smart Flows, Template Builder/Template Designer, Xpertdoc Portal 3Xpertdoc Portal 3)
-
Experlogix Configure, Price, Quote (e.g., Design Center, Web Configurator, Cloud Connect)
-
e-Con Solutions (e.g., e-Con Studio, e-Con Configurator)
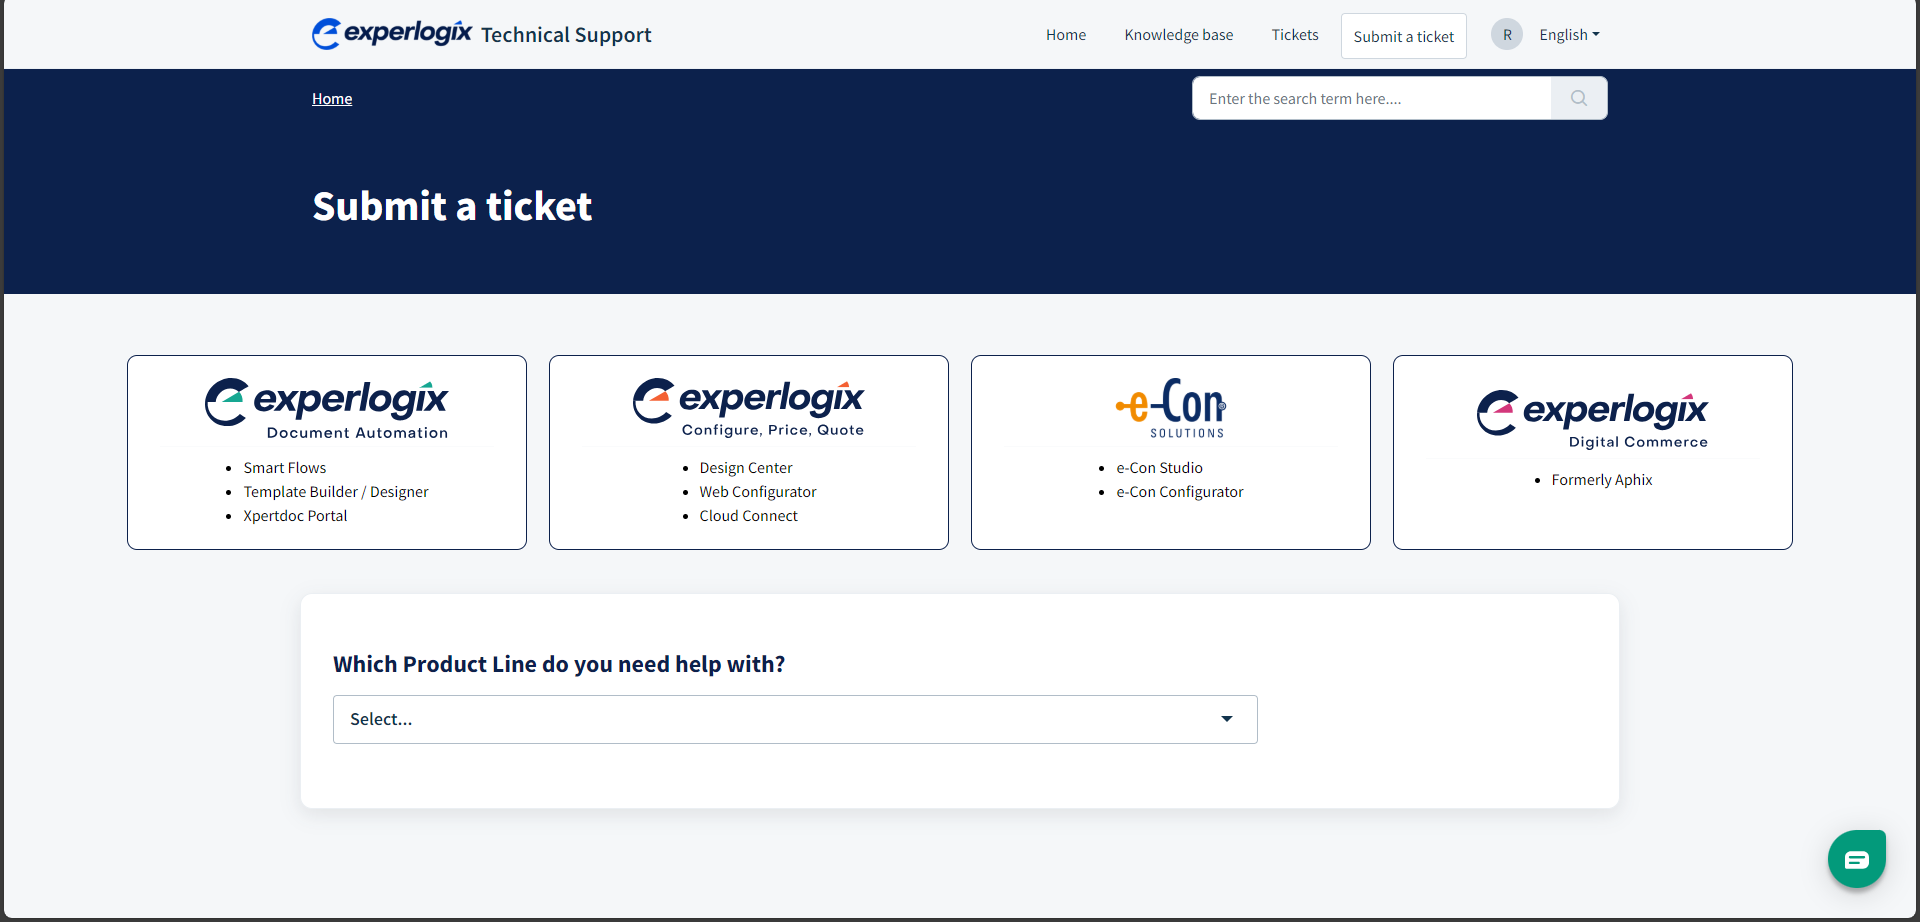
| 3. | Select the corresponding box for your product line. |
| 4. | Complete the required fields by including all relevant details. |
| 5. | Fill out the fields on the ticket form. Depending on your selection, the form may include: |
-
Requester Information: Ensure your e-mail address is accurate to receive updates.
-
Add CC (Optional): Include additional recipients for ticket updates.
-
Subject: Provide a concise summary of the issue.
-
Type: Select the category that best matches your request, such as "Bug," "Feature Request," or "General Inquiry."
-
Severity: Indicate the priority level of the issue. Select here for severity definitions.
-
Product Details: Specify the product, version, and deployment type (e.g., on-premise or cloud). For help identifying your connector version, see .
-
Description: Provide a detailed explanation of the issue, including:
-
Steps to reproduce the problem; see Steps and Screenshots for best practices.
-
Expected and actual outcomes.
-
Any troubleshooting steps already attempted.
-
Duration of the issue: how long has the issue been occurring?
-
| 6. | Attach Files (Optional); see Best Practices for Attachments. |
Use the attachment field to include relevant screenshots, logs, or configuration files that support your request. When submitting a ticket via the Freshdesk widget or form, please note that the maximum attachment size is 20 MB per e-mail. Supported file formats include PDF, DOC, DOCX, XLS, XLSX, PPT, PPTX, TXT, JPEG, PNG, GIF, and ZIP. There is no specific limit on the number of attachments, but the total size of all attachments combined must not exceed the 20 MB limit. Consider using third-party services like Dropbox or OneDrive to share files without size restrictions for larger files.
| 7. | After completing all required fields, select Submit. |
You will receive an e-mail confirmation with a reference number to track your request.
| 8. | Track and Manage Your Ticket: |
| 8.1. | Use the reference number provided in the confirmation e-mail to monitor the status of your ticket. |
| 8.2. | Log back into the portal to view updates or provide additional information as needed. |
How to Get the Version of Your Connector/Integration System
These steps are current as of the publication date. For the most up-to-date instructions, please refer to the documentation provided by the respective system providers:
- Microsoft Dynamics 365 Customer Engagement (CE) Documentation
- Microsoft Dynamics 365 Finance and Operations (FO) Documentation
- Microsoft Dynamics 365 Business Central (BC) Documentation
- Salesforce Documentation
Microsoft Dynamics 365 CE
| 1. | Navigate to Settings > About. |
| 2. | The Version Number will be displayed on this page. |
| 3. | Record the version number and include it in your ticket. |
Microsoft Dynamics 365 F&O
| 1. | Go to System Administration. |
| 2. | Select License Configuration. |
| 3. | The Version Number will be displayed in the module details. |
| 4. | Record the version number and take a screenshot for your ticket. |
Microsoft Dynamics 365 BC
| 1. | Open Business Central and navigate to Help and Support. |
| 2. | Select About. |
| 3. | The Version Number will be displayed in the dialog box. |
| 4. | Record the version number and take a screenshot for your ticket. |
Salesforce
| 1. | Log in to Salesforce and navigate to Setup. |
| 2. | In the Quick Find box, search for Company Information. |
| 3. | The Instance and API Version will be displayed in the company information details. |
| 4. | Record this information and include it in your ticket. |
Smart Flows Environment URL
Currently,
https://mysmartflowsenvironment.smartflows.xpertdoc.com
Steps and Screenshots
Provide a detailed account of the steps that led to the issue. Follow these best practices:
- Provide Context: Describe the screen, program, or section where the issue occurred.
- Be Clear: Specify exact actions, including clicks and inputs.
- Be Thorough: Outline every action taken to replicate the issue.
Best Practices for Attachments
- Whenever possible, ensure that screenshots are full-screen. Full-screen images provide the full context of the issue, making it easier for the support team to diagnose the problem.
- Annotate screenshots to highlight the area of concern while ensuring the rest of the context remains visible.
- Obscure sensitive information such as usernames or customer data before attaching images.
- Include logs or configuration files when requested by the support team.
Using the Support Portal Effectively
The Support Portal is your primary tool for submitting and managing support tickets. Follow these tips to ensure a smooth experience:
- Ensure the e-mail address you provide is actively monitored to receive updates and responses from the support team.
- Respond promptly to any additional information requests to avoid delays in resolution.
- Use the reference number provided in the confirmation e-mail to track the status of your ticket.
- Log back into the portal to provide updates or review responses from the support team.
By providing complete and accurate information, you help our team resolve your issue quickly and effectively. Refer to the linked resources for detailed guidance, and don't hesitate to reach out via the Support Portal for assistance.